SWT(JFace)体验之GridLayout布局
GridLayout布局
GridLayout 布局的功能非常强大,也是笔者常用的一种布局方式。GridLayout是网格式布局,它把父组件分成一个表格,默认情况下每个子组件占据一个单元格的空间,每个子组件按添加到父组件的顺序排列在表格中。GridLayout提供了很多的属性,可以灵活设置网格的信息。另外,GridLayout 布局提供了GridData类,子组件可以设置相应的GridData,例如 “dogPhoto.setLayoutData(gridData)”,GridData可以设置每个组件当做单元格的信息。
GridLayout的风格
GridLayout类提供了GridLayout 布局中划分网格的信息,主要通过以下几个参数进行设置。
NumColumns:通过“gridLayout.numColumns”属性可以设置父组件中分几列显示子组件。
MakeColumnsEqualWidth:通过“gridLayout. makeColumnsEqualWidth”属性可以设置父组件中子组件是否有相同的列宽,当MakeColumnsEqualWidth为true时表示每列的列宽相等。
MarginLeft:表示当前组件距离父组件左边距的像素点个数。
MarginRight:表示当前组件距离父组件右边距的像素点个数。
MarginTop:表示当前组件距离父组件上边距的像素点个数。
MarginBottom:表示当前组件距离父组件下边距的像素点个数。
HorizontalSpacing:表示子组件的水平间距。
VerticalSpacing:表示子组件的垂直间距。
GridData的相关属性
GridLayout布局的灵活之处在于它利用网格布局数据GridData。通过GridData可以设置子组件在网格中的填充方式、大小边距等信息,用户可以通过子组件的setLayoutData方法设置网格布局数据。
GridData可以控制子组件在网格中的位置大小等相关显示信息。GridData可以设置如下的一些属性。
HorizontalAlignment:表示水平对齐方式。
VerticalAlignment:表示子组件的垂直对齐方式,值和水平方式一样。
HorizontalIndent:表示子组件水平偏移多少像素。此属性和“horizontalAlignment = GridData.BEGINNING”属性一起使用。
HorizontalSpan:表示组件水平占据几个网格。
GrabExcessHorizontalSpace:表示当父组件大小改变时,子组件是否以水平方向抢占空间。
GrabExcessVerticalSpace:表示当父组件大小改变时,子组件是否以垂直方向抢占空间。
WidthHint:表示子组件的宽度为多少像素(前提是未设置其他相关属性)。
HeightHint:表示子组件的高度为多少像素(前提是未设置其他相关属性)。
另外,GridData可以通过构造函数指定相应的属性值,有兴趣的读者可以参考GridData类的构造函数。
测试代码:
package swt_jface.demo2;
import org.eclipse.swt.SWT;
import org.eclipse.swt.layout.GridData;
import org.eclipse.swt.layout.GridLayout;
import org.eclipse.swt.widgets.Button;
import org.eclipse.swt.widgets.Display;
import org.eclipse.swt.widgets.List;
import org.eclipse.swt.widgets.Shell;
public class GridLayoutSample {
Display display = new Display();
Shell shell = new Shell(display);
public GridLayoutSample() {
GridLayout gridLayout = new GridLayout();
gridLayout.numColumns = 2;
gridLayout.makeColumnsEqualWidth = true;
shell.setLayout(gridLayout);
Button button1 = new Button(shell, SWT.PUSH);
button1.setText("button1");
button1.setLayoutData(new GridData(GridData.VERTICAL_ALIGN_BEGINNING));
List list = new List(shell, SWT.BORDER);
list.add("item 1");
list.add("item 2");
list.add("item 3");
list.setLayoutData(new GridData(GridData.VERTICAL_ALIGN_CENTER));
Button button2 = new Button(shell, SWT.PUSH);
button2.setText("button #2");
GridData gridData = new GridData(GridData.VERTICAL_ALIGN_END);
gridData.horizontalIndent = 5;
button2.setLayoutData(gridData);
Button button3 = new Button(shell, SWT.PUSH);
button3.setText("3");
button3.setLayoutData(new GridData(GridData.VERTICAL_ALIGN_FILL));
shell.pack();
shell.open();
while (!shell.isDisposed()) {
if (!display.readAndDispatch()) {
display.sleep();
}
}
display.dispose();
}
public static void main(String[] args) {
new GridLayoutSample();
}
}
GridLayoutSampleGrabSpace.java
代码如下:
package swt_jface.demo2;
import org.eclipse.swt.SWT;
import org.eclipse.swt.layout.GridData;
import org.eclipse.swt.layout.GridLayout;
import org.eclipse.swt.widgets.Button;
import org.eclipse.swt.widgets.Display;
import org.eclipse.swt.widgets.Label;
import org.eclipse.swt.widgets.Shell;
import org.eclipse.swt.widgets.Text;
public class GridLayoutSampleGrabSpace {
public GridLayoutSampleGrabSpace() {
Display display = new Display();
Shell shell = new Shell(display);
GridLayout gridLayout = new GridLayout();
gridLayout.numColumns = 3;
shell.setLayout(gridLayout);
Label label = new Label(shell, SWT.BORDER);
label.setText("label");
GridData gridData3 = new GridData();
gridData3.widthHint = 60;
gridData3.heightHint = 20;
label.setLayoutData(gridData3);
Text text = new Text(shell, SWT.SINGLE | SWT.BORDER);
text.setText("text");
GridData gridData = new GridData();
gridData.grabExcessHorizontalSpace = true;
gridData.grabExcessVerticalSpace = true;
gridData.horizontalAlignment = GridData.FILL;
gridData.verticalAlignment = GridData.FILL;
text.setLayoutData(gridData);
Button button = new Button(shell, SWT.PUSH);
button.setText("button");
GridData gridData2 = new GridData();
gridData2.grabExcessVerticalSpace = true;
gridData2.grabExcessHorizontalSpace = true;
gridData2.verticalAlignment = GridData.FILL;
gridData2.horizontalAlignment = GridData.FILL;
button.setLayoutData(gridData2);
shell.setSize(300, 80);
//shell.pack();
shell.open();
while (!shell.isDisposed()) {
if (!display.readAndDispatch()) {
display.sleep();
}
}
display.dispose();
}
public static void main(String[] args) {
new GridLayoutSampleGrabSpace();
}
}
GridLayoutSampleSpan.java
代码如下:
package swt_jface.demo2;
import org.eclipse.swt.SWT;
import org.eclipse.swt.layout.GridData;
import org.eclipse.swt.layout.GridLayout;
import org.eclipse.swt.widgets.Button;
import org.eclipse.swt.widgets.Display;
import org.eclipse.swt.widgets.List;
import org.eclipse.swt.widgets.Shell;
public class GridLayoutSampleSpan {
Display display = new Display();
Shell shell = new Shell(display);
public GridLayoutSampleSpan() {
GridLayout gridLayout = new GridLayout();
gridLayout.numColumns = 2;
gridLayout.makeColumnsEqualWidth = true;
shell.setLayout(gridLayout);
Button button1 = new Button(shell, SWT.PUSH);
button1.setText("button1");
button1.setLayoutData(new GridData(GridData.VERTICAL_ALIGN_BEGINNING));
List list = new List(shell, SWT.BORDER);
list.add("item 1");
list.add("item 2");
list.add("item 3");
list.setLayoutData(new GridData(GridData.VERTICAL_ALIGN_CENTER));
Button button2 = new Button(shell, SWT.PUSH);
button2.setText("button #2");
GridData gridData = new GridData(GridData.VERTICAL_ALIGN_END);
gridData.horizontalSpan = 2;
gridData.horizontalAlignment = GridData.FILL;
button2.setLayoutData(gridData);
Button button3 = new Button(shell, SWT.PUSH);
button3.setText("3");
GridData gridData2 = new GridData(GridData.VERTICAL_ALIGN_END);
gridData2.verticalSpan = 3;
button3.setLayoutData(gridData2);
shell.pack();
shell.open();
while (!shell.isDisposed()) {
if (!display.readAndDispatch()) {
display.sleep();
}
}
display.dispose();
}
public static void main(String[] args) {
new GridLayoutSampleSpan();
}
}
package swt_jface.demo2;
import org.eclipse.swt.SWT;
import org.eclipse.swt.custom.CLabel;
import org.eclipse.swt.graphics.Image;
import org.eclipse.swt.layout.GridData;
import org.eclipse.swt.layout.GridLayout;
import org.eclipse.swt.widgets.Button;
import org.eclipse.swt.widgets.Combo;
import org.eclipse.swt.widgets.Display;
import org.eclipse.swt.widgets.Label;
import org.eclipse.swt.widgets.Shell;
import org.eclipse.swt.widgets.Text;
public class Sample {
Display display = new Display();
Shell shell = new Shell(display);
public Sample() {
shell.setText("Book Entry Demo");
GridLayout gridLayout = new GridLayout(4, false);
gridLayout.verticalSpacing = 8;
shell.setLayout(gridLayout);
Label label = new Label(shell, SWT.NULL);
label.setText("Title: ");
Text title = new Text(shell, SWT.SINGLE | SWT.BORDER);
GridData gridData = new GridData(GridData.HORIZONTAL_ALIGN_FILL);
gridData.horizontalSpan = 3;
title.setLayoutData(gridData);
label = new Label(shell, SWT.NULL);
label.setText("Author(s): ");
Text authors = new Text(shell, SWT.SINGLE | SWT.BORDER);
gridData = new GridData(GridData.HORIZONTAL_ALIGN_FILL);
gridData.horizontalSpan = 3;
authors.setLayoutData(gridData);
label = new Label(shell, SWT.NULL);
label.setText("Cover: ");
gridData = new GridData();
gridData.verticalSpan = 3;
label.setLayoutData(gridData);
CLabel cover = new CLabel(shell, SWT.NULL);
gridData = new GridData(GridData.FILL_HORIZONTAL);
gridData.horizontalSpan = 1;
gridData.verticalSpan = 3;
gridData.heightHint = 100;
gridData.widthHint = 100;
cover.setLayoutData(gridData);
label = new Label(shell, SWT.NULL);
label.setText("Pages");
Text pages = new Text(shell, SWT.SINGLE | SWT.BORDER);
pages.setLayoutData(new GridData(GridData.HORIZONTAL_ALIGN_FILL));
label = new Label(shell, SWT.NULL);
label.setText("Publisher");
Text pubisher = new Text(shell, SWT.SINGLE | SWT.BORDER);
pubisher.setLayoutData(new GridData(GridData.HORIZONTAL_ALIGN_FILL));
label = new Label(shell, SWT.NULL);
label.setText("Rating");
Combo rating = new Combo(shell, SWT.READ_ONLY);
rating.setLayoutData(new GridData(GridData.HORIZONTAL_ALIGN_FILL));
rating.add("5");
rating.add("4");
rating.add("3");
rating.add("2");
rating.add("1");
label = new Label(shell, SWT.NULL);
label.setText("Abstract:");
Text bookAbstract =
new Text(
shell,
SWT.WRAP
| SWT.MULTI
| SWT.BORDER
| SWT.H_SCROLL
| SWT.V_SCROLL);
gridData =
new GridData(
GridData.HORIZONTAL_ALIGN_FILL | GridData.VERTICAL_ALIGN_FILL);
gridData.horizontalSpan = 3;
gridData.grabExcessVerticalSpace = true;
bookAbstract.setLayoutData(gridData);
Button enter = new Button(shell, SWT.PUSH);
enter.setText("Enter");
gridData = new GridData();
gridData.horizontalSpan = 4;
gridData.horizontalAlignment = GridData.END;
enter.setLayoutData(gridData);
title.setText("Professional Java Interfaces with SWT/JFace");
authors.setText("Jack Li Guojie");
pages.setText("500pp");
pubisher.setText("John Wiley & Sons");
cover.setBackground(new Image(display, "C:/eclipse32.gif"));
bookAbstract.setText(
"This book provides a comprehensive guide for \n"
+ "you to create Java user interfaces with SWT/JFace. ");
shell.pack();
shell.open();
while (!shell.isDisposed()) {
if (!display.readAndDispatch()) {
display.sleep();
}
}
display.dispose();
}
public static void main(String[] args) {
new Sample();
}
}
GridLayout 布局的功能非常强大,也是笔者常用的一种布局方式。GridLayout是网格式布局,它把父组件分成一个表格,默认情况下每个子组件占据一个单元格的空间,每个子组件按添加到父组件的顺序排列在表格中。
GridLayout提供了很多的属性,可以灵活设置网格的信息。另外,GridLayout 布局提供了GridData类,子组件可以设置相应的GridData,例如“dogPhoto.setLayoutData(gridData)”,GridData可以设置每个组件当做单元格的信息。
14.11.1 GridLayout的风格
GridLayout类提供了GridLayout 布局中划分网格的信息,主要通过以下几个参数进行设置。
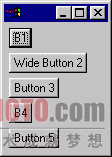
NumColumns:通过“gridLayout.numColumns”属性可以设置父组件中分几列显示子组件,如表14-4所示。
表14-4 NumColumns效果
列 数 |
显 示 效 果 |
|
numColumns = 1 |
|
|
numColumns = 2 |
|
|
numColumns = 3 |
|
 498)this.style.width=498;" border=0>
 498)this.style.width=498;" border=0>
 498)this.style.width=498;" border=0>
MakeColumnsEqualWidth:通过“gridLayout. makeColumnsEqualWidth”属性可以设置父组件中子组件是否有相同的列宽,当MakeColumnsEqualWidth为true时表示每列的列宽相等。
MarginLeft:表示当前组件距离父组件左边距的像素点个数。
MarginRight:表示当前组件距离父组件右边距的像素点个数。
MarginTop:表示当前组件距离父组件上边距的像素点个数。
MarginBottom:表示当前组件距离父组件下边距的像素点个数。
HorizontalSpacing:表示子组件的水平间距。
VerticalSpacing:表示子组件的垂直间距。
相关推荐
-
Android布局——Preference自定义layout的方法
导语:PreferenceActivity是一个方便设置管理的界面,但是对于界面显示来说比较单调,所以自定义布局就很有必要了.本文举例说明在Preference中自定义layout的方法.笔者是为了在设置中插入@有米v4广告条才研究了一晚上的. 正文:首先PreferenceScreen是一个xml文件于res/xml目录下,不属于layout文件.要插入layout,有两种方法. 1.使用Preference的android:@layout属性 1)xml文件中preference的添加 复制
-

jQuery布局插件UI Layout简介及使用方法
UI Layout是一种基于jQuery的布局框架,项目主页http://layout.jquery-dev.net/.该框架的参考原型是ExtJS的border-layout,因此十分适用于将原有使用ExtJS的项目改造成jQuery项目.其核心是一个大小自适应的中心面板(必选),面板的上下左右四个方向可以放置可折叠.可缩放的面板(可选),各个面板可以添加任意数量的页眉和页脚面板.UI Layout支持内层布局的嵌套,任意块元素都可以当作布局的容器,最基本的布局容器是body. 基本使用方法:
-
Android开发笔记 TableLayout常用的属性介绍
TableLayout经常用到的属性有: android:collapseColumns:以第0行为序,隐藏指定的列: android:collapseColumns该属性为空时,效果如下图: 把android:collapseColumns=0,2-------------->意思是把第0和第2列去掉,如下图: android:shrinkColumns:以第0行为序,自动延伸指定的列填充可用部分: 当LayoutRow里面的控件还没有布满布局时,shrinkColumns不起作用,如下图:
-
基于AnDroid FrameLayout的使用详解
今天在学习实现墨迹天气那样的拖动效果时,看到用的是重写FrameLayout.翻了翻书,突然想明白,为什么用FrameLayout.在FrameLayout中,用我看的书中的话说是,空间永远用不完. 复制代码 代码如下: <?xml version="1.0" encoding="utf-8"?><FrameLayout xmlns:android="http://schemas.android.com/apk/res/androi
-
Android中的android:layout_weight使用详解
在使用LinearLayout的时候,子控件可以设置layout_weight.layout_weight的作用是设置子空间在LinearLayout的重要度(控件的大小比重).layout_weight的值越低,则控件越重要.若不设置layout_weight则默认比重为0. 如果在一个LinearLayout里面放置两个Button,Button1和Button2,Button1的layout_weight设置为1,Button2的layout_weight设置为2,且两个Button的la
-
jQuery EasyUI 中文API Layout(Tabs)
Tabs[标签] 创建一个tab标签 使用说明 使用到的头文件:easyui.css.icon.css.jquery-1.4.2.min.js.jquery.easyui.min.js html 复制代码 代码如下: <div id="tt" style="width:500px;height:250px;"> <div title="Tab1" style="padding:20px;display:none;&qu
-
CoordinatorLayout的使用如此简单(Android)
曾在网上找了一些关于CoordinatorLayout的教程,大部分文章都是把CoordinatorLayout.AppbarLayout.CollapsingToolbarLayout 以及Toolbar等一起使用来介绍,这让我不知不觉在心中认为把这几个布局要一起使用,而且只是用于那种场景中.其实CoordinatorLayout的功能并不是局限于与AppBarLayout一起使用,它的功能强大着呢,本文主要对CoordinatorLayout的使用进行介绍,后面再写一篇文章将AppBarLa
-
android layout 按比例布局的代码
为了创建比例大小的子View,可以将LinearLayout的宽度和高度设为fill_parent, 而将子View的宽度或是高度设为0,然后为子View设置不同权重(weight) ,这样子View的大小就会权值成比例. 本例使用横向LinearLayout,LinearLayout的android:layout_width="match_parent",表示将使用整个屏幕宽度. 对于LinearLayout的几个子View,将它们的宽度都定义为0,android:layout_wi
-
android LinearLayout和RelativeLayout组合实现精确布局方法介绍
先明确几个概念的区别: padding margin都是边距的含义,关键问题得明白是什么相对什么的边距. padding是控件的内容相对控件的边缘的边距. margin是控件边缘相对父空间的边距. android:gravity 属性是对该view 内容的限定.比如一个button 上面的text. 你可以设置该text 在view的靠左,靠右等位置.该属性就干了这个. android:layout_gravity是用来设置该view中的子view相对于父view的位置.比如一个button
-
jqeury-easyui-layout问题解决方法
今天在用easyui做布局时,碰到了一个疑惑的问题. 问题:当把class="easyui-layout"写在一个独立的div中时,layout的样式无法显示,也不报错. 例如: 复制代码 代码如下: <span style="font-size:14px;"><body > <div class="easyui-layout"> <div data-options="region:'north