如何利用IDEA搭建SpringBoot项目整合mybatis实现简单的登录功能
利用闲余时间想自己搭建一个springboot+mybatis的项目,提升一下自己对项目的了解,毕竟自己还是一个小白,在这里为自己创建项目的过程做一个记录,以便以后回忆。同时将搭建中遇到的问题也在这里做记录。如有遇到同样问题的同学,希望能给你一下借鉴。
springboot的优势之一就是快速搭建项目,省去了自己导入jar包和配置xml的时间,使用非常方便。
一,搭建项目:
1、打开IDEA,点击File→New→Project...,如图1所示

图1 搭建项目
2、当我们选择project...后,会看见如图2所示的页面,选择Spring Initializr,点击NEXT即可。

图2 搭建项目
3、接下来将看到如图3所示的页面,在这个页面中我只是修改了名称。然后点击NEXT进行下一步。
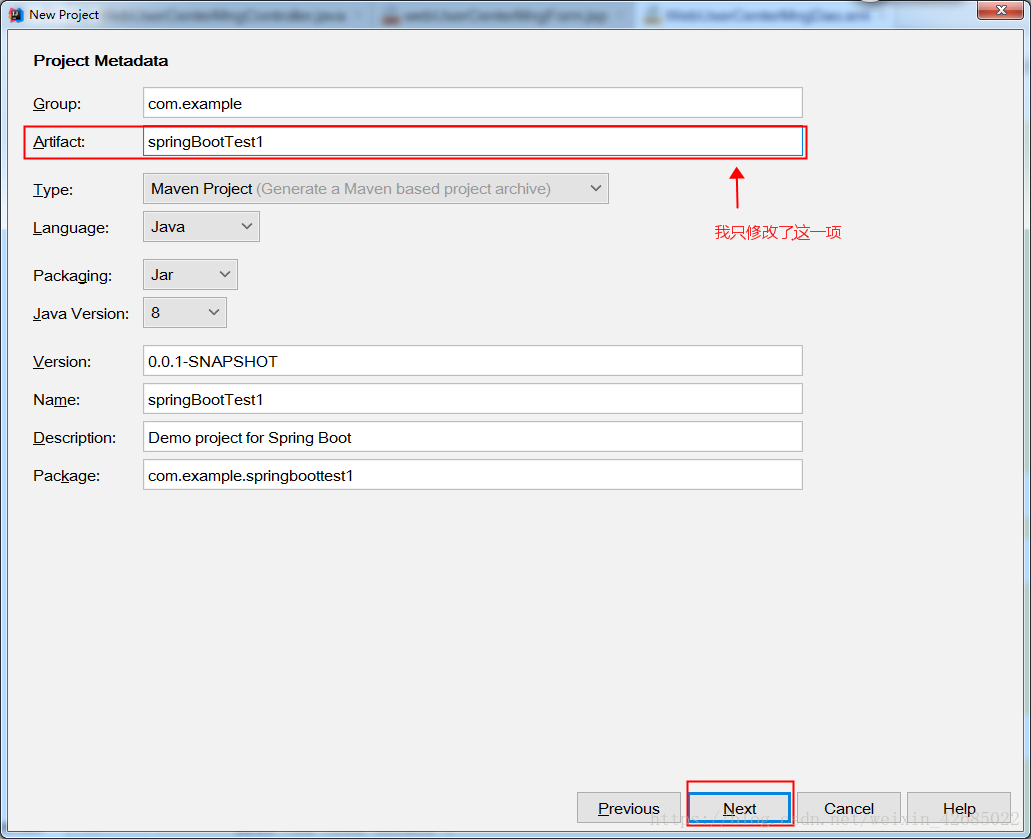
图3 搭建项目
4、当我点击NEXT时,却出现如图4所示的错误,这由于创建时因为Artifact的命名为大小写混合,将大写改为小写即可正常创建。
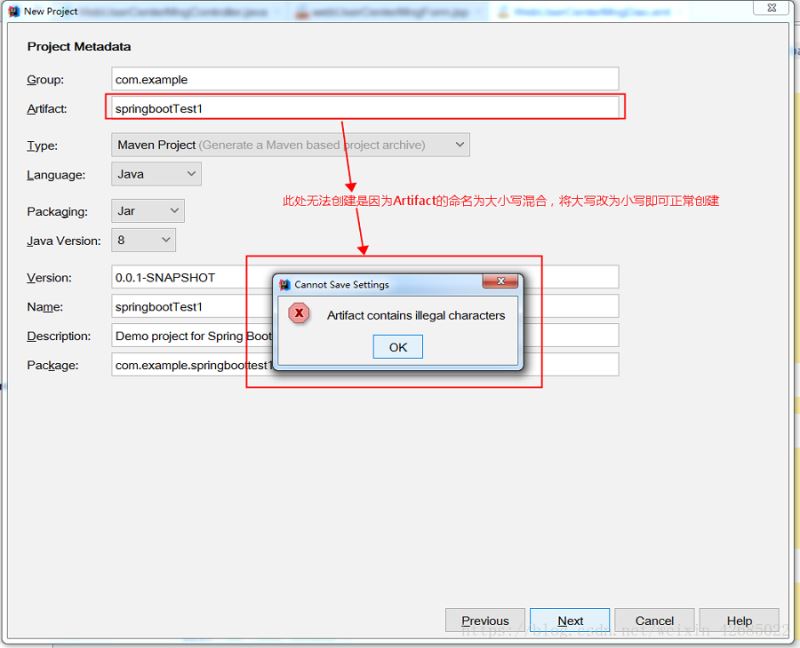
图4 搭建项目 (注意名称大小写问题)
5、接下来我们修改上面的错误,我将springbootTest1→springboottest1,然后进行下一步。会看见如图5所示的页面。 在当前页面中我们一次选择左侧的Web、Template Engines、SQL。然后在中间部分选择我们需要的选项,最终选择结果如最右侧所示。然后点击NEXT,进行下一步。

图5 搭建项目(选择需要的内容)
6、如图6所示,进人创建项目的最后一个页面,在这里我们可以修改项目保存的位置。确认自己输入的内容,点击Fiish即可完成项目的创建。

图6 搭建项目(可以修改文件路径)
7、点击Finish后,出现如图7所示页面,我们选择New Window即可,即在新的IDEA中打开我们新建的项目。
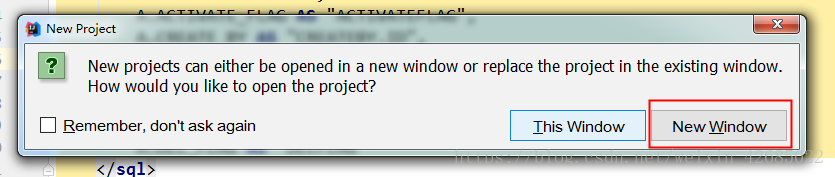
图7 打开项目
二、启动项目、添加配置文件等
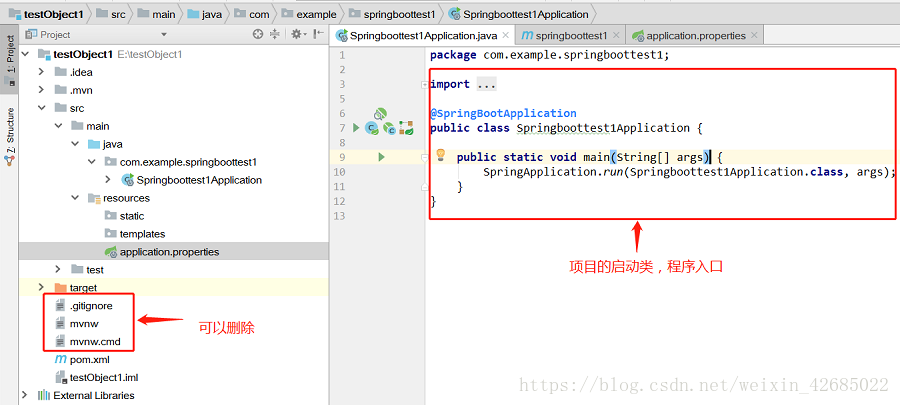
1、打开新项目后,我们可以观察一下左侧的项目结构。如图8所示。
生成的项目中,resources文件夹下,static文件夹下存放静态文件,比如css、js、html和图片等 。
templates下存放html文件,controller默认访问该文件夹下的html文件。
这个在application.properties配置文件中是可以修改的。
下面为项目生成的pom.xml文件:
<?xml version="1.0" encoding="UTF-8"?>
<project xmlns="http://maven.apache.org/POM/4.0.0" xmlns:xsi="http://www.w3.org/2001/XMLSchema-instance"
	xsi:schemaLocation="http://maven.apache.org/POM/4.0.0 http://maven.apache.org/xsd/maven-4.0.0.xsd">
	<modelVersion>4.0.0</modelVersion>

	<groupId>com.example</groupId>
	<artifactId>springboottest1</artifactId>
	<version>0.0.1-SNAPSHOT</version>
	<packaging>jar</packaging>

	<name>springboottest1</name>
	<description>Demo project for Spring Boot</description>

	<parent>
		<groupId>org.springframework.boot</groupId>
		<artifactId>spring-boot-starter-parent</artifactId>
		<version>2.0.4.RELEASE</version>
		<relativePath/> <!-- lookup parent from repository -->
	</parent>

	<properties>
		<project.build.sourceEncoding>UTF-8</project.build.sourceEncoding>
		<project.reporting.outputEncoding>UTF-8</project.reporting.outputEncoding>
		<java.version>1.8</java.version>
	</properties>

	<dependencies>
		<dependency>
			<groupId>org.springframework.boot</groupId>
			<artifactId>spring-boot-starter-jdbc</artifactId>
		</dependency>
		<dependency>
			<groupId>org.springframework.boot</groupId>
			<artifactId>spring-boot-starter-thymeleaf</artifactId>
		</dependency>
		<dependency>
			<groupId>org.springframework.boot</groupId>
			<artifactId>spring-boot-starter-web</artifactId>
		</dependency>
		<dependency>
			<groupId>org.mybatis.spring.boot</groupId>
			<artifactId>mybatis-spring-boot-starter</artifactId>
			<version>1.3.2</version>
		</dependency>

		<dependency>
			<groupId>mysql</groupId>
			<artifactId>mysql-connector-java</artifactId>
			<scope>runtime</scope>
		</dependency>
		<dependency>
			<groupId>org.springframework.boot</groupId>
			<artifactId>spring-boot-starter-test</artifactId>
			<scope>test</scope>
		</dependency>
	</dependencies>

	<build>
		<plugins>
			<plugin>
				<groupId>org.springframework.boot</groupId>
				<artifactId>spring-boot-maven-plugin</artifactId>
			</plugin>
		</plugins>
	</build>

</project>
图8 项目文件结构
2、了解项目的文件结构后,我们尝试着启动项目。我们发现项目启动过程中出现错误,错误信息如图9所示。
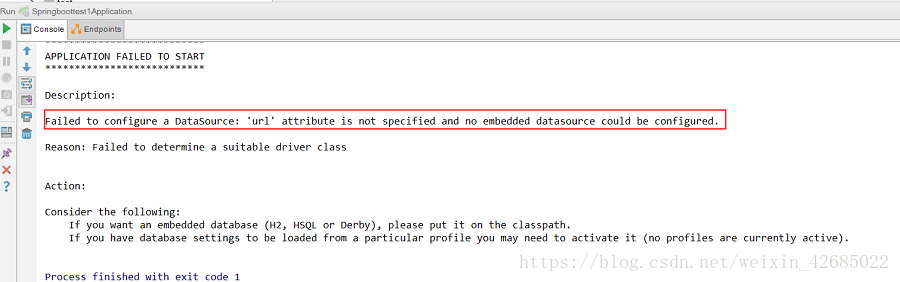
图9 项目启动报错
这是因为我们创建Spring Boot项目时,在选择组件时添加了mysql、mybatis,但现在还没有配置数据库,导致项目启动报错。
我们需要在项目的application.properties文件中配置数据信息。如图10所示,是我自己配置的数据库,具体情况根据自己数据库的设置配置。

图10 数据库配置
数据库采用MySQL数据库,下面是数据库的设计,只有几个简单的字段。如图11所示。

图11 数据库设计
这里也可以不使用application.properties文件,采用更加简洁的application.yml文件。将resource文件夹下原有的application.properties文件删除,创建application.yml配置文件(备注:其实SpringBoot底层会把application.yml文件解析为application.properties), 文件的内容如下(此处只配置最基本的):
server:
 port: 8080

spring:
 datasource:
 name: test
 url: jdbc:mysql://127.0.0.1:3306/test
 username: root
 password: 123456
 driver-class-name: com.mysql.jdbc.Driver
接下来再次尝试重新启动项目。发现项目可以正常启动了。可以打开浏览器访问http://localhost:8080/,访问结果如图12所示。证明项目正常启动了。

图12 访问结果
三、项目整合mybatis
1、在application.yml文件中添加mybatis。
server:
 port: 8080

spring:
 datasource:
 name: test
 url: jdbc:mysql://127.0.0.1:3306/test
 username: root
 password: 123456
 driver-class-name: com.mysql.jdbc.Driver

mybatis:
 mapper-locations: classpath:mapper/*.xml #注意:一定要对应mapper映射xml文件的所在路径
 type-aliases-package: com.example.springboottest1.entity # 注意:对应实体类的路径
2、在pom.xml中添加 mybatis generator 自动生成代码插件。
<build>
		<plugins>
			<plugin>
				<groupId>org.springframework.boot</groupId>
				<artifactId>spring-boot-maven-plugin</artifactId>
			</plugin>
			<!-- mybatis generator 自动生成代码插件 -->
			<plugin>
				<groupId>org.mybatis.generator</groupId>
				<artifactId>mybatis-generator-maven-plugin</artifactId>
				<version>1.3.1</version>
				<configuration>
					<configurationFile>${basedir}/src/main/resources/generator/generatorConfig.xml</configurationFile>
					<overwrite>true</overwrite>
					<verbose>true</verbose>
				</configuration>
			</plugin>
		</plugins>
	</build>
3、在resource文件夹下创建generator文件夹,并在文件夹中创建generatorConfig.xml文件。文件内容如下所示:
<?xml version="1.0" encoding="UTF-8"?>
<!DOCTYPE generatorConfiguration
 PUBLIC "-//mybatis.org//DTD MyBatis Generator Configuration 1.0//EN"
 "http://mybatis.org/dtd/mybatis-generator-config_1_0.dtd">
<generatorConfiguration>
 <!-- 数据库驱动:选择你的本地硬盘上面的数据库驱动包-->
 <classPathEntry location="C:\Program Files (x86)\MySQL\Connector.J 5.1\mysql-connector-java-5.1.36-bin.jar"/>
 <context id="DB2Tables" targetRuntime="MyBatis3">
 <commentGenerator>
  <property name="suppressDate" value="true"/>
  <!-- 是否去除自动生成的注释 true:是 : false:否 -->
  <property name="suppressAllComments" value="false"/>
 </commentGenerator>
 <!--数据库连接驱动类,URL,用户名、密码 -->
 <jdbcConnection driverClass="com.mysql.jdbc.Driver" connectionURL="jdbc:mysql://127.0.0.1/test" userId="root" password="123456">
 </jdbcConnection>
 <javaTypeResolver>
  <property name="forceBigDecimals" value="false"/>
 </javaTypeResolver>
 <!-- 生成(实体)模型的包名和位置-->
 <javaModelGenerator targetPackage="com.example.springboottest1.entity" targetProject="src">
  <property name="enableSubPackages" value="true"/>
  <property name="trimStrings" value="true"/>
 </javaModelGenerator>
 <!-- 生成XML映射文件的包名和位置-->
 <sqlMapGenerator targetPackage="resources.mapper" targetProject="src">
  <property name="enableSubPackages" value="true"/>
 </sqlMapGenerator>
 <!-- 生成DAO接口的包名和位置-->
 <javaClientGenerator type="XMLMAPPER" targetPackage="com.example.springboottest1.mapper" targetProject="src">
  <property name="enableSubPackages" value="true"/>
 </javaClientGenerator>
 <!-- 要生成的表 tableName是数据库中的表名或视图名 domainObjectName是实体类名-->
 <table tableName="user" domainObjectName="user" enableCountByExample="false" enableUpdateByExample="false" enableDeleteByExample="false" enableSelectByExample="false" selectByExampleQueryId="false"></table>
 </context>
</generatorConfiguration>
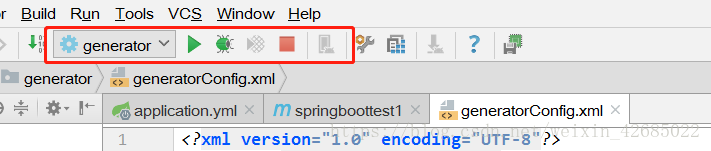
4、所有文件创建完成后,还需要进行简单的配置。Run→Edit Configurations...,然后选择maven,配置Command line。

5、所用文件创建完成,并配置好相关设置,重新启动项目,启动后运行generator。通过控制台可以看见代码是否生成成功,或失败的原因。如果代码生成成功,可以在项目文件夹中看见生成的项目。
这个过程共生成三个文件,一个实体类,dao,还有sql语句。
5.1、生成的实体类entity:
5.2、生
package com.example.springboottest1.entity;

public class user {
 /**
 * This field was generated by MyBatis Generator.
 * This field corresponds to the database column user.id
 *
 * @mbggenerated
 */
 private Integer id;

 /**
 * This field was generated by MyBatis Generator.
 * This field corresponds to the database column user.username
 *
 * @mbggenerated
 */
 private String username;

 /**
 * This field was generated by MyBatis Generator.
 * This field corresponds to the database column user.password
 *
 * @mbggenerated
 */
 private String password;

 /**
 * This field was generated by MyBatis Generator.
 * This field corresponds to the database column user.age
 *
 * @mbggenerated
 */
 private Integer age;

 /**
 * This method was generated by MyBatis Generator.
 * This method returns the value of the database column user.id
 *
 * @return the value of user.id
 *
 * @mbggenerated
 */
 public Integer getId() {
 return id;
 }

 /**
 * This method was generated by MyBatis Generator.
 * This method sets the value of the database column user.id
 *
 * @param id the value for user.id
 *
 * @mbggenerated
 */
 public void setId(Integer id) {
 this.id = id;
 }

 /**
 * This method was generated by MyBatis Generator.
 * This method returns the value of the database column user.username
 *
 * @return the value of user.username
 *
 * @mbggenerated
 */
 public String getUsername() {
 return username;
 }

 /**
 * This method was generated by MyBatis Generator.
 * This method sets the value of the database column user.username
 *
 * @param username the value for user.username
 *
 * @mbggenerated
 */
 public void setUsername(String username) {
 this.username = username == null ? null : username.trim();
 }

 /**
 * This method was generated by MyBatis Generator.
 * This method returns the value of the database column user.password
 *
 * @return the value of user.password
 *
 * @mbggenerated
 */
 public String getPassword() {
 return password;
 }

 /**
 * This method was generated by MyBatis Generator.
 * This method sets the value of the database column user.password
 *
 * @param password the value for user.password
 *
 * @mbggenerated
 */
 public void setPassword(String password) {
 this.password = password == null ? null : password.trim();
 }

 /**
 * This method was generated by MyBatis Generator.
 * This method returns the value of the database column user.age
 *
 * @return the value of user.age
 *
 * @mbggenerated
 */
 public Integer getAge() {
 return age;
 }

 /**
 * This method was generated by MyBatis Generator.
 * This method sets the value of the database column user.age
 *
 * @param age the value for user.age
 *
 * @mbggenerated
 */
 public void setAge(Integer age) {
 this.age = age;
 }
}
成的Dao:
package com.example.springboottest1.mapper;

import com.example.springboottest1.entity.user;

public interface userMapper {
 /**
 * This method was generated by MyBatis Generator.
 * This method corresponds to the database table user
 *
 * @mbggenerated
 */
 int deleteByPrimaryKey(Integer id);

 /**
 * This method was generated by MyBatis Generator.
 * This method corresponds to the database table user
 *
 * @mbggenerated
 */
 int insert(user record);

 /**
 * This method was generated by MyBatis Generator.
 * This method corresponds to the database table user
 *
 * @mbggenerated
 */
 int insertSelective(user record);

 /**
 * This method was generated by MyBatis Generator.
 * This method corresponds to the database table user
 *
 * @mbggenerated
 */
 user selectByPrimaryKey(Integer id);

 /**
 * This method was generated by MyBatis Generator.
 * This method corresponds to the database table user
 *
 * @mbggenerated
 */
 int updateByPrimaryKeySelective(user record);

 /**
 * This method was generated by MyBatis Generator.
 * This method corresponds to the database table user
 *
 * @mbggenerated
 */
 int updateByPrimaryKey(user record);
}
5.3、生成的SQL语句(其中一些没有用的注释被我删掉了):
<?xml version="1.0" encoding="UTF-8" ?>
<!DOCTYPE mapper PUBLIC "-//mybatis.org//DTD Mapper 3.0//EN" "http://mybatis.org/dtd/mybatis-3-mapper.dtd" >
<mapper namespace="com.example.springboottest1.mapper.userMapper" >
 <resultMap id="BaseResultMap" type="com.example.springboottest1.entity.user" >
 <!--
 WARNING - @mbggenerated
 This element is automatically generated by MyBatis Generator, do not modify.
 -->
 <id column="id" property="id" jdbcType="INTEGER" />
 <result column="username" property="username" jdbcType="VARCHAR" />
 <result column="password" property="password" jdbcType="VARCHAR" />
 <result column="age" property="age" jdbcType="INTEGER" />
 </resultMap>
 <sql id="Base_Column_List" >
 id,
 username,
 password,
 age
 </sql>
 <select id="selectByPrimaryKey" resultMap="BaseResultMap" parameterType="java.lang.Integer" >
 select
 <include refid="Base_Column_List" />
 from user
 where id = #{id,jdbcType=INTEGER}
 </select>
 <delete id="deleteByPrimaryKey" parameterType="java.lang.Integer" >
 delete from user
 where id = #{id,jdbcType=INTEGER}
 </delete>
 <insert id="insert" parameterType="com.example.springboottest1.entity.user" >
 insert into user (id, username, password, age)
 values (
 #{id,jdbcType=INTEGER},
 #{username,jdbcType=VARCHAR},
 #{password,jdbcType=VARCHAR},
 #{age,jdbcType=INTEGER})
 </insert>
 <insert id="insertSelective" parameterType="com.example.springboottest1.entity.user" >
 insert into user
 <trim prefix="(" suffix=")" suffixOverrides="," >
 <if test="id != null" >
  id,
 </if>
 <if test="username != null" >
  username,
 </if>
 <if test="password != null" >
  password,
 </if>
 <if test="age != null" >
  age,
 </if>
 </trim>
 <trim prefix="values (" suffix=")" suffixOverrides="," >
 <if test="id != null" >
  #{id,jdbcType=INTEGER},
 </if>
 <if test="username != null" >
  #{username,jdbcType=VARCHAR},
 </if>
 <if test="password != null" >
  #{password,jdbcType=VARCHAR},
 </if>
 <if test="age != null" >
  #{age,jdbcType=INTEGER},
 </if>
 </trim>
 </insert>
 <update id="updateByPrimaryKeySelective" parameterType="com.example.springboottest1.entity.user" >
 update user
 <set >
 <if test="username != null" >
  username = #{username,jdbcType=VARCHAR},
 </if>
 <if test="password != null" >
  password = #{password,jdbcType=VARCHAR},
 </if>
 <if test="age != null" >
  age = #{age,jdbcType=INTEGER},
 </if>
 </set>
 where id = #{id,jdbcType=INTEGER}
 </update>
 <update id="updateByPrimaryKey" parameterType="com.example.springboottest1.entity.user" >
 update user
 set username = #{username,jdbcType=VARCHAR},
 password = #{password,jdbcType=VARCHAR},
 age = #{age,jdbcType=INTEGER}
 where id = #{id,jdbcType=INTEGER}
 </update>
</mapper>
四、测试访问
做好以上的准备以后,可以简单的写一个小页面,试着访问一下。
同时这个时候可以自己了解一下@Controller与@RestController的区别,以及@ResponseBody的用法。
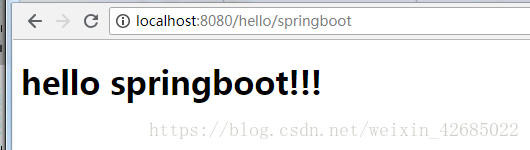
1、比如写一个简单的HTML页面,HelloWord.html。
<!DOCTYPE html>
<html lang="en">
<head>
 <meta charset="UTF-8">
 <title>HelloWord</title>
</head>
<body>
<h1>hello springboot!!!</h1>
</body>
</html>
2、访问页面的controller。helloController.java
package com.example.springboottest1.controller;

import org.springframework.stereotype.Controller;
import org.springframework.web.bind.annotation.RequestMapping;

@Controller
@RequestMapping(value = {"/hello"})
public class helloController {

 @RequestMapping(value = {"/springboot"})
 public String hello(){
 return "HelloWord";
 }
}
3、重新启动项目,访问http://localhost:8080/hello/springboot,访问的结果如下所示。
五、编写用户登录过程代码
1、编写简单的登录页面与注册页面
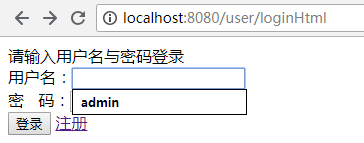
(1)登录页面 userLogin.html
<!DOCTYPE html> <html lang="en"> <head> <meta charset="UTF-8"> <title>用户登录</title> </head> <body> 请输入用户名与密码登录 <form action="/user/userLogin" method="post"> 用户名:<input type="text" name="username" /><br> 密 码:<input type="password" name="password" /><br> <input type="submit" value="登录" /> <a href="/user/registerpage" target="_blank">注册</a> </form> </body> </html>
页面效果:
(2)注册页面 register.html
<!DOCTYPE html>
<html lang="en">
<head>
 <meta charset="UTF-8">
 <title>注册</title>
</head>
<body>
<form action="/user/uregister" method="post">
 用户名:<input type="text" name="username" /></br>
 密码:<input type="password" name="password" /></br>
 确认密码:<input type="password" name="password2" /></br>
 年龄:<input type="text" name="age" /></br>
 <input type="submit" value="注册">
</form>
</body>
</html>
页面效果:

(3)登录成功页面 index.html
<!DOCTYPE html>
<html lang="en">
<head>
 <meta charset="UTF-8">
 <title>登录成功</title>
</head>
<body>
<h1>用户名与密码正确,登录成功!!!</h1>

</body>
</html>
页面效果:
(4)登录失败页面 loginError.html
<!DOCTYPE html>
<html lang="en">
<head>
 <meta charset="UTF-8">
 <title>登录失败</title>
</head>
<body>
<h1>用户名或密码错误,登录失败!!!</h1>
</body>
</html>
页面效果:
2、对于写代码的顺序,我是从xml(sql语句)开始写,然后Dao,Service,最后写Controller。下面为我的部分代码。(开始生成的代码没有用到的部分被我删除掉了)
(1)xml(sql语句) userMapper.xml
<?xml version="1.0" encoding="UTF-8" ?>
<!DOCTYPE mapper PUBLIC "-//mybatis.org//DTD Mapper 3.0//EN" "http://mybatis.org/dtd/mybatis-3-mapper.dtd" >
<mapper namespace="com.example.springboottest1.mapper.userMapper" >

 <!--用户登录验证-->
 <select id="userlogin" parameterType="user" resultType="User">
 SELECT id,username,password,age FROM user WHERE username = #{username} AND password = #{password}
 </select>

 <!--新用户注册 方式1-->
 <insert id="adduser" parameterType="user" useGeneratedKeys="true" keyProperty="id">
 INSERT INTO user (username,password,age) VALUES (#{username},#{password},#{age})
 </insert>

 <!--新用户注册 方式2-->
 <insert id="adduser1" parameterType="user">
 INSERT INTO user (id,username,password,age) VALUES (UUID(),#{username},#{password},#{age})
 </insert>

</mapper>
(2)Dao层 userMapper.java
package com.example.springboottest1.mapper;

import com.example.springboottest1.entity.User;
import org.apache.ibatis.annotations.Mapper;
import org.apache.ibatis.annotations.Param;
import org.springframework.stereotype.Component;

import java.util.Map;

@Mapper
@Component
public interface userMapper {

 //用户登录
 User userlogin(@Param("username") String username,@Param("password") String password);

 //注册新用户(方式1)
 int adduser(@Param("username") String username, @Param("password") String password, @Param("age") int age);

 //注册新用户(方式2)
 int adduser1(@Param("username") String username, @Param("password") String password, @Param("age") int age);
}
(3)Servicr层 UserLoginService.java
package com.example.springboottest1.service;

import com.example.springboottest1.entity.User;
import com.example.springboottest1.mapper.userMapper;
import org.springframework.beans.factory.annotation.Autowired;
import org.springframework.stereotype.Service;

import java.util.Map;

@Service
public class UserLoginService {

 /**
 * 注入dao
 */
 @Autowired
 private userMapper usermapper;

 //用户登录
 public User userLogin(String username,String password){
 User user = usermapper.userlogin(username,password);
 return user;
 }

 //注册新用户
 public int adduser(String username,String password,int age){

 return usermapper.adduser(username,password,age);
 //return usermapper.adduser1(username,password,age); //对应sql语句中的第二种注册方式
 }
}
(4)Controller层 UserLoginController.java
package com.example.springboottest1.controller;

import com.example.springboottest1.entity.User;
import com.example.springboottest1.service.UserLoginService;
import org.springframework.beans.factory.annotation.Autowired;
import org.springframework.stereotype.Controller;
import org.springframework.web.bind.annotation.RequestBody;
import org.springframework.web.bind.annotation.RequestMapping;
import org.springframework.web.bind.annotation.RequestParam;
import org.springframework.web.bind.annotation.ResponseBody;

import javax.servlet.http.HttpServletRequest;

@Controller
@RequestMapping(value = {"/user"})
public class UserLoginController {

 /**
 * 注入service
 */
 @Autowired
 private UserLoginService userLoginService;

 /**
 * 跳转到用户登录页面
 * @return 登录页面
 */
 @RequestMapping(value = {"/loginHtml"})
 public String loginHtml(){
 return "userLogin";
 }

 /**
 * 跳转到用户注册页面
 * @return 注册页面
 */
 @RequestMapping(value = {"/registerpage"})
 public String registerpage(){
 return "register";
 }

 /**
 * 获取用户名与密码,用户登录
 * @return 登录成功页面
 */
 @RequestMapping(value = {"/userLogin"})
 public String userLogin(@RequestParam("username") String username, @RequestParam("password") String password, HttpServletRequest request){

 User user = userLoginService.userLogin(username,password);

 if(user != null){       //登录成功
  request.getSession().setAttribute("session_user",user); //将用户信息放入session
  return "index";
 }
 return "loginError";
 }

 /**
 * 注册新用户
 * @return 注册结果
 */
 @ResponseBody
 @RequestMapping(value = {"/uregister"})
 public String addUser(@RequestParam("username") String username,
    @RequestParam("password") String password,
    @RequestParam("password2") String password2,
    @RequestParam("age") int age){

 if(!password.equals(password2)){

  return "两次密码不相同,注册失败!!";
 }else {
  int res = userLoginService.adduser(username,password,age);
  if(res == 0){
  return "注册失败!";
  }else {
  return "注册成功!";
  }
 }

 }
}
由于有同学问我要源码,有时候我可能看不见消息,所以将源码在百度云中分享出来,大家根据自己需要,自行下载吧,如果有什么建议就评论吧:
链接: https://pan.baidu.com/s/1TO00D-eHnwA8tm6VHRgIbA
提取码: waeu
总结
到此这篇关于如何利用IDEA搭建SpringBoot项目整合mybatis实现简单的登录功能的文章就介绍到这了,更多相关IDEA搭建SpringBoot项目整合mybatis实现登录内容请搜索我们以前的文章或继续浏览下面的相关文章希望大家以后多多支持我们!
相关推荐
-
如何利用IDEA搭建SpringBoot项目整合mybatis实现简单的登录功能
利用闲余时间想自己搭建一个springboot+mybatis的项目,提升一下自己对项目的了解,毕竟自己还是一个小白,在这里为自己创建项目的过程做一个记录,以便以后回忆.同时将搭建中遇到的问题也在这里做记录.如有遇到同样问题的同学,希望能给你一下借鉴. springboot的优势之一就是快速搭建项目,省去了自己导入jar包和配置xml的时间,使用非常方便. 一,搭建项目: 1.打开IDEA,点击File→New→Project...,如图1所示 图1 搭建项目 2.当我们选择project..
-
SpringBoot项目整合mybatis的方法步骤与实例
1. 导入依赖的jar包 springboot项目整合mybatis之前首先要导入依赖的jar包,配置pom.xml文件如下: <?xml version="1.0" encoding="UTF-8"?> <project xmlns="http://maven.apache.org/POM/4.0.0" xmlns:xsi="http://www.w3.org/2001/XMLSchema-instance"
-

springboot项目整合mybatis并配置mybatis中间件的实现
记录创建springboot项目并配置mybatis中间件: 资源准备及版本说明 编程工具:IDEA JDK版本:1.8 Maven版本:Apache Maven 3.6.3 springboot版本:2.4.4 mybatis版本:1.3.2 mysql版本:5.1.48 创建mavem项目 通过IDEA创建很便捷,参考<IDEA创建SpirngBoot项目>. 配置pom.xml 使用mybatis需要添加依赖 <dependency> <groupId>org.m
-
springboot项目整合druid数据库连接池的实现
Druid连接池是阿里巴巴开源的数据库连接池项目,后来贡献给Apache开源: Druid的作用是负责分配.管理和释放数据库连接,它允许应用程序重复使用一个现有的数据库连接,而不是再重新建立一个: Druid连接池内置强大的监控功能,其中的StatFilter功能,能采集非常完备的连接池执行信息,方便进行监控,而监控特性不影响性能. Druid连接池内置了一个监控页面,提供了非常完备的监控信息,可以快速诊断系统的瓶颈. SpringBoot 1.x版本默认使用的的tomcat的jdbc连接池,由
-
springboot快速整合Mybatis组件的方法(推荐)
Spring Boot简介 Spring Boot是由Pivotal团队提供的全新框架,其设计目的是用来简化新Spring应用的初始搭建以及开发过程.该框架使用了特定的方式来进行配置,从而使开发人员不再需要定义样板化的配置.通过这种方式,Spring Boot致力于在蓬勃发展的快速应用开发领域(rapid application development)成为领导者. 原有Spring优缺点分析 Spring的优点分析 Spring是Java企业版(Java Enterprise Edition,
-
idea快速搭建springboot项目的操作方法
Spring Boot是由Pivotal团队提供的全新框架,设计目的是用来简化新Spring应用的初始搭建以及开发过程.它主要推崇的是'消灭配置',实现零配置. 那么,如何在idea中创建一个springboot项目呢? 一.在你建立的工程下创建 Module 选择Spring initializr创建. 二.在Type处选择: Maven Project(项目的构建工具) 三.创建依赖时勾上web,mybatis,mysql(这个看你个人需要吧,可以自主选择) 建立好的项目结构如下: 相对应的
-
Docker 部署 SpringBoot 项目整合 Redis 镜像做访问计数示例代码
最终效果如下 大概就几个步骤 1.安装 Docker CE 2.运行 Redis 镜像 3.Java 环境准备 4.项目准备 5.编写 Dockerfile 6.发布项目 7.测试服务 环境准备 系统:Ubuntu 17.04 x64 Docker 17.12.0-ce IP:45.32.31.101 一.安装 Docker CE 国内不建议使用:"脚本进行安装",会下载安装很慢,使用步骤 1 安装,看下面的链接:常规安装方式 1.常规安装方式 Ubuntu 17.04 x64 安装
-
利用Dockerfile部署SpringBoot项目的方法
1.创建一个SpringBooot项目并且打成jar包 2.在Linux中创建一个文件夹,来做docker测试 [root@izwz90lvzs7171wgdhul8az ~]# mkdir /root/docker_test 3.将jar包上传到Linux中 创建存放jar包的文件夹 [root@izwz90lvzs7171wgdhul8az docker_test]# mkdir /root/docker_test/jar 然后利用XShell上传jar包到上面的文件夹中 4.编写Docke
-
Idea使用插件实现逆向工程搭建SpringBoot项目的图文教程
之前写SpringBoot项目,每次都要手动去写实体类.dao层啥的,尤其是数据库表字段特别多的时候,特别麻烦.然后很多小伙伴都会用逆向工程来自动生成这些类,省去许多没必要的代码量,但是Mybatis的逆向工程依然需要配置,导逆向工程的jar啊,还有编写generatorConfig.xml文件啊(有兴趣的朋友可以看看这篇博客).今天逛gitee的时候,看到了一款可以免去许多配置的idea逆向工程插件,几个步骤简单使用一下 这个插件. 1.下载并安装EasyCode插件 Setting->Plu
-
SpringBoot快速整合Mybatis、MybatisPlus(代码生成器)实现数据库访问功能
1. 创建SpringBoot项目 1.1 引入依赖 pom.xml <?xml version="1.0" encoding="UTF-8"?> <project xmlns="http://maven.apache.org/POM/4.0.0" xmlns:xsi="http://www.w3.org/2001/XMLSchema-instance" xsi:schemaLocation="ht