c++中nlohmann json的基本使用教程
目录
- 一.json.hpp库下载及安装
- 1.1 开源地址及引入方法
- 1.2 demo程序测试
- 二.nlohmann json基本操作
- 2.1 由basic value创建json
- 2.2 由json对象得到basic value
- 2.3 像操作stl container一样操作json value
- 三.json序列化与反序列化
- 3.1 json value和string
- 3.2 json对象和文件输入输出转换
- 3.3 json value和自定义对象
- 四.NLOHMANN_DEFINE_TYPE_INTRUSIVE宏的使用
- 4.1 宏的定义
- 4.2 宏的使用
- 总结
一.json.hpp库下载及安装
1.1 开源地址及引入方法
nlohmann json的开源项目地址,其中有对json使用方法的详细说明:
https://github.com/nlohmann/json#serialization–deserialization
对于我们项目中要使用nlohmann json工具,只需要引入json.hpp这一个文件,其中包含所有接口函数,正如其文档中所述json.hpp文件在single_include/nlohmann目录下,我们只需要下载该文件即可:
git clone https://github.com/nlohmann/json/blob/develop/single_include/nlohmann/json.hpp
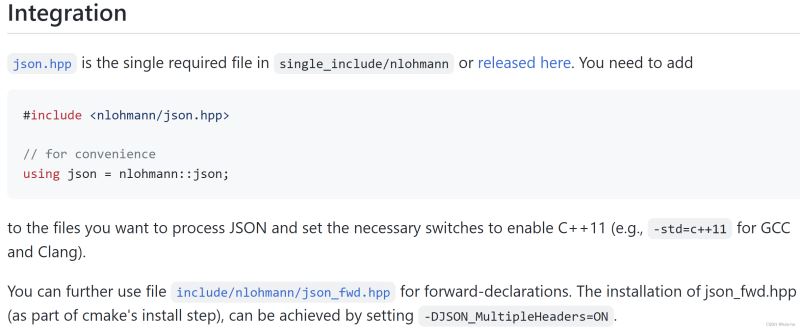
如上图片所示,使用json.hpp文件需要关注两点:
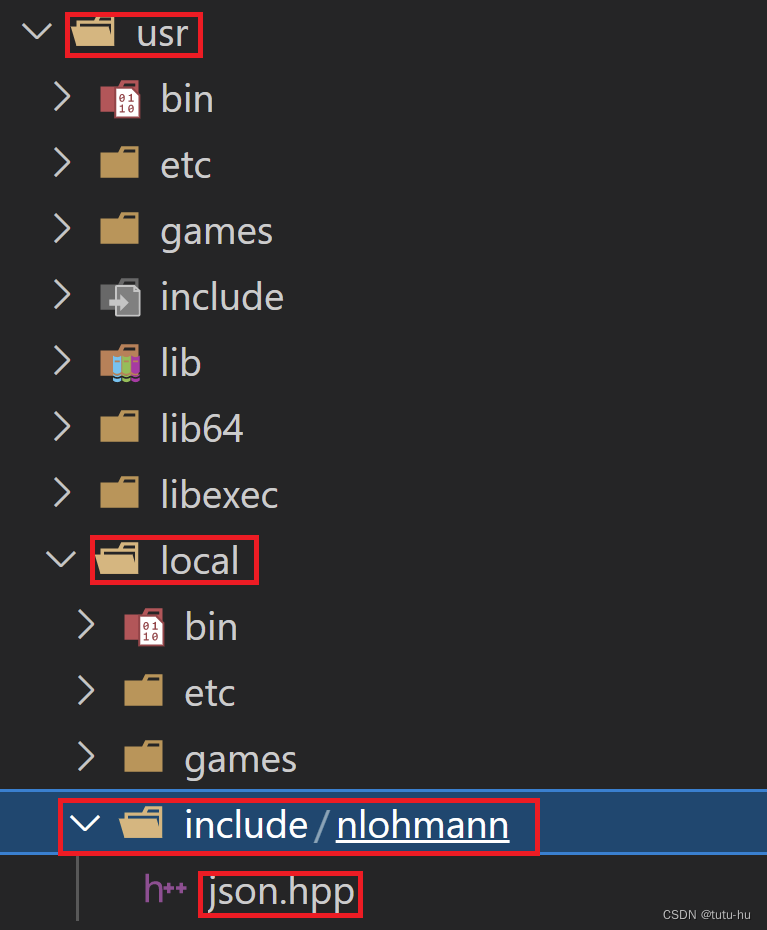
一是:#include <nlohmann/json.hpp>头文件路径的引入,这里将json.hpp文件放到linux系统中的/usr/local/include路径下,这是系统默认头文件路径,在编译时系统会自动查找该路径。我们在/usr/local/include路径下创建/nlohmann/json.hpp,如下图所示:
二是:在编译时需要指定c++11标准,-std=c++11。
1.2 demo程序测试
jsontest.cpp:
#include <iostream>
#include <nlohmann/json.hpp>   //引入json.hpp,该文件已经放在系统默认路径:/usr/local/include/nlohmann/json.hpp
using namespace std;
// for convenience
using json = nlohmann::json;

int main()
{
  auto config_json = json::parse(R"({"happy": true, "pi": 3.141})");  //构建json对象
  cout << config_json << endl;   //输出json对象值
  return 0;
}
编译:
g++ jsontest.cpp -std=c++11
输出结果:
{“happy”:true,“pi”:3.141}
二.nlohmann json基本操作
2.1 由basic value创建json
两种方式创建json对象:赋值构造+直接构造
jsontest.cpp:
#include <iostream>
#include <nlohmann/json.hpp>   //引入json.hpp,该文件已经放在系统默认路径:/usr/local/include/nlohmann/json.hpp

using namespace std;
using json = nlohmann::json;    // for convenience

int main()
{
  //方式一:赋值构造
  json j1;
  j1["name"]="LeBorn Jame";//字符串
  j1["number"]=23;         //整数
  j1["man"]=true;          //布尔值
  j1["children"]={"LeBorn Jr","Bryce Maximus","Zhuri"};//数组
  j1["behavior"]["funny"]="gigigigigigi";              //对象中元素值
  j1["wife"]={{"name","Savannah Brinson"},{"man",false}};//对象

  //方式二:直接构造
  json j2={
    {"name","LeBorn Jame"},
    {"number",23},
    {"man",true},
    {"children",{"LeBorn Jr","Bryce Maximus","Zhuri"}},
    {"behavior",{{"funny","gigigigigigi"}}},
    {"wife",{{"name","Savannah Brinson"},{"man",false}}}
  };

  cout << "j1: "<<j1 << endl;   //输出json对象值
  cout <<  "j2: "<<j2 << endl;   //输出json对象值
  return 0;
}
编译:
g++ jsontest.cpp -std=c++11
输出结果:
j1: {“behavior”:{“funny”:“gigigigigigi”},“children”:[“LeBorn Jr”,“Bryce Maximus”,“Zhuri”],“man”:true,“name”:“LeBorn Jame”,“number”:23,“wife”:{“man”:false,“name”:“Savannah Brinson”}}
j2: {“behavior”:{“funny”:“gigigigigigi”},“children”:[“LeBorn Jr”,“Bryce Maximus”,“Zhuri”],“man”:true,“name”:“LeBorn Jame”,“number”:23,“wife”:{“man”:false,“name”:“Savannah Brinson”}}
2.2 由json对象得到basic value
#include <iostream>
#include <string>

#include <nlohmann/json.hpp>   //引入json.hpp,该文件已经放在系统默认路径:/usr/local/include/nlohmann/json.hpp

using namespace std;

using json = nlohmann::json;    // for convenience

int main()
{
  //构建一个json对象hututu
  json hututu = {
      {"name","hututu"},
      {"age",18},
      {"gender",'m'},
      {"score",88.99},
      {"location",{"aaa","bbb","ccc"}},
  };
  //方式一
  auto name = hututu["name"].get<std::string>();  //获取“name”对应的value值,并转为string类型
  cout<<"name = "<<name<<endl;
  cout<<"type name = "<<typeid(name).name()<<endl;
  cout<<"----------------------"<<endl;
  //方式二
  auto location0 = hututu["location"][0].get<std::string>();
  auto location1 = hututu["location"][1].get<std::string>();
  auto location2 = hututu["location"].at(2).get<std::string>();
  cout<<"location0 = "<<location0<<endl;
  cout<<"location1 = "<<location1<<endl;
  cout<<"location2 = "<<location2<<endl;
  return 0;
}
输出结果:
name = hututu
type name = Ss
location0 = aaa
location1 = bbb
location2 = ccc
2.3 像操作stl container一样操作json value
#include <iostream>
#include <string>

#include <nlohmann/json.hpp>   //引入json.hpp,该文件已经放在系统默认路径:/usr/local/include/nlohmann/json.hpp

using namespace std;

using json = nlohmann::json;    // for convenience

int main()
{
  //构建一个json对象animalArray
  json animalArray={"cat","dog"};//定义一个数组类型的json对象
  animalArray.push_back("pig");//添加元素
  animalArray.emplace_back("duck");//C++11新方式添加元素,减少申请内存
  cout<<"animalArray: "<<animalArray<<endl;
  //使用is_array()函数判断对象类型,使用empty函数判断数量是否为空
  if(animalArray.is_array() && !animalArray.empty())
  {
      auto size=animalArray.size();          //使用size函数获取元素数量
      cout<<"animalArray size: "<<size<<endl;
      auto animalLast=animalArray.at(size-1).get<std::string>();
      cout<<"animalArray[size-1]: "<<animalLast<<endl;
      cout<<"/--------------------/"<<endl;
  }

  json animalObject={{"kind","dog"},{"height",50}};//定义一个对象类型的json对象
  animalObject.push_back({"color","red"});//插入元素
  animalObject.erase("kind");//删除键值
  cout<<"animalObject: "<<animalObject<<endl;
  animalObject["height"] = 99;   //通过key修改value值
  //判断是否含有某个键值方式一
  if(animalObject.contains("height"))//通过contains函数判断是否包含某个key
  {
      auto height=animalObject["height"].get<double>();
      cout<<"方式一:height: "<<height<<endl;
  }
  //判断是否含有某个键值方式二
  auto size=animalObject.count("height");//通过count函数计算某一个键的数量
  if(size>0)
  {
      cout<<"方式二:存在height键值"<<endl;
  }
  //判断是否含有某个键值方式三
  auto iter=animalObject.find("height");//通过find函数查找某个键的迭代器
  if(iter!=animalObject.end())
  {
      cout<<"方式三:存在height键值"<<endl;
  }
  //遍历输出键值方式1
  cout<<"遍历输出键值方式1:"<<endl;
  for(auto item:animalObject.items())
  {
      std::cout<<item.key()<<" "<<item.value()<<std::endl;
  }
  //遍历输出键值方式2
  cout<<"遍历输出键值方式2:"<<endl;
  for(auto iter=animalObject.begin();iter!=animalObject.end();++iter)
  {
      cout<<iter.key()<<" "<<iter.value()<<std::endl;
  }
  return 0;
}
输出结果:
animalArray: [“cat”,“dog”,“pig”,“duck”]
animalArray size: 4
animalArray[size-1]: duck
/--------------------/
animalObject: {“color”:“red”,“height”:50}
方式一:height: 99
方式二:存在height键值
方式三:存在height键值
遍历输出键值方式1:
color “red”
height 99
遍历输出键值方式2:
color “red”
height 99
三.json序列化与反序列化
3.1 json value和string
#include <iostream>
#include <string>

#include <nlohmann/json.hpp>   //引入json.hpp,该文件已经放在系统默认路径:/usr/local/include/nlohmann/json.hpp

using namespace std;

using json = nlohmann::json;    // for convenience

int main()
{
  //反序列化构建json对象,两种方式
  json hututu1 = "{\"name\":\"hututu\",\"age\":18,\"score\":88.99}"_json;//方式1,通过"_json"实现反序列化
  auto temp = R"({"name":"hututu","age":18,"score":88.99})";//使用原生字符串关键字R来避免转移字符,但这一句并没有序列化,hututu2只保存字符串而已,需要结合方式3实现反序列化
  json hututu2 = json::parse(temp);//方式2,通过静态函数"parse"实现反序列化
  cout<<"/----------反序列化-----------/"<<endl;
  cout<<"hututu1 = "<<hututu1<<endl;
  cout<<"hututu2 = "<<hututu2<<endl;
  cout<<"/----------序列化-----------/"<<endl;
  //序列化(Serialization):dump(number),number为打印出的空格数
  std::string hututu1_string=hututu1.dump();//animal1值为{"kind":"dog","height":50}
  std::string hututu2_string=hututu2.dump(4);
  cout<<"hututu1_string = "<<hututu1_string<<endl;
  cout<<"hututu2_string = "<<hututu2_string<<endl;

  return 0;
}
输出结果:
/----------反序列化-----------/
hututu1 = {“age”:18,“name”:“hututu”,“score”:88.99}
hututu2 = {“age”:18,“name”:“hututu”,“score”:88.99}
/----------序列化-----------/
hututu1_string = {“age”:18,“name”:“hututu”,“score”:88.99}
hututu2_string = {
“age”: 18,
“name”: “hututu”,
“score”: 88.99
}
3.2 json对象和文件输入输出转换
#include <iostream>        //文件操作头文件
#include <string>
#include <fstream>
#include <nlohmann/json.hpp>   //引入json.hpp,该文件已经放在系统默认路径:/usr/local/include/nlohmann/json.hpp

using namespace std;

using json = nlohmann::json;    // for convenience

int main()
{
  //上述操作适用于istream和ostream的子类,比如我们经常会用到的ifstream和ofstream
  //从.json文件中读取内容到json对象中
  std::ifstream in("./person.json");//打开文件,关联到流in
  json hututu={"111","222"};      //定义一个json对象为hututu,有初始内容,但是会被覆盖
  in>>hututu;                     //从流in中(也就是./person.json文件)读取内容到json对象中,会覆盖之前内容
  in.close();                     //关闭文件流in
  hututu["aaa"]="bbb";             //添加json对象内容
  cout << hututu << endl;   //输出json对象值

  //输出json对象内容到文件中,并生成新的文件
  std::ofstream out("./new.json");    //创建文件./new.json,并关联到流out
  hututu["name"]="new name";          //更改hututu对象的内容
  out<<std::setw(4)<<hututu;          //输出json对象hututu信息到文件./new.json中,std::setw(4)用于设置增加打印空格
  out.close();         //关闭文件流out

  return 0;
}
./person.json文件内容
{
“name”:“hututu”,
“age”:18,
“gender”:“m”,
“score”:88.99
}
执行程序后,输出的json对象内容如下,也就是从./person.json文件中读取的信息:
{“aaa”:“bbb”,“age”:18,“gender”:“m”,“name”:“hututu”,“score”:88.99}
同时在当前目录下生成新的文件./new.json,内容如下所示:
{
“aaa”: “bbb”,
“age”: 18,
“gender”: “m”,
“name”: “new name”,
“score”: 88.99
}
3.3 json value和自定义对象
在自定义对象命名空间中定义两个函数即可像basic value一样进行反序列化和序列化:from_json(const json& j,T& value)、to_json(json& j,const T& value)
#include <iostream>        //文件操作头文件
#include <string>
#include <nlohmann/json.hpp>   //引入json.hpp,该文件已经放在系统默认路径:/usr/local/include/nlohmann/json.hpp

using namespace std;

using json = nlohmann::json;

class person
{
    public:
        person(){}       //默认构造函数
        person(string m_name,int m_age,double m_score):name(m_name),age(m_age),score(m_score){};
    public:
      string name;
      int age;
      double score;
    void display()
    {
      cout<<"person name = "<<this->name<<endl;
      cout<<"person age = "<<this->age<<endl;
      cout<<"person score = "<<this->score<<endl;
    }
};
//定义from_json(const json& j,T& value)函数,用于序列化
//json对象----->class对象
void from_json(const json& j,person& hututu)
{
    hututu.name=j["name"].get<std::string>();
    hututu.age=j["age"].get<int>();
    hututu.score=j["score"].get<double>();
}

//定义to_json(json& j,const T& value)函数,用于反序列化
//class对象----->json对象
void to_json(json& j,const person& hututu)
{
    j["name"]=hututu.name;
    j["age"]=hututu.age;
    j["score"]=hututu.score;
}
// void to_json(json& j, const person& p)
// {
// 	j = json{ {"name", p.name}, {"address", p.address}, {"age", p.age} };
// }

// void from_json(const json& j, person& p) {
// 	j.at("name").get_to(p.name);
// 	j.at("address").get_to(p.address);
// 	j.at("age").get_to(p.age);
// }

//main.cpp文件
int main()
{
    person hututu{"hututu",18,88.99};//定义一个person对象为hututu
    cout<<"/----------to json,方式1:json=class隐式转换-----------/"<<endl;
    json j1=hututu;                //class to json,隐式调用to_json函数
    cout<<"j1 = "<<j1<<endl;       //输出json对象值
    cout<<"/----------to json,方式2:调用to_json函数-----------/"<<endl;
    json j2;
    to_json(j2,hututu);          //to json,调用to_json函数
    cout<<"j2 = "<<j2<<endl;     //输出json对象值
    cout<<"/----------from json,方式1:调用from_json函数-----------/"<<endl;
    j1["name"]="new name";        //修改json对象数据
    cout<<"new j1 = "<<j1<<endl;        //输出json对象值
    person hututu_new;
    from_json(j1,hututu_new);   //json---->class
    hututu_new.display();     //输出person对象内容
    cout<<"/----------from json,方式2:调用.get函数-----------/"<<endl;
    person hututuNew = j2.get<person>();//像basic value一样通过get函数获取值,将其值直接赋值给自定义对象
    hututuNew.display();
    return 0;
}
执行结果:
/----------to json,方式1:json=class隐式转换-----------/
j1 = {“age”:18,“name”:“hututu”,“score”:88.99}
/----------to json,方式2:调用to_json函数-----------/
j2 = {“age”:18,“name”:“hututu”,“score”:88.99}
/----------from json,方式1:调用from_json函数-----------/
new j1 = {“age”:18,“name”:“new name”,“score”:88.99}
person name = new name
person age = 18
person score = 88.99
/----------from json,方式2:调用.get函数-----------/
person name = hututu
person age = 18
person score = 88.99
四.NLOHMANN_DEFINE_TYPE_INTRUSIVE宏的使用
4.1 宏的定义
JSON for Modern C++ 中为方便序列化和反序列化定义了两宏,如下
NLOHMANN_DEFINE_TYPE_NON_INTRUSIVE(name, member1, member2, …) 将在要为其创建代码的类/结构的命名空间内定义。
NLOHMANN_DEFINE_TYPE_INTRUSIVE(name, member1, member2, …) 将在要为其创建代码的类/结构中定义。 该宏还可以访问私有成员。
进一步查看代码:
/*!
@brief macro
@def NLOHMANN_DEFINE_TYPE_INTRUSIVE
@since version 3.9.0
*/
#define NLOHMANN_DEFINE_TYPE_INTRUSIVE(Type, ...)  \
    friend void to_json(nlohmann::json& nlohmann_json_j, const Type& nlohmann_json_t) { NLOHMANN_JSON_EXPAND(NLOHMANN_JSON_PASTE(NLOHMANN_JSON_TO, __VA_ARGS__)) } \
    friend void from_json(const nlohmann::json& nlohmann_json_j, Type& nlohmann_json_t) { NLOHMANN_JSON_EXPAND(NLOHMANN_JSON_PASTE(NLOHMANN_JSON_FROM, __VA_ARGS__)) }

/*!
@brief macro
@def NLOHMANN_DEFINE_TYPE_NON_INTRUSIVE
@since version 3.9.0
*/
#define NLOHMANN_DEFINE_TYPE_NON_INTRUSIVE(Type, ...)  \
    inline void to_json(nlohmann::json& nlohmann_json_j, const Type& nlohmann_json_t) { NLOHMANN_JSON_EXPAND(NLOHMANN_JSON_PASTE(NLOHMANN_JSON_TO, __VA_ARGS__)) } \
    inline void from_json(const nlohmann::json& nlohmann_json_j, Type& nlohmann_json_t) { NLOHMANN_JSON_EXPAND(NLOHMANN_JSON_PASTE(NLOHMANN_JSON_FROM, __VA_ARGS__)) }
4.2 宏的使用
可以看出上述的宏主要实现了from_json和to_json两个函数的功能,使用时需要在一个类中调用该宏,并传入(类名,参数1,参数2,参数3…)使用,这样在json对象和class对象之间之间直接赋值可以完成相互转换,具体用法如下:
#include <iostream>        //文件操作头文件
#include <string>
#include <nlohmann/json.hpp>   //引入json.hpp,该文件已经放在系统默认路径:/usr/local/include/nlohmann/json.hpp

using namespace std;

using json = nlohmann::json;

class person
{
   public:
      string name;
      int age;
      double score;
      void display()
      {
        cout<<"person name = "<<this->name<<endl;
        cout<<"person age = "<<this->age<<endl;
        cout<<"person score = "<<this->score<<endl;
      }
      // 类名,成员1,成员2,成员3
      NLOHMANN_DEFINE_TYPE_INTRUSIVE(person, name, age, score);
};

//main.cpp文件
int main()
{
    person hututu{"hututu",18,88.99};//定义一个person对象为hututu
    cout<<"/----------调用宏实现:to json-----------/"<<endl;
    json j1 = hututu;
    cout << j1<< endl;
    cout << j1.dump() << endl;
    cout<<"/----------调用宏实现:from json-----------/"<<endl;
    j1["name"]="new name";
    person hututu_new = j1;
    hututu_new.display();

    return 0;
}
输出结果:
/----------调用宏实现:to json-----------/
{“age”:18,“name”:“hututu”,“score”:88.99}
{“age”:18,“name”:“hututu”,“score”:88.99}
/----------调用宏实现:from json-----------/
person name = new name
person age = 18
person score = 88.99
总结
到此这篇关于c++中nlohmann json基本使用的文章就介绍到这了,更多相关c++ nlohmann json使用内容请搜索我们以前的文章或继续浏览下面的相关文章希望大家以后多多支持我们!
相关推荐
-
c++中nlohmann json的基本使用教程
目录 一.json.hpp库下载及安装 1.1 开源地址及引入方法 1.2 demo程序测试 二.nlohmann json基本操作 2.1 由basic value创建json 2.2 由json对象得到basic value 2.3 像操作stl container一样操作json value 三.json序列化与反序列化 3.1 json value和string 3.2 json对象和文件输入输出转换 3.3 json value和自定义对象 四.NLOHMANN_DEFINE_TYPE
-
Python入门教程(二十八)Python中的JSON
JSON 是用于存储和交换数据的语法. JSON 是用 JavaScript 对象表示法(JavaScript object notation)编写的文本. Python 中的 JSON Python 有一个名为 json 的内置包,可用于处理 JSON 数据. 实例 导入 json 模块: import json 解析 JSON - 把 JSON 转换为 Python 若有 JSON 字符串,则可以使用 json.loads() 方法对其进行解析. 结果将是 Python 字典 实例 把 JS
-
vscode中launch.json和task.json配置教程(重要参数详解)
目录 背景 Tasks.json launch.json 总结 背景 开始前先说一下搞这个的原因,最早的时候看不懂json,后面在工作中有大量接触json的缘故,看这个json其实也就是一个key-value对,因为之前自己的编译器总是debug不了,就很难受,花了一个上午的时间深入研究了一下这个vscode的配置文件信息,也算是记录一下. Tasks.json 按编译逻辑来说,先讲tasks.json 先贴图: "label": 对应launch.json中的 "preLa
-
Android中关于JSON相关应用分析
本文分析了Android中关于JSON相关应用.分享给大家供大家参考,具体如下: JSON的定义: 一种轻量级的数据交换格式,具有良好的可读和便于快速编写的特性.业内主流技术为其提供了完整的解决方案(有点类似于正则表达式,获得了当今大部分语言的支持),从而可以在不同平台间进行数据交换.JSON采用兼容性很高的文本格式,同时也具备类似于C语言体系的行为. – Json.org JSON的结构: Name/Value Pairs,类似所熟知的Keyed list. Hash table.Discti
-
Spring Boot中使用JDBC Templet的方法教程
前言 Spring 的 JDBC Templet 是 Spring 对 JDBC 使用的一个基本的封装.他主要是帮助程序员实现了数据库连接的管理,其余的使用方式和直接使用 JDBC 没有什么大的区别. 业务需求 JDBC 的使用大家都比较熟悉了.这里主要为了演示在 SpringBoot 中使用 Spring JDBC Templet 的步骤,所以我们就设计一个简单的需求.一个用户对象的 CURD 的操作.对象有两个属性,一个属性是id,一个属性是名称.存储在 MySQL 的 auth_user
-
springboot项目中jackson-序列化-处理 NULL教程
在项目中有事需要对值为NULL的对象中Field不做序列化输入配置方式如下: [配置类型]: 源码包中的枚举类: public static enum Include { ALWAYS, NON_NULL, NON_ABSENT, NON_EMPTY, NON_DEFAULT, USE_DEFAULTS; private Include() { } } Include.Include.ALWAYS 默认 Include.NON_DEFAULT 属性为默认值不序列化 Include.NON_EMP
-

在Go中使用JSON(附demo)
目录 Go编码/json包 编码.将Go对象转换为JSON 什么是Go中的marshaling? 装载简单对象 对复杂对象进行编码 集合功能 重命名字段 生成具有缩进功能的JSON(pretty-print) 忽略JSON输出中的特定字段 解除伪装.将JSON转换为Go对象 解除对简单JSON结构的封存 解除复杂数据结构的束缚 从文件系统中读取JSON文件 将JSON文件写到文件系统中 自定义抓取和解除抓取 自定义编排 自定义解密 总结 Golang(又称Go)是一种静态类型的编译编程语言,具有
-
利用Jackson解析JSON的详细实现教程
目录 JSON 介绍 Jackson 介绍 Jackson Maven 依赖 ObjectMapper 对象映射器 Jackson JSON 基本操作 Jackson JSON 序列化 Jackson JSON 反序列化 JSON 转 List JSON 转 Map Jackson 忽略字段 Jackson 日期格式化 Date 类型 LocalDateTime 类型 时间格式化 Jackson 常用注解 @JsonIgnore @JsonGetter @JsonSetter @JsonAnyS
-
Golang中Gin框架的使用入门教程
目录 安装与简单测试 常见请求与分组请求 获取参数 与 参数合法性验证 获得query中参数 获得multipart/urlencoded form中的参数 模型绑定和参数验证 自定义参数验证 项目结构参考 Gin框架运行模式 Gin如何获取客户ip Gin处理请求结果 以String类型响应请求 以Json格式响应请求 以文件形式响应请求 设置http响应头 Gin处理html模板 Gin访问静态资源文件 Gin处理Cookie操作 Gin文件上传 Gin中间件 官方地址:gin-gonic.
-
VSCode中ESLint插件修复以及配置教程
目录 vscode+eslint插件+配置教程 如果不好用 排查1: 如果出现后面回车符问题 排查2: 保存时好了但是一瞬间代码又回来了 排查3: 右下角是否开启eslint服务 排查4: 如果保存还是变回去了 排查5: ESLint不生效 排查6: 如果都用心走了一遍, 还不行 总结 vscode+eslint插件+配置教程 1.打开项目, 必须让Vscode左侧工作区根目录是项目文件夹, 确保根目录下(第一级)有eslintrc.js / package.json中有eslint相关配置.