单点登录之cas集成sonar的配置方法
一、修改 sonar 配置 conf/sonar.properties
修改 sonar 配置文件 conf/sonar.properties:
sonar.security.realm = cas
sonar.authenticator.createUsers = true
#sonar.cas.forceCasLogin = true
sonar.cas.protocol = cas3
sonar.cas.casServerUrlPrefix = http://192.168.1.58:8080/cas
sonar.cas.casServerLoginUrl = http://192.168.1.58:8080/cas/login
sonar.cas.casServerLogoutUrl = http://192.168.1.58:8080/cas/logout
sonar.cas.sonarServerUrl = http://192.168.1.35:9200
sonar.cas.urlAfterCasRedirectCookieMaxAgeSeconds = 300
sonar.cas.sessionStorePath = /opt/sonarqube/data/sonarcas/sessionstore
sonar.cas.sessionStore.cleanUpIntervalInSeconds = 1800

# Specifies whether gateway=true should be sent to the CAS server. Default is false.
# sonar.cas.sendGateway

# Specifies how SonarQube groups should be replicated. A value of "CAS" always overwrites the user's local groups with
# the group provided by CAS upon UI log-in. The user's local groups will be untouched, f. i. with the value "sonarqube".
# Defaults to "CAS".
sonar.cas.groupReplication = CAS
sonar.cas.rolesAttributes = groups
sonar.cas.fullNameAttribute = displayName
sonar.cas.eMailAttribute = mail
sonar.cas.saml11.toleranceMilliseconds = 1000
sonar.cas.disableCertValidation = true
二、下载插件 sonar-cas-plugin
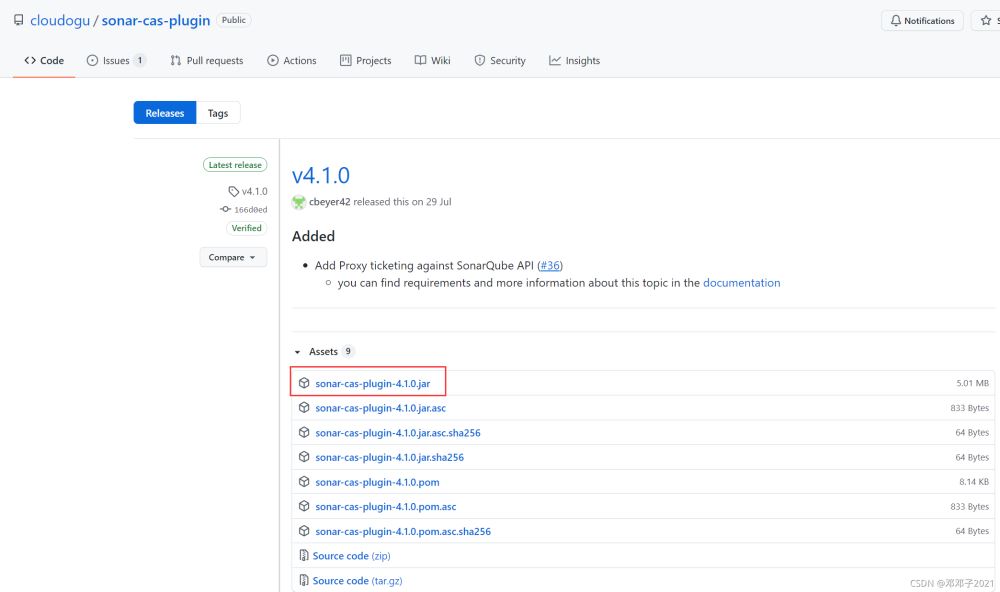
下载插件 sonar-cas-plugin,将插件拷贝至 sonar 的 extentions/plugins 目录下,并重启 sonar 服务。
下载链接:https://github.com/cloudogu/sonar-cas-plugin/releases
三、修改 cas 配置文件 application.yml
修改 cas 配置文件 application.yml,修改内容如下:
# Application properties that need to be
# embedded within the web application can be included here
cas:
  authn:
    jdbc:
      query:
      - dialect: org.hibernate.dialect.MySQLDialect
        driverClass: com.mysql.jdbc.Driver
        fieldPassword: password
        password: 'xxxxxx'
        sql: select * from user where user_name=?
        url: jdbc:mysql://192.168.1.32:3306/cas?useUnicode=true&characterEncoding=utf-8&useSSL=false
        user: root
  serviceRegistry:
    initFromJson: true
  tgc:
    secure: false
四、修改 cas 配置文件 HTTPSandIMAPS-10000001.json
新增 cas/WEB-INF/classes/services/HTTPSandIMAPS-10000001.json 文件,添加 http 支持:
{
  "@class" : "org.apereo.cas.services.RegexRegisteredService",
  "serviceId" : "^(https?|http?|imaps?)://.*",
  "name" : "All",
  "id" : 10000000,
  "description" : "This service definition authorizes all application urls that support HTTPS and IMAPS protocols.",
  "evaluationOrder" : 10000,
  "proxyPolicy" : {
    "@class" : "org.apereo.cas.services.RegexMatchingRegisteredServiceProxyPolicy",
    "pattern" : "^(https?|http?|imaps?)://.*"
  },
  "usernameAttributeProvider" : {
    "@class" : "org.apereo.cas.services.DefaultRegisteredServiceUsernameProvider"
  },
  "attributeReleasePolicy" : {
    "@class" : "org.apereo.cas.services.ReturnAllAttributeReleasePolicy"
  }
}
到此这篇关于单点登录之cas集成sonar的文章就介绍到这了,更多相关cas集成sonar内容请搜索我们以前的文章或继续浏览下面的相关文章希望大家以后多多支持我们!
相关推荐
-
springboot集成CAS实现单点登录的示例代码
最近新参与的项目用到了cas单点登录,我还不会,这怎么能容忍!空了学习并搭建了一个spring-boot 集成CAS 的demo.实现了单点登录与登出. 单点登录英文全称是:Single Sign On,简称SSO. 含义:在多个相互信任的系统中,只要登录一个系统其他系统均可访问. CAS 是一种使用广泛的单点登录实现,分为客户端CAS Client和服务端 CAS Service,客户端就是我们的系统,服务端是认证中心,由CAS提供,我们需要稍作修改,启动起来就可以用.~~~~ 效果演示 ht
-

单点登录之cas集成sonar的配置方法
一.修改 sonar 配置 conf/sonar.properties 修改 sonar 配置文件 conf/sonar.properties: sonar.security.realm = cas sonar.authenticator.createUsers = true #sonar.cas.forceCasLogin = true sonar.cas.protocol = cas3 sonar.cas.casServerUrlPrefix = http://192.168.1.58:80
-
spring boot 集成shiro的配置方法
spring boot提供了一个自带的认证框架,同时也提供自定义的javaconfig配置扩展,spring-sercurity同样也是优秀的框架,但是习惯了用apache shiro框架,而且原项目就是集成的shiro框架,到网上找了一下配置方式,没找到完全配置的方法,因此决定自己动手,丰衣足食! 要在spring boot上集成其他框架,首先要会spring javaconfig方法,利用此方法同样可以配置其他模块,废话少说,开始... 开始前需要导入maven依赖(shiro-web可选)
-
springboot集成nacos的配置方法
本文介绍了springboot集成nacos的配置方法,分享给大家,具体如下: nacos仓库:https://github.com/alibaba/nacos nacos介绍文档:https://nacos.io/zh-cn/docs/architecture.html nacos使用例子:https://github.com/nacos-group/nacos-examples springboot配置-集成nacos,例子代码下载 springboot-nacos-consumer spr
-
入门到精通Java SSO单点登录原理详解
目录 1. 基础概念 2. 单点登录 3. CAS 流程 4. OAuth 流程 5. CAS和OAuth的区别 1. 基础概念 SSO单点登录(Single sign-on) 所谓单点登录就是在多个应用系统中,用户只需登录一次就可以访问所有相互信任的系统. CAS 中央认证服务(Central Authentication Service) CAS是由美国耶鲁大学发起的一个企业级开源项目,旨在为WEB应用系统提供一种可靠的单点登录解决方案(WEB SSO). OAuth2.0 开放授权(Ope
-
spring boot 1.5.4 集成shiro+cas,实现单点登录和权限控制
1.添加maven依赖(先安装好cas-server-3.5.2,安装步骤请查看本文参考文章) <dependency> <groupId>org.apache.shiro</groupId> <artifactId>shiro-spring</artifactId> <version>1.2.4</version> </dependency> <dependency> <groupId>
-
Django集成CAS单点登录的方法示例
CAS 全称集中式认证服务(Central Authentication Service),是实现单点登录(SSO)的一中手段. CAS 的通讯流程图如下(图片来自Google图库): 对于本文用户可感知的层面,认证过程如下: 前端访问后端登录接口 后端返回重定向到 CAS 服务器的登录页面,并携带当前用户访问的网页链接 用户登录,浏览器发送请求到 CAS 服务器进行认证 CAS 认证通过,将本次登录保存到会话,返回回调地址给后端 后端返回重定向请求给前端 前端重定向到跳转登录前的页面 中间涉及
-
Spring boot security权限管理集成cas单点登录功能的实现
目录 1.Springboot集成Springsecurity 2.部署CASserver 3.配置CASclient 挣扎了两周,Spring security的cas终于搞出来了,废话不多说,开篇! 1.Spring boot集成Spring security 本篇是使用spring security集成cas,因此,先得集成spring security新建一个Spring boot项目,加入maven依赖,我这里是用的架构是Spring boot2.0.4+Spring mvc+Spri
-
spring + shiro + cas 实现sso单点登录的示例代码
sso-shiro-cas spring下使用shiro+cas配置单点登录,多个系统之间的访问,每次只需要登录一次,项目源码 系统模块说明 1.cas: 单点登录模块,这里直接拿的是cas的项目改了点样式而已 2.doc: 文档目录,里面有数据库生成语句,采用的是MySQL5.0,数据库名为db_test 3.spring-node-1: 应用1 4.spring-node-2: 应用2 其中node1跟node2都是采用spring + springMVC + mybatis 框架,使用ma
-
springboot 集成cas5.3 实现sso单点登录详细流程
什么是单点登录? 单点登录(Single Sign On),简称为 SSO,是目前比较流行的企业业务整合的解决方案之一.SSO的定义是在多个应用系统中,用户只需要登录一次就可以访问所有相互信任的应用系统. 我们目前的系统存在诸多子系统,而这些子系统是分别部署在不同的服务器中,那么使用传统方式的session是无法解决的,我们需要使用相关的单点登录技术来解决. SSO单点登录访问流程主要有以下步骤: 访问服务:SSO客户端发送请求访问应用系统提供的服务资源. 定向认证:SSO客户端会重定向用户请求