React配置子路由的实现
1、组件First.js下有子组件:
import Admin from './Admin'
import FormCom from './FormCom'
import One from './One'
import ButtonCom from './ButtonCom'
import MenuCom from './MenuCom'
import StepsCom from './StepsCom'
import TabsCom from './TabsCom'
import TableCom from './TableCom'
import MessageCom from './MessageCom'
import NotificationCom from './NotificationCom'
import ProgressCom from './ProgressCom'
import SpinCom from './SpinCom'
import BadgeCom from './BadgeCom'
First.js完整代码如下:
import React from 'react'
import { Layout, Menu } from 'antd';
import { UserOutlined, LaptopOutlined, NotificationOutlined } from '@ant-design/icons';
import { HashRouter, Route, Link } from 'react-router-dom'
import Admin from './Admin'
import FormCom from './FormCom'
import One from './One'
import ButtonCom from './ButtonCom'
import MenuCom from './MenuCom'
import StepsCom from './StepsCom'
import TabsCom from './TabsCom'
import TableCom from './TableCom'
import MessageCom from './MessageCom'
import NotificationCom from './NotificationCom'
import ProgressCom from './ProgressCom'
import SpinCom from './SpinCom'
import BadgeCom from './BadgeCom'
const { SubMenu } = Menu;
const { Header, Content, Sider } = Layout;

export default class First extends React.Component {
    constructor() {
        super();
    }

    //只展开当前父级菜单 begin
    rootSubmenuKeys = ['sub1', 'sub2', 'sub3'];

    state = {
        openKeys: ['sub1'],
    };

    onOpenChange = openKeys => {
        const latestOpenKey = openKeys.find(key => this.state.openKeys.indexOf(key) === -1);
        if (this.rootSubmenuKeys.indexOf(latestOpenKey) === -1) {
            this.setState({ openKeys });
        } else {
            this.setState({
                openKeys: latestOpenKey ? [latestOpenKey] : [],
            });
        }
    };
    //只展开当前父级菜单 end

    render() {
        return (<div>
            <Layout>
                <HashRouter>
                    <Header className="header" style={{ position: 'fixed', zIndex: 1, width: '100%', paddingLeft: '20px'}}>
                        <div className="logo" style={{fontSize: '32px', color: '#ffffff', fontWeight: 'bold'}}>React App</div>
                        <Menu theme="dark" mode="horizontal" defaultSelectedKeys={['1']}>
                            {/*<Menu.Item key="1">nav 1</Menu.Item>
                            <Menu.Item key="2">nav 2</Menu.Item>
                            <Menu.Item key="3">nav 3</Menu.Item>*/}
                        </Menu>
                    </Header>
                    <Layout>
                        <Sider width={200} className="site-layout-background" style={{
                            overflow: 'auto',
                            height: '100vh',
                            position: 'fixed',
                            left: 0,
                        }}>
                            <Menu
                                theme="dark"
                                mode="inline"
                                defaultSelectedKeys={['2']}
                                defaultOpenKeys={['sub1']}
                                style={{ height: '100%', paddingTop: '60px', borderRight: 0 }}
                                onOpenChange={this.onOpenChange}
                                openKeys={this.state.openKeys}
                            >
                                <SubMenu key="sub1" icon={<UserOutlined />} title="subnav 1">
                                    <Menu.Item key="1"><Link to={`${this.props.match.path}/admin`}>admin</Link></Menu.Item>
                                    <Menu.Item key="2"><Link to={`${this.props.match.path}/form`}>form</Link></Menu.Item>
                                    <Menu.Item key="3"><Link to={`${this.props.match.path}/one`}>One</Link></Menu.Item>
                                    <Menu.Item key="4"><Link to={`${this.props.match.path}/menu`}>Menu</Link></Menu.Item>
                                </SubMenu>
                                <SubMenu key="sub2" icon={<LaptopOutlined />} title="subnav 2">
                                    <Menu.Item key="5"><Link to={`${this.props.match.path}/step`}>Step</Link></Menu.Item>
                                    <Menu.Item key="6"><Link to={`${this.props.match.path}/tabs`}>Tabs</Link></Menu.Item>
                                    <Menu.Item key="7"><Link to={`${this.props.match.path}/table`}>Table</Link></Menu.Item>
                                    <Menu.Item key="8"><Link to={`${this.props.match.path}/message`}>Message</Link></Menu.Item>
                                </SubMenu>
                                <SubMenu key="sub3" icon={<NotificationOutlined />} title="subnav 3">
                                    <Menu.Item key="9"><Link to={`${this.props.match.path}/notification`}>Notification</Link></Menu.Item>
                                    <Menu.Item key="10"><Link to={`${this.props.match.path}/progress`}>ProgressCom</Link></Menu.Item>
                                    <Menu.Item key="11"><Link to={`${this.props.match.path}/spin`}>Spin</Link></Menu.Item>
                                    <Menu.Item key="12"><Link to={`${this.props.match.path}/badge`}>Badge</Link></Menu.Item>
                                    <Menu.Item key="13"><Link to={`${this.props.match.path}/button`}>Button</Link></Menu.Item>
                                </SubMenu>
                            </Menu>
                        </Sider>
                        <Layout style={{ padding: '84px 20px 20px', marginLeft: 200}}>
                            <Content
                                className="site-layout-background"
                                style={{
                                    padding: 24,
                                    margin: 0
                                }}
                            >
                                <Route path={`${this.props.match.path}/admin`} exact component={Admin}></Route>
                                <Route path={`${this.props.match.path}/form`} component={FormCom}></Route>
                                <Route path={`${this.props.match.path}/one`} component={One}></Route>
                                <Route path={`${this.props.match.path}/menu`} component={MenuCom}></Route>
                                <Route path={`${this.props.match.path}/step`} component={StepsCom}></Route>
                                <Route path={`${this.props.match.path}/tabs`} component={TabsCom}></Route>
                                <Route path={`${this.props.match.path}/table`} component={TableCom}></Route>
                                <Route path={`${this.props.match.path}/message`} component={MessageCom}></Route>
                                <Route path={`${this.props.match.path}/notification`} component={NotificationCom}></Route>
                                <Route path={`${this.props.match.path}/progress`} component={ProgressCom}></Route>
                                <Route path={`${this.props.match.path}/spin`} component={SpinCom}></Route>
                                <Route path={`${this.props.match.path}/badge`} component={BadgeCom}></Route>
                                <Route path={`${this.props.match.path}/button`} component={ButtonCom}></Route>
                            </Content>
                        </Layout>
                    </Layout>
                </HashRouter>
            </Layout>
        </div>)
    }
}
其中
${this.props.match.path}
是关键。
2、假设还有一个登录组件Login.js,代码如下:
import React from 'react'
import { Button } from 'antd';

export default class Login extends React.Component {
    constructor() {
        super();
    }

    redirectHandle = () => {
        console.log("aaa");
        this.props.history.push("/home");
    }

    render() {
        return (<Button type="primary" onClick={()=>this.redirectHandle()}>Primary Button</Button>)
    }
}
假设React项目用的是React脚手架搭建,则在src目录下的App.js文件中设置路由:
  render() {
    return (<HashRouter>
      <Switch>
        <Route exact={true} path="/login" component={Login} />
        <Route path="/home" component={First} />
        <Redirect to='/login' /> {/*/login和/home之外的路由直接跳转到/login*/}
      </Switch>
    </HashRouter>)
  }
App.js完整代码如下:
import React from 'react';
import { notification } from 'antd'
import { HashRouter, Route, Switch, Redirect } from 'react-router-dom';
import First from './First';
import Login from './Login';
import './App.css';

class App extends React.Component {
  constructor() {
    super();
    this.openNotificationWithIcon = type => {
      notification[type]({
        message: 'Notification Title',
        description:
          'This is the content of the notification. This is the content of the notification. This is the content of the notification.',
      });
    }
  }

  clickHandle() {
    console.log("clicked!!!");
  }

  render() {
    return (<HashRouter>
      <Switch>
        <Route exact={true} path="/login" component={Login} /> {/**exact 防止混路由混合   如:输入127.xx.xx.xx/home 中有/login页面*/}
        <Route path="/home" component={First} />
        <Redirect to='/login' />
      </Switch>
    </HashRouter>)
  }
}

export default App;
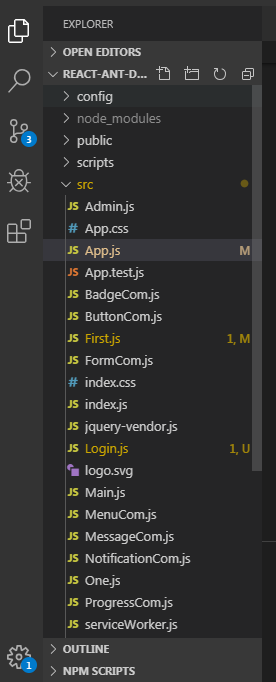
项目目录结构如下:
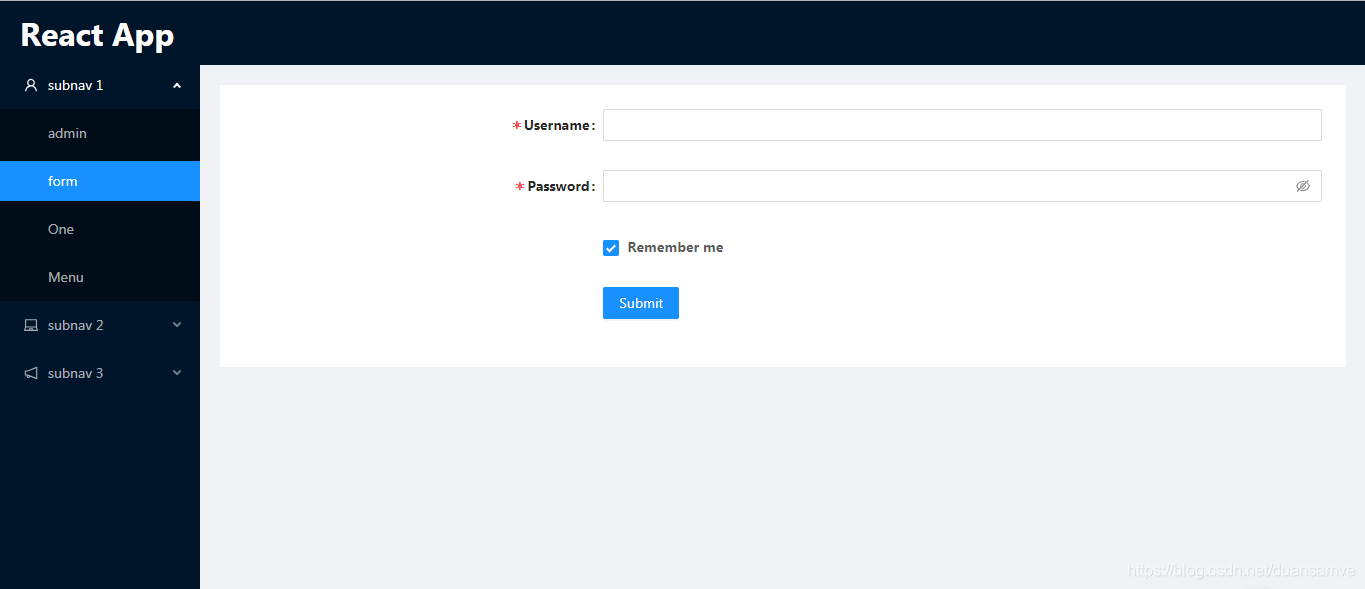
项目预览效果如下:
到此这篇关于React配置子路由的实现的文章就介绍到这了,更多相关React配置子路由内容请搜索我们以前的文章或继续浏览下面的相关文章希望大家以后多多支持我们!
相关推荐
-
Nginx配置React项目Url后直接输入路由路径时报404问题的解决
前言 如今react应用普遍,最近在配置react项目中遇到了一个问题,通过查找相关的资料终于找到了解决的方法,所以想着总结一下分享出来给有需要的朋友们,下面话不多说了,来一起看看详细的介绍吧. 发现问题 大家都知道,当我们写完项目后,要对项目进行部署,我的配置很简单 location /demo { root E:/; index index.html index.htm; } 这样配置的有一个问题,只能 http://localhost/demo/来访问. 如果想访问里面的其它界面如 htt
-

react路由配置方式详解
本文介绍了react路由配置,最近刚开始学,分享给大家,顺便给自己留个笔记. 包含了LInk跳转以及js触发跳转并传参. 这是项目的目录结构,主要的代码都在src目录下,src下面新建一个containers文件夹放我们的一些组件,router文件夹是配置路由用的. 按照顺序来写:detail文件夹下的代码 import React from 'react' class Detail extends React.Component { render() { return ( <p>Detail
-
React-router v4 路由配置方法小结
本文主要介绍了React-router v4 路由配置方法小结,分享给大家,也给自己留个笔记 一. Switch .Router .Route三者的区别 1.Route Route 是建立location 和 ui的最直接联系 2.Router react-router v4 中,Router被拆分成了StaticRouter.MemoryRouter.BrowserRouter.HashRouter.NativeRouter. MemoryRouter.BrowserRouter.HashRo
-
React配置子路由的实现
1.组件First.js下有子组件: import Admin from './Admin' import FormCom from './FormCom' import One from './One' import ButtonCom from './ButtonCom' import MenuCom from './MenuCom' import StepsCom from './StepsCom' import TabsCom from './TabsCom' import TableC
-
react配置px转换rem的方法
安装相关的依赖 npm i lib-flexible --save npm i postcss-px2rem --save 主要用来暴露项目配置 npm run eject !如果运行npm run eject报错,出错的原因应该是仓库里面代码没有提交,如下提交一下 git add . git commit -m '自定义名' npm run eject 然后打开项目中 config->webpack.config.js 进行配置 // 在配置文件中添加如下两行代码 // px2rem({ re
-
JS跨域解决方案react配置反向代理
跨域解决方案 jsonp(模拟get) CORS(跨域资源共享) 代理 iframe postMessage window.name WebSocket react的代理实现跨域 在配置在src/setupProxy.js文件,并通过npm安装http-proxy-middleware,代理中间件模块 创建 src/setupProxy.js 安装模块 npm i -S http-proxy-middleware const {createProxyMiddleware: proxy}
-
React配置多个代理实现数据请求返回问题
目录 使用axios以及express框架进行数据传输 App.js: index.js: server1.js: server2.js setupProxy.js: 运行 使用axios以及express框架进行数据传输 react脚手架中src文件配置如下: App.js: 设置两个按钮,点击第一个获取学生数据,点击第二个获取汽车数据,值得注意的是这两个数据源在不同的服务器中 import React, { Component } from 'react' import axios from
-
react配置antd按需加载的使用
我目前使用的antd版本是2.13.现在最新的是3.0.1. 脚手架工具就是create-react-app.创建完成项目后,需添加配置,执行yarn eject 也就是打开配置的文档. 然后安装第三方依赖yarn add babel-plugin-import --save-dev 找到config文件夹.里面有2个配置文档, webpack.config.dev.js和webpack.config.prod.js 添加配置时一定要保持文档的一致性.我就是犯了错误,值配置了开发的没有配置正式文
-
快速创建React项目并配置webpack
目录 1.快速创建React项目 2.安装所需包 3.根目录创建webpack.config.js文件,代码如下 4.在根目录下添加文件 .babelrc,代码如下 5.修改 package.json 6.修改public/index.html文件 7.修改src/index.js文件 8.修改src/App.js文件 9.修改 src/App.css文件 10.在项目根目录下执行 1.快速创建React项目 npm install -g create-react-app // 全局安装crea
-
React项目配置prettier和eslint的方法
目录 配置prettier和eslint 配置stylelint 保存自动修复 参考视频: https://www.bilibili.com/video/BV1rh411e7E5?vd_source=eee62ea3954ac01bff9e87e2a7b40084 prettier代码格式化 eslint js语法检查 stylellint css样式检查 配置prettier和eslint 1.初始化React项目 npx create-react-app study_react 2.安装vs
-
react项目中@路径简单配置指南
目录 前言 1. 安装craco 2.根路径下创建 craco.config.js 3. 修改package.json文件的script字段 4.使用 补充:React 配置 @ 路径别名 总结 前言 无论是vue还是react开发,我们通常需要引入路径的便捷化配置,通常我们都会约定使用路径@作为根路径地址.如果是个人react开发的@路径简单配置 1. 安装craco yarn add @craco/craco 2.根路径下创建 craco.config.js const path = req
-
vue子路由跳转实现tab选项卡
现在很多的后台管理系统都采用tab选项卡的布局,左边是导航栏固定,右边是对应的页面,每次点击左边的导航标题,只有右面的对应页面再切换,而vue要做tab选项卡,推荐使用<router-link></router-link>实现a标签的效果,然后使用<router-view></router-view>实现插槽的效果,把对应的页面 "塞" 进去,具体实现看下面的案例: 1.这是tab选项卡的页面,布局就不说了,主要是<router-l
-
Vue路由配置方法详细介绍
目录 手动配置Vue-router环境 组件内部跳转路由与传参useRouter,useRoute 手动配置Vue-router环境 1.下载包: npm i vue-router --save或者 npm i vue-router --S 或者用cdn引入 2.创建路由的js文件(路由.子路由.重定向.开启history模式) createRouter.createWebHistory //路由文件 import { createRouter, createWebHistory } from