QML用PathView实现轮播图
轮播图是一个常见的功能,在QML中,可以使用PathView来实现一个循环播放的轮播图组件。
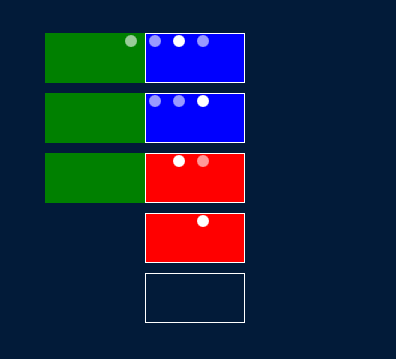
默认情况,如果限制了加载个数,切换时第一帧会马上消失,第二帧才进入,这样会有断档的感觉。通过设置PathView中preferredHighlightBegin/End为0.5,这样当前选定的项位于路径的中间,就没有断档的感觉了。效果如下(为了测试,我没有clip,clip之后只有范围内的才可见):
//CircleView.qml
import QtQuick 2.12
import QtQuick.Controls 2.12

//轮播图
Item {
 id: control

 property int indicatorWidth: 12

 //定时切换间隔
 property alias timerInterval: path_timer.interval
 //切换动画执行时间
 property alias pathDuration: path_view.highlightMoveDuration
 property alias delegate: path_view.delegate
 property alias model: path_view.model
 //页数
 property alias count: path_page.count

 PathView{
 id: path_view
 anchors.fill: parent

 //此属性保存任何时候在路径上可见的项目数。
 //将pathItemCount设置为undefined将显示路径上的所有项目。
 //因为path代码的问题,设置为2最合适
 pathItemCount: 2

 //测试时,把clip去掉就能看到完整的
 //clip: true

 //向前移动,即顺序0 1 2 3
 movementDirection: PathView.Positive

 //切换的时间
 highlightMoveDuration: 1000

 //视图中突出显示(当前项目)的首选范围,默认值PathView.StrictlyEnforceRange
 //配合preferredHighlight的范围0.5 0.5,就能显示在正中,切换更自然
 //highlightRangeMode: PathView.StrictlyEnforceRange

 //希望当前选定的项位于路径的中间,则将突出显示范围设置为0.5,0.5
 preferredHighlightBegin: 0.5
 preferredHighlightEnd: 0.5
 path: Path {
  startX: -path_view.width/2
  startY: path_view.height / 2

  PathLine {
  x: path_view.pathItemCount * path_view.width-path_view.width / 2
  y: path_view.height / 2
  }
 }
 onModelChanged: {
  if(path_timer.running){
  path_timer.restart();
  }
 }

 //测试用
 //model: ["red","green","blue"]
 //delegate: Rectangle{
 // width: path_view.width
 // height: path_view.height
 // color: modelData
 //}
 }
 //定时切换
 Timer{
 id: path_timer
 running: control.visible
 repeat: true
 interval: 3000
 onTriggered: {
  //至少两个才切换
  if(path_view.count>1)
  path_view.currentIndex=(path_view.currentIndex+1)%path_view.count
 }
 }
 //右下角小圆圈
 PageIndicator {
 id: path_page
 anchors{
  right: parent.right
  bottom: parent.bottom
  margins: 30
 }
 count: path_view.count
 currentIndex: path_view.currentIndex
 spacing: control.indicatorWidth
 delegate: Rectangle{
  width: control.indicatorWidth
  height: width
  radius: width/2
  color: "white"
  //非当前页就灰色
  opacity: index===path_page.currentIndex?1:0.6
  Behavior on opacity {
  OpacityAnimator{
   duration: 200
  }
  }
  //点击跳转到该页
  //还有问题,非连续的item,他会快速连续切换到目标index
  //因为不是直接切换,有闪烁的感觉
  MouseArea{
  anchors.fill: parent
  onClicked: {
   path_view.currentIndex=index;
   if(path_timer.running){
   path_timer.restart();
   }
  }
  }
 }
 }
}
//main.qml
测试了不同的Item个数
import QtQuick 2.12
import QtQuick.Window 2.12
import QtQuick.Controls 2.12

Window {
 visible: true
 width: 700
 height: 500
 title: qsTr("龚建波 1992")

 color: "#021B39"

 Column{
 anchors.centerIn: parent
 spacing: 10
 CircleView{
  width: 100
  height: 50
  model:["red","green","blue","orange"]

  delegate: Rectangle {
  width: 100
  height: 50
  color: modelData
  //Component.onCompleted: console.log(modelData,"completed")
  }

  Rectangle{
  anchors.fill: parent
  color: "transparent"
  border.color: "white"
  }
 }
 CircleView{
  width: 100
  height: 50
  model:["red","green","blue"]

  delegate: Rectangle {
  width: 100
  height: 50
  color: modelData
  //Component.onCompleted: console.log(modelData,"completed")
  }

  Rectangle{
  anchors.fill: parent
  color: "transparent"
  border.color: "white"
  }
 }
 CircleView{
  width: 100
  height: 50
  model:["red","green"]

  delegate: Rectangle {
  width: 100
  height: 50
  color: modelData
  //Component.onCompleted: console.log(modelData,"completed")
  }

  Rectangle{
  anchors.fill: parent
  color: "transparent"
  border.color: "white"
  }
 }
 CircleView{
  width: 100
  height: 50
  model:["red"]

  delegate: Rectangle {
  width: 100
  height: 50
  color: modelData
  //Component.onCompleted: console.log(modelData,"completed")
  }

  Rectangle{
  anchors.fill: parent
  color: "transparent"
  border.color: "white"
  }
 }
 CircleView{
  width: 100
  height: 50

  delegate: Rectangle {
  width: 100
  height: 50
  color: modelData
  //Component.onCompleted: console.log(modelData,"completed")
  }

  Rectangle{
  anchors.fill: parent
  color: "transparent"
  border.color: "white"
  }
 }
 }
}
借鉴:链接
以上就是本文的全部内容,希望对大家的学习有所帮助,也希望大家多多支持我们。
相关推荐
-
Python实现转换图片背景颜色代码
在使用图片的时候有时候我们希望改变背景颜色,这样就只关注于图片本身.比如在连连看中就只有图片,而没有背景,其实我个人感觉有背景好看一点. 两种方法,思路一致: 法一: import cv2 # 修改透明背景为白色 def transparence2white(img): sp=img.shape # 获取图片维度 width=sp[0] # 宽度 height=sp[1] # 高度 for yh in range(height): for xw in range(width): color_d=
-
QML用PathView实现轮播图
轮播图是一个常见的功能,在QML中,可以使用PathView来实现一个循环播放的轮播图组件. 默认情况,如果限制了加载个数,切换时第一帧会马上消失,第二帧才进入,这样会有断档的感觉.通过设置PathView中preferredHighlightBegin/End为0.5,这样当前选定的项位于路径的中间,就没有断档的感觉了.效果如下(为了测试,我没有clip,clip之后只有范围内的才可见): //CircleView.qml import QtQuick 2.12 import QtQuick.
-
简单实现AngularJS轮播图效果
本文实例为大家分享了AngularJS轮播图的具体代码,供大家参考,具体内容如下 <!DOCTYPE html> <html ng-app="myApp" lang="en"> <head> <meta charset="UTF-8"> <title>AngularJS carousel</title> <link href="http://libs.baid
-
Angularjs中使用轮播图指令swiper
我们在angualrjs移动开发中遇到轮播图的功能 安装 swiper npm install --save swiper 或者 bower install --save swiper 引入文件路径 <link rel="stylesheet" href="../bower_components/swiper/dist/css/swiper.min.css" rel="external nofollow" /> <scri
-

jQuery按需加载轮播图(web前端性能优化)
引言 关于幻灯轮播图,想必大家都不陌生,尤其是基于 jQuery 的,插件.代码网上一搜一大堆,但是真正符合自己需求的几乎没有,所以我要打造一个符合自身需求,经得起广大网民考验的 jQuery 轮播图! 思路 为什么说网上其他一些轮播图不符合我的要求?我的需求又是什么呢? 现在网上可以找到的多数幻灯轮播图的 jQuery 插件的作法是,先把图片和链接的 HTML 写好,然后控制隐藏和显示来轮流展示当前的幻灯图片.但是对用户而言,我们始终只是看到当前的一张图片,那其他几张隐藏的图片为什么要事先加载
-
jQuery实现简洁的轮播图效果实例
本文实例讲述了jQuery实现简洁的轮播图效果.分享给大家供大家参考,具体如下: HTML: <div class="ppt"> <a href="###"><img src="ppt/ppt1.jpg" /></a> <a href="###" style="display:none;"><img src="ppt/ppt2.jp
-
简单实现轮播图效果的实例
一.要点: 1.页面加载时,图片重合,叠在一起[绝对定位]; 2.第一张显示,其它隐藏; 3.设置下标,给下标设置颜色让它随图片移动; 4.鼠标移动到图片上去,显示左右移动图标,鼠标移走,继续轮播; 二.实现代码: html代码: <!DOCTYPE html> <html xmlns="http://www.w3.org/1999/xhtml"> <head> <meta http-equiv="Content-Type"
-
jquery 实现轮播图详解及实例代码
轮播图: 接触jquery也有一段时间了,今天刚好利用轮播图来练练手.博文的前面会介绍一个简单用jquery做轮播图的例子,中间会插入一些关于轮播图更多的思考,在后面会用Javascript的方法来写一个轮播图,最后则是关于jquery和Javascript的比较.轮播图的效果可以点击如下链接查看:http://sandbox.runjs.cn/show/t07kscph jquery做轮播图的例子: html部分代码: <!DOCTYPE html> <html> <hea
-
JQuery和html+css实现带小圆点和左右按钮的轮播图实例
是的!你没看错!还是轮播图.这次的JQuery的哟!! CSS代码: /*轮播图 左右按钮 小白点*/ #second_div{ margin-top: 160px; } .img_box{ overflow: hidden; width:100%; height:420px; border:1px solid; position:relative; } .img_box img{ width:100%; position:absolute; } .ul5{ list-style: none;
-
jquery实现左右轮播图效果
我们经常看到购物网站上首页有轮播图,比如某东某京 如图我们打开网页就看到京东的轮播图 接下来,这个小案例就是要介绍如何实现这种效果,即这张轮播图上所有的事件. 首先 我们看到轮播图上的有1.左右的小按钮(图片会随着左右的点击移动) 2**重点内容.还有位于中间的小圆点(点击小圆点会跳转到那个图片) 3重点内容**轮播图会自己向左滑动(里面有一个定时器自动播放) 分析完之后就是我们写代码(这个是仿京东的轮播图) HTML的内容 代码片 以上就是本文的全部内容,希望对大家的学习有所帮助,也希望大家多
-
基于vue.js轮播组件vue-awesome-swiper实现轮播图
一般做移动端轮播图的时候,最常用的就是Swiper插件了,而vue.js也有一个轮播组件vue-awesome-swiper,用法跟swiper相似. 1.安装vie-awesome-swiper nam install vue-awesome-swiper --save-dev 2.引用vie-awesome-swiper组件,这里我是用vie-cli创建的项目,在main.js: import VueAwesomeSwiper from 'vue-awesome-swiper'; Vue.u