详解Spring Cloud Consul 实现服务注册和发现
Spring Cloud 是一个基于 Spring Boot 实现的云应用开发工具,它为基于 JVM 的云应用开发中涉及的配置管理、服务发现、断路器、智能路由、微代理、控制总线、全局锁、决策竞选、分布式会话和集群状态管理等操作提供了一种简单的开发方式。通过 Spring Boot 风格进行再封装屏蔽掉了复杂的配置和实现原理,最终给开发者留出了一套简单易懂、易部署和易维护的分布式系统开发工具包。
Spring Cloud 包含了多个子项目(针对分布式系统中涉及的多个不同开源产品),比如:Spring Cloud Config、Spring Cloud Netflix、Spring Cloud CloudFoundry、Spring Cloud AWS、Spring Cloud Security、Spring Cloud Commons、Spring Cloud Zookeeper、Spring Cloud CLI 等项目。
项目地址:https://github.com/yuezhongxin/spring-cloud-consul-sample
ASP.NET Core 2.0 & Docker & Consul 的实现:https://github.com/yuezhongxin/HelloDocker.Sample
目前的测试站点,使用 ASP.NET Core 结合 Conusl 和 Fabio 搭建的微服务集群,因为各服务之间的通信基于 HTTP REST 协议,所以服务的实现可以跨语言,下面我们就开发一个 Spring Boot 服务,然后使用 Spring Cloud Consul 将服务注册到已有的集群中。
Java 开发工具我选用的 IntelliJ IDEA(MacOS 安装教程),目前使用很好(Color Scheme 使用系统的 Darcula,字体大小 14),Java SDK 需要额外下载安装(我安装的版本 10)。
因为第一次使用 IntelliJ IDEA,下面我把创建项目的过程,贴详细一点。
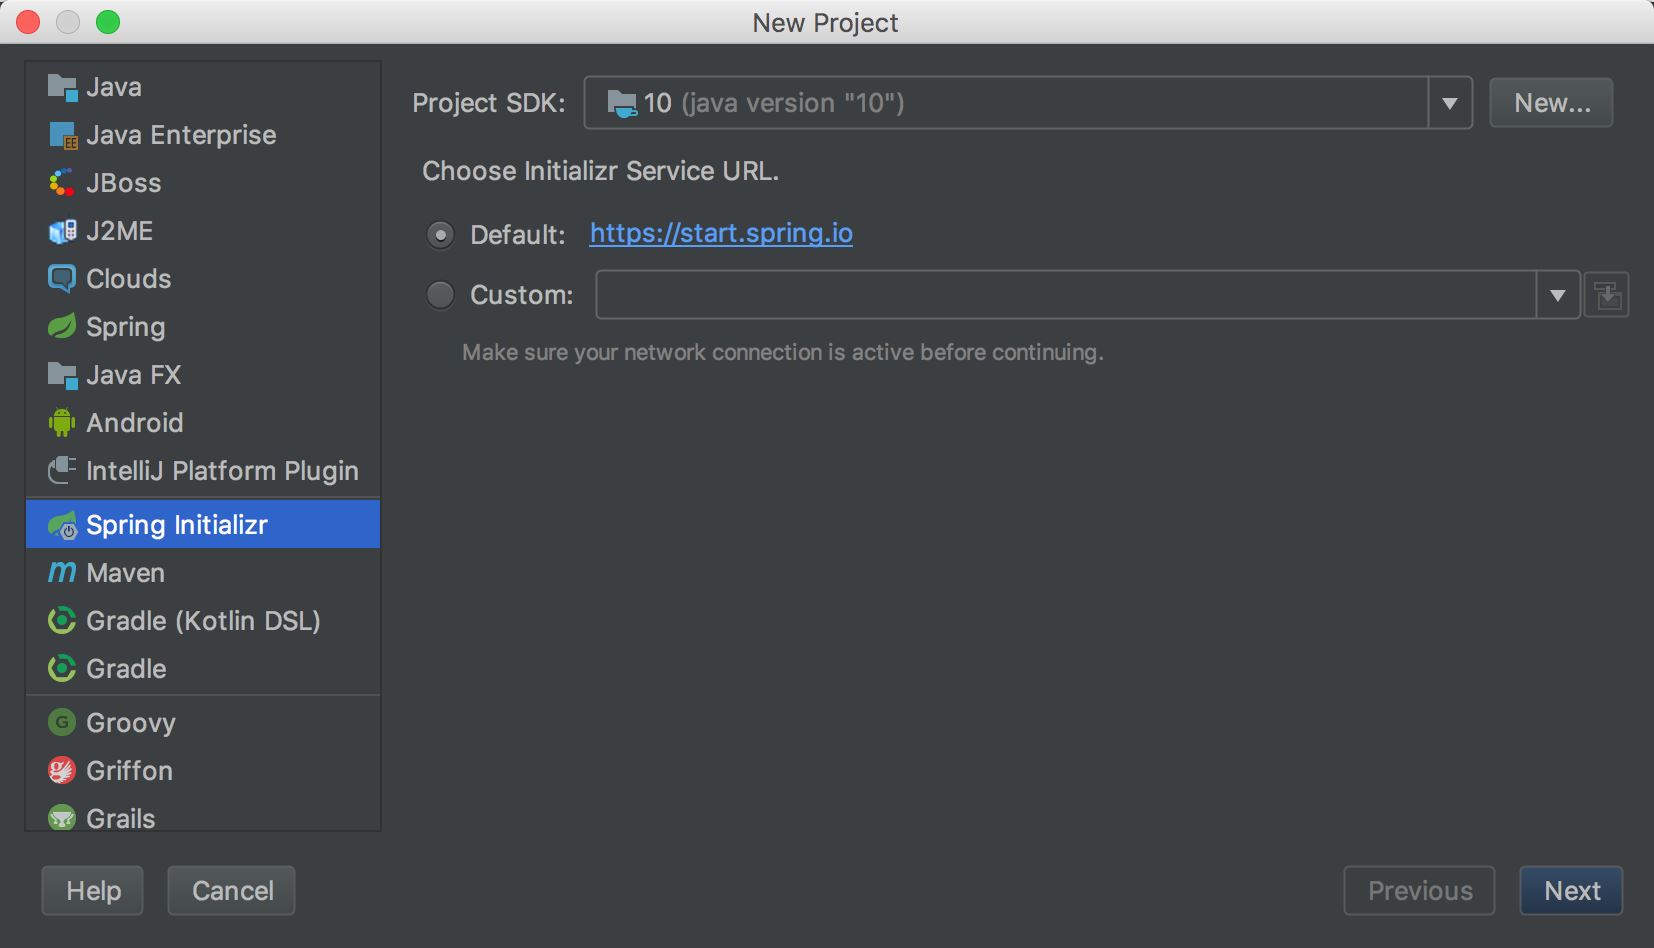
首先,创建项目(选择“Spring Initializr”,Spring Boot 项目),默认选择 Java SDK 10:
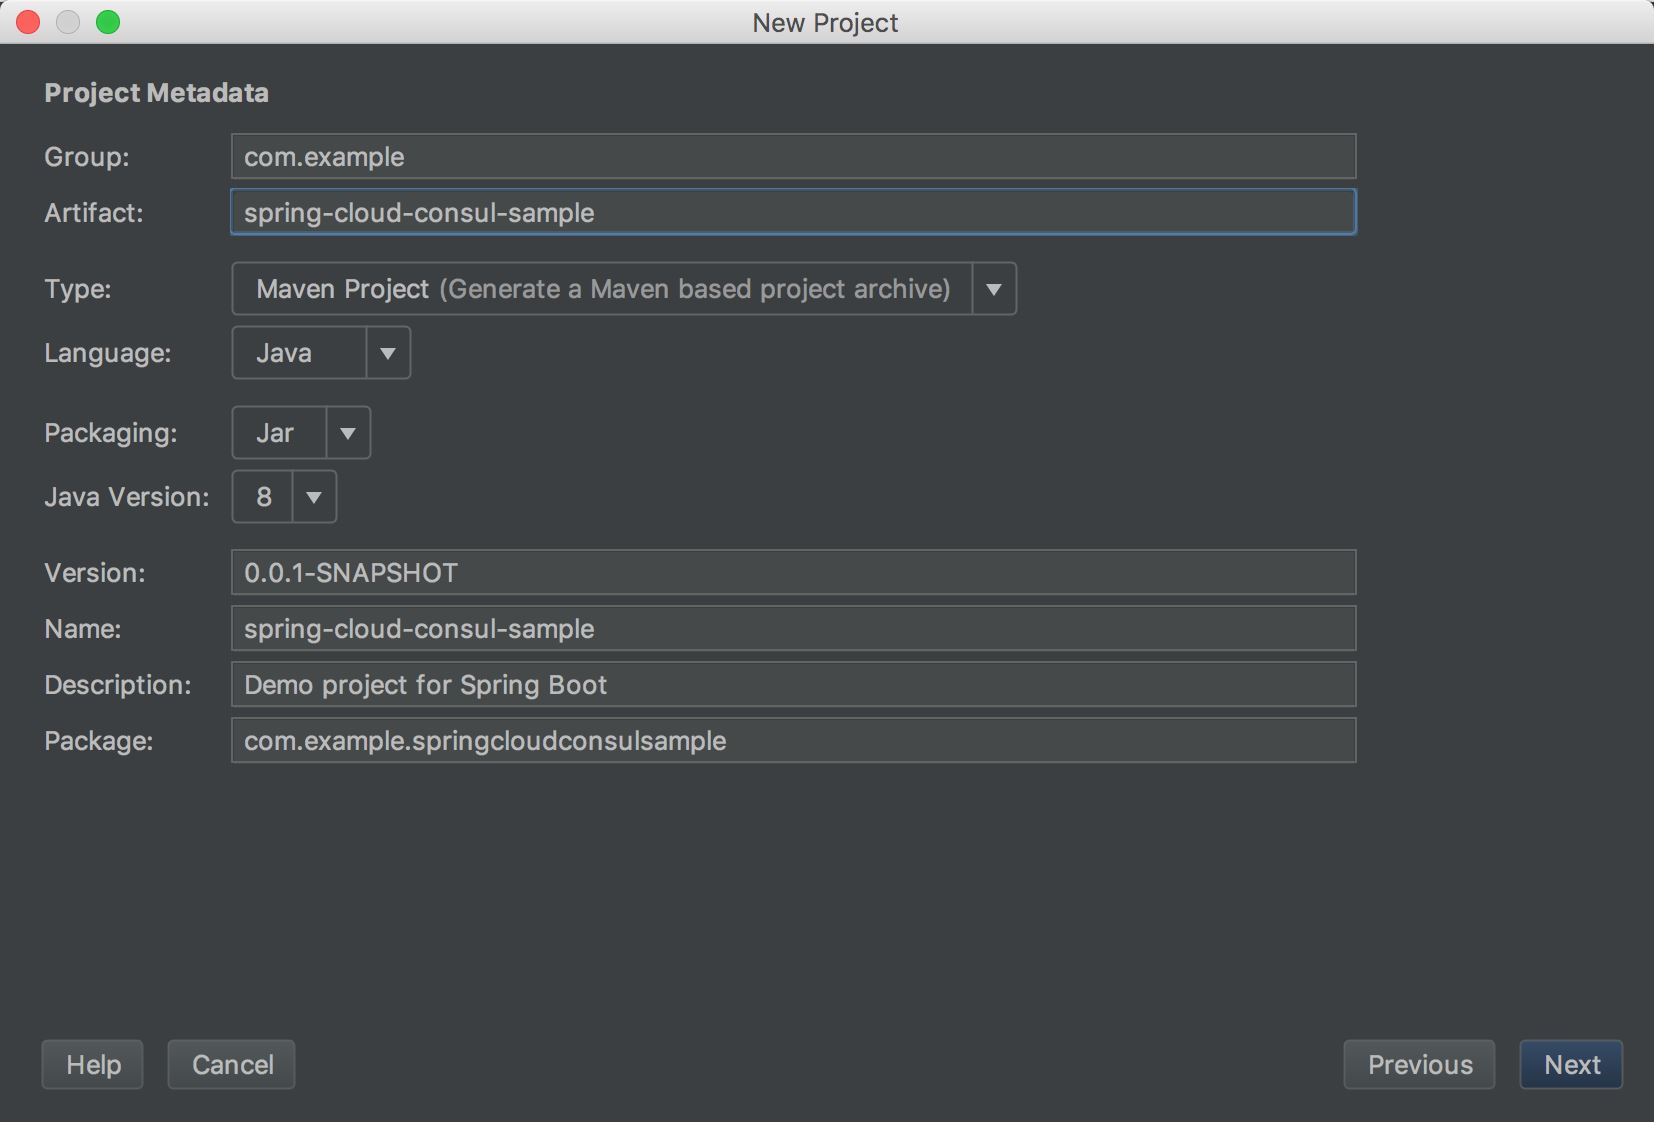
然后填写项目的基本信息(Artifact 为"spring-cloud-consul-sample",其他为默认):
注:Maven 是一个项目管理和构建工具,包含三个关键组件:项目对象模型(POM)、依赖项管理模型、构建生命周期和阶段。
Group ID 和 Artifact ID 的区别,如果把 Group ID 看作是公司,那 Artifact ID 就可以看作是公司部门,有点类似于 .NET 中的解决方案和类库的关系,比如 Spring Cloud 项目的 Group ID 为org.springframework.cloud,Spring Cloud Consul 的 Artifact ID 为spring-cloud-starter-consul-discovery。
下面选择创建 Spring Boot 项目类型(选择 Web 依赖项):

然后填写项目名称和项目目录:
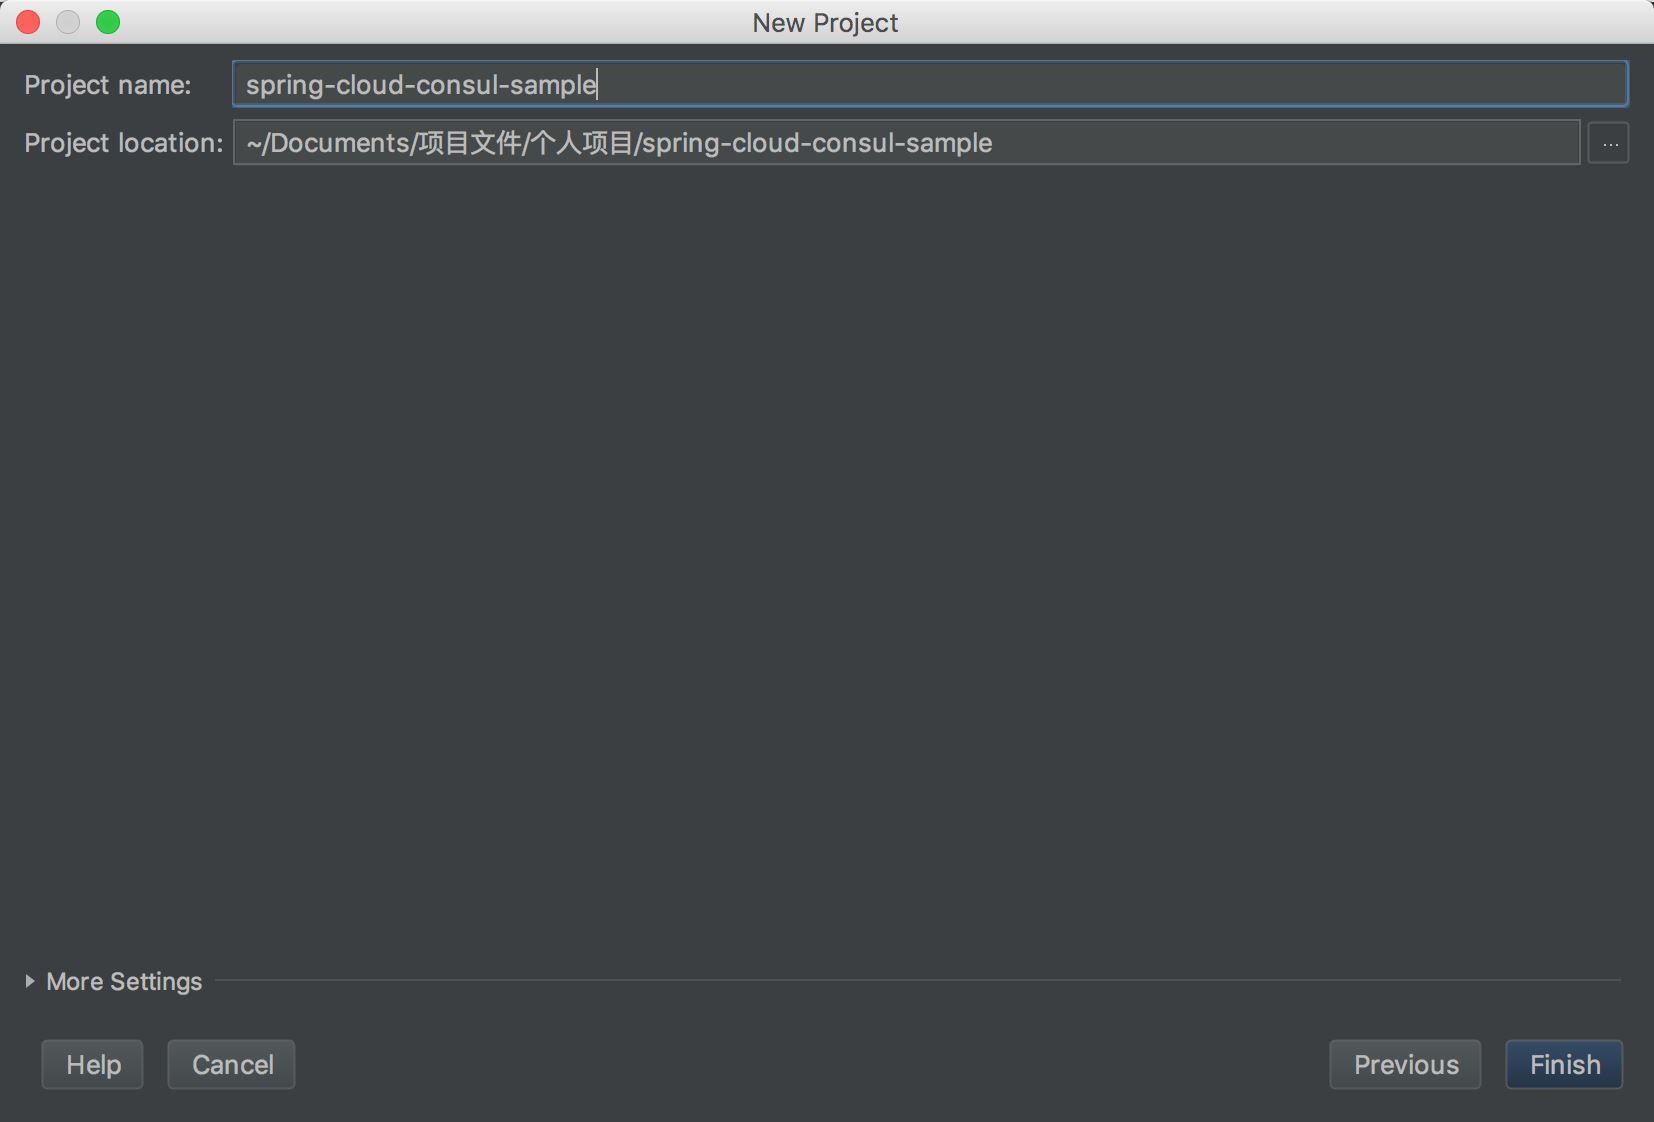
然后点击“Finish”,就完成啦。
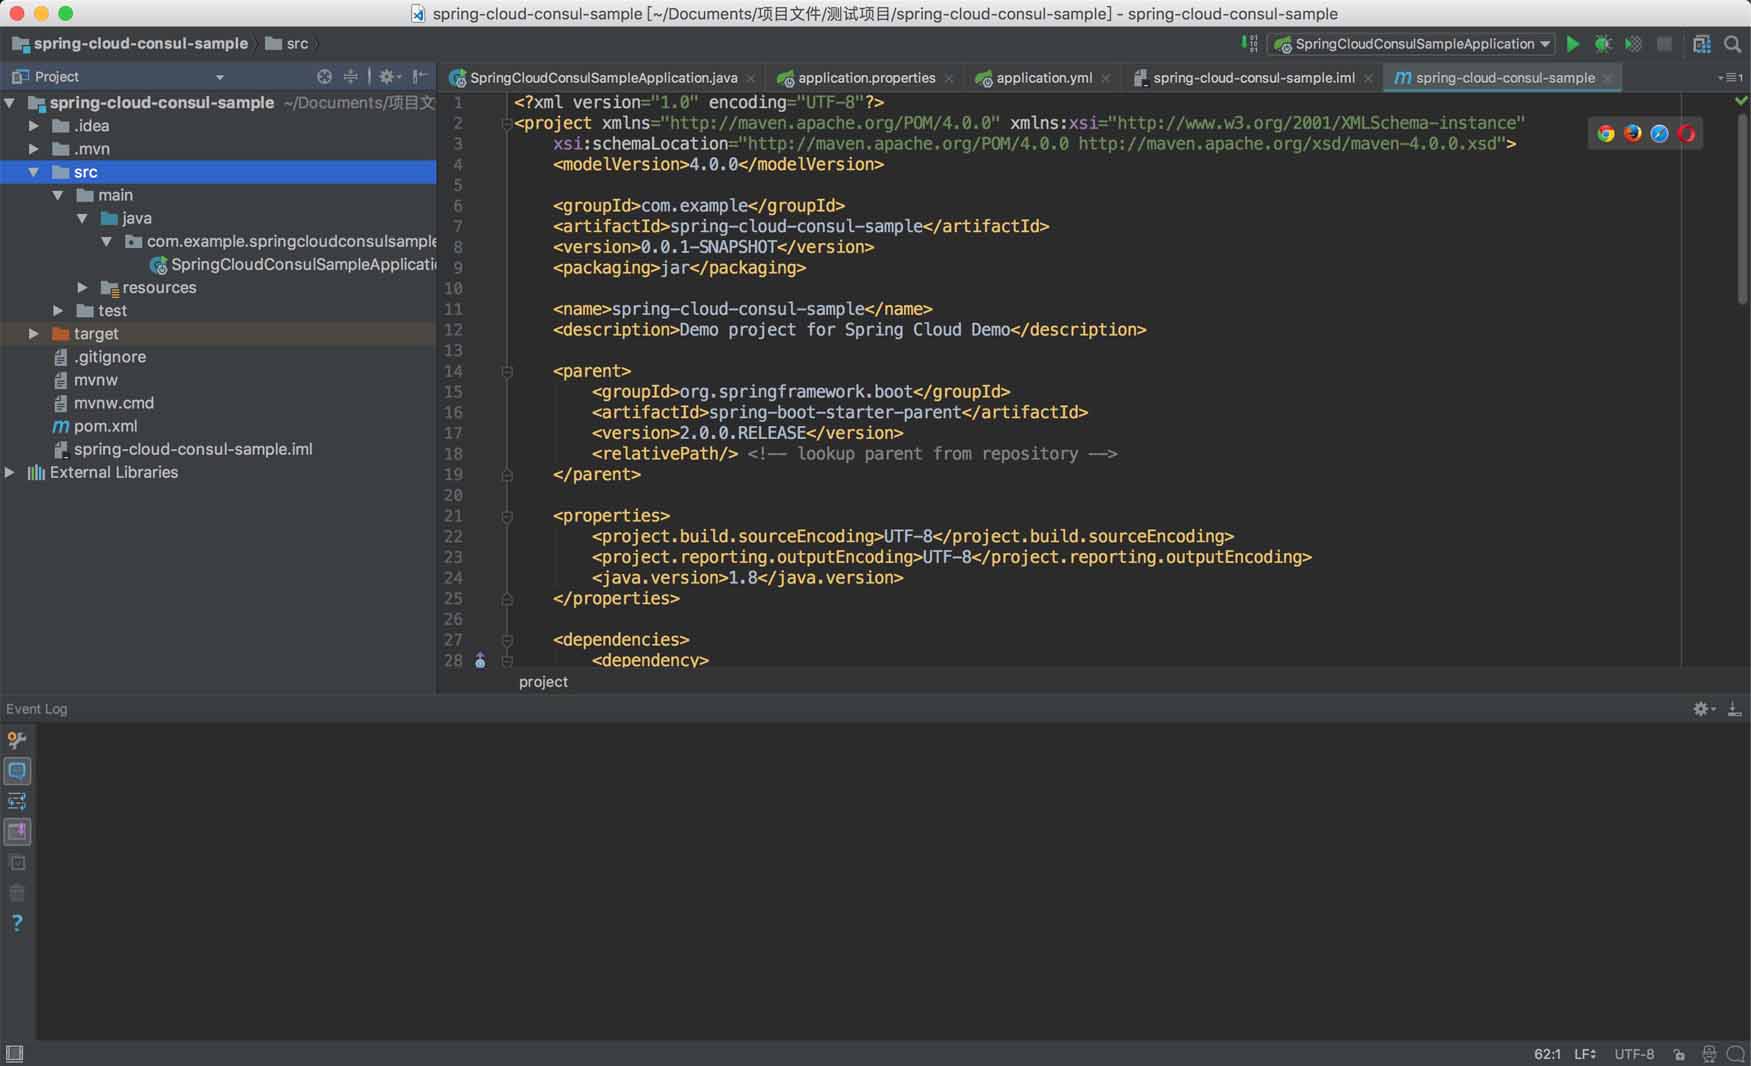
像开发 ASP.NET Core 应用程序一样,我们需要先引用各种程序包,Spring Boot 项目也是一样,因为使用 Maven 进行依赖管理,我们需要在pom.xml中配置依赖关系,配置如下:
<parent>
 <groupId>org.springframework.boot</groupId>
 <artifactId>spring-boot-starter-parent</artifactId>
 <version>2.0.0.RELEASE</version>
 <relativePath/> <!-- lookup parent from repository -->
</parent>

<properties>
 <project.build.sourceEncoding>UTF-8</project.build.sourceEncoding>
 <project.reporting.outputEncoding>UTF-8</project.reporting.outputEncoding>
 <java.version>1.8</java.version>
</properties>

<dependencies>
 <dependency>
  <groupId>org.springframework.boot</groupId>
  <artifactId>spring-boot-starter-web</artifactId>
 </dependency>

 <dependency>
  <groupId>org.springframework.cloud</groupId>
  <artifactId>spring-cloud-starter-consul-discovery</artifactId>
 </dependency>

 <dependency>
  <groupId>org.springframework.boot</groupId>
  <artifactId>spring-boot-starter-actuator</artifactId>
  <scope>compile</scope>
 </dependency>

 <dependency>
  <groupId>org.springframework.boot</groupId>
  <artifactId>spring-boot-starter-test</artifactId>
  <scope>test</scope>
 </dependency>
</dependencies>

<dependencyManagement>
 <dependencies>
  <dependency>
   <groupId>org.springframework.cloud</groupId>
   <artifactId>spring-cloud-consul-dependencies</artifactId>
   <version>2.0.0.M7</version>
   <type>pom</type>
   <scope>import</scope>
  </dependency>
 </dependencies>
</dependencyManagement>
引用spring-cloud-starter-consul-discovery对应 Spring Cloud Consul,引用spring-boot-starter-actuator用作健康检查(地址/actuator/health),另外 Actuator 还支持项目的监控和管理。
这里再说下节点的作用:
parent:父引用配置,会继承父引用的配置。dependencies:当前引用配置,如果父引用配置了,子项目会自动引用。dependencyManagement:当然引用配置,如果父引用配置了,子项目不会自动引用,子项目只要用到的时候引用,不需要配置版本号。
然后再贴一下SpringCloudConsulSampleApplication.java的代码:
package com.example.springcloudconsulsample;

import org.springframework.beans.factory.annotation.Autowired;
import org.springframework.boot.SpringApplication;
import org.springframework.boot.autoconfigure.SpringBootApplication;
import org.springframework.web.bind.annotation.RequestMapping;
import org.springframework.web.bind.annotation.RestController;
import org.springframework.cloud.client.discovery.EnableDiscoveryClient;
import org.springframework.cloud.client.discovery.DiscoveryClient;

@EnableDiscoveryClient
@RestController
@SpringBootApplication
public class SpringCloudConsulSampleApplication {

 @Autowired
 private DiscoveryClient discoveryClient;

 /**
  * 获取所有服务
  */
 @RequestMapping("/services")
 public Object services() {
  return discoveryClient.getServices();
 }

 @RequestMapping("/home")
 public String home() {
  return "Hello World";
 }

 public static void main(String[] args) {
  SpringApplication.run(SpringCloudConsulSampleApplication.class, args);
 }
}
增加@EnableDiscoveryClient注解,项目启动的时候,会注册当前 Spring Boot 服务。
在使用 ASP.NET Core 注册服务的时候,配置信息会填写在代码中(如服务名称和端口等,当然也可以在配置文件),然后使用 Consul 组件注册服务(调用 Consul HTTP REST)。
Spring Cloud Consul 注册服务的话,需要添加配置文件(Spring Boot 项目资源文件在 resources 目录下)。
application.properties中添加配置:
spring.application.name=spring-boot-service
然后添加application.yml配置文件:
然后添加application.yml配置文件:
debug: true
server:
port: 24543
spring:
cloud:
consul:
host: 127.0.0.1
port: 8500
discovery:
register: true
hostname: 10.9.10.215
serviceName: ${spring.application.name}
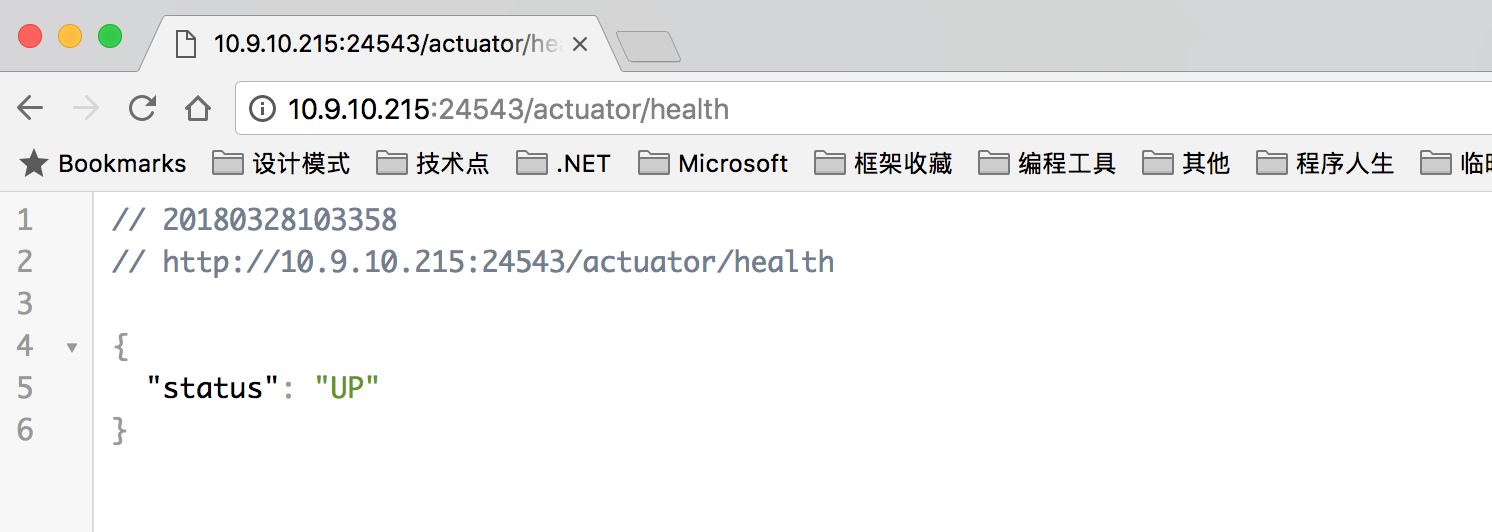
healthCheckPath: /actuator/health
healthCheckInterval: 15s
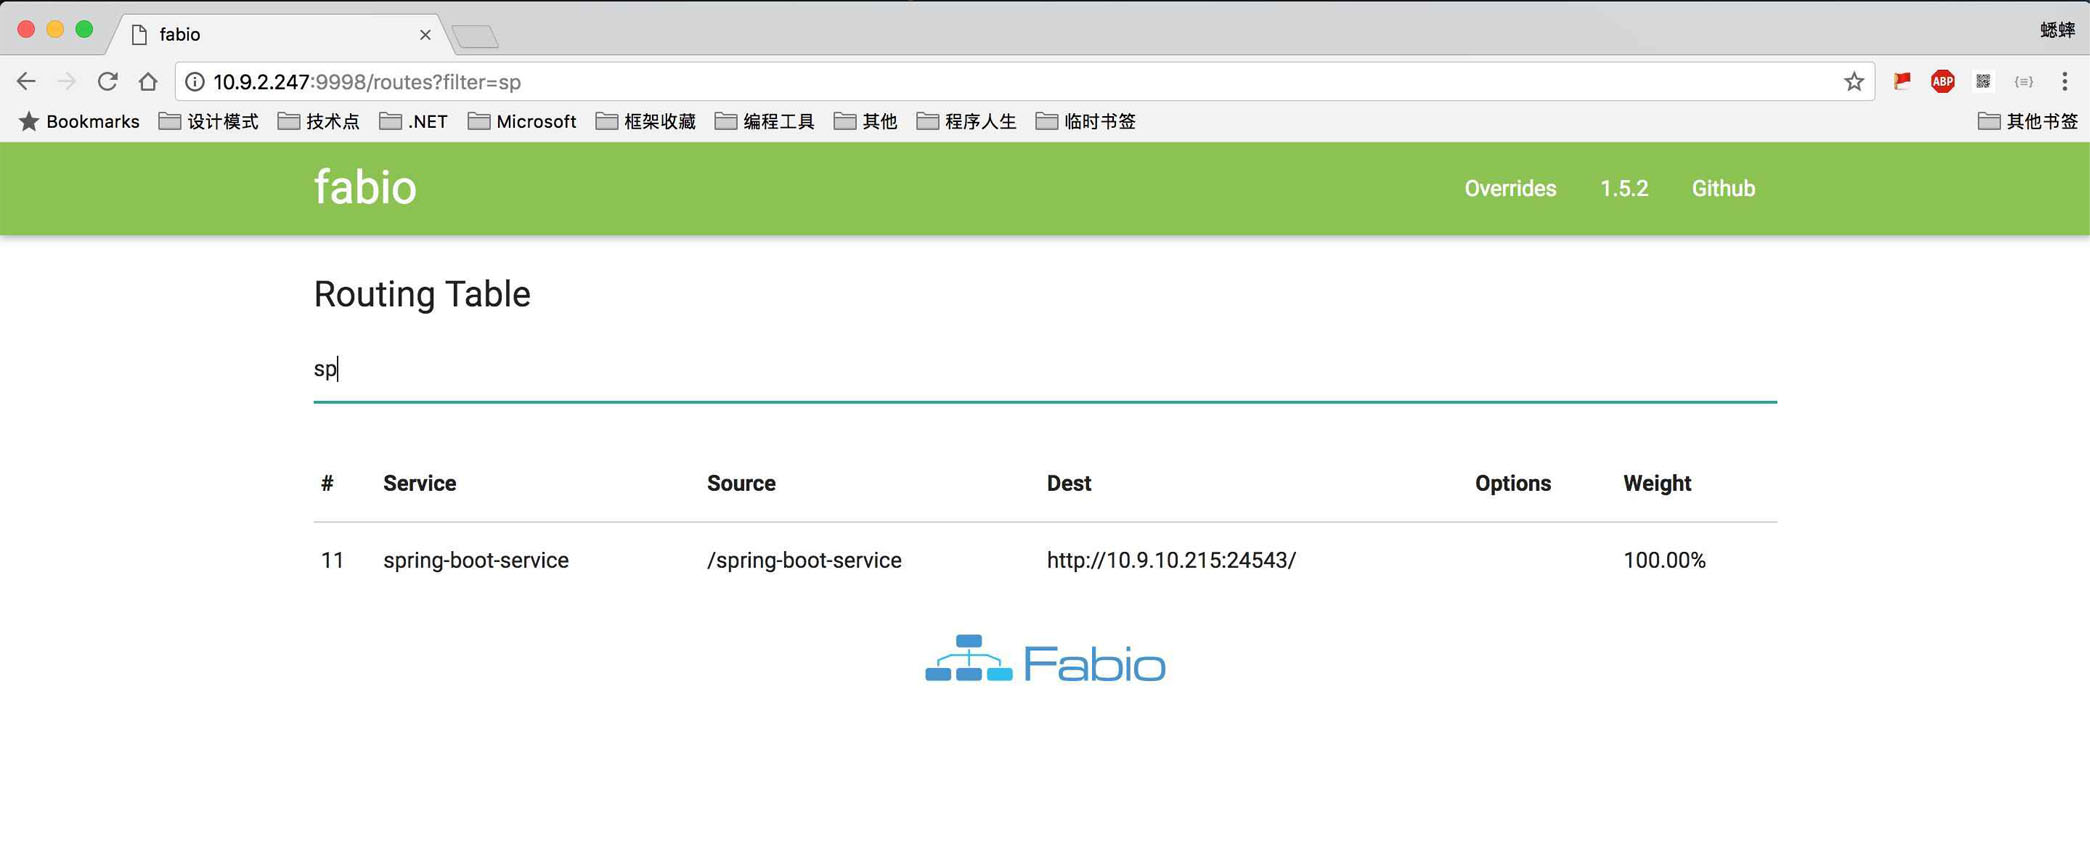
tags: urlprefix-/${spring.application.name}
instanceId: ${spring.application.name}:${vcap.application.instance_id:${spring.application.instance_id:${random.value}}}
上面配置需要再详细说明说明下:
debug配置是否调试模式,如果打包发布的话,需要设置为false。server.port配置的是 Spring Boot 服务的端口。spring.cloud.consul.host/port配置的是本地 Consul 的地址和端口(Server 节点和 Client 节点都可以),Spring Cloud Consul 会调用 Consul HTTP REST 接口,进行服务注册。spring.cloud.consul.discovery.true配置启动是否注册服务,spring.cloud.consul.discovery.hostname配置 Spring Boot 服务的主机地址,也可以不进行配置,默认本机地址。spring.cloud.consul.discovery.serviceName配置 Consul 注册的服务名称,${spring.application.name}变量是我们上面application.properties配置文件中添加的配置。spring.cloud.consul.discovery.healthCheckPath配置 Consul 健康检查地址,Actuator 组件帮我们进行了实现,所以我们不需要额外的实现,地址在服务启动的时候,打印信息里面可以看到。spring.cloud.consul.discovery.healthCheckInterval配置 Consul 健康检查频率,也就是心跳频率。spring.cloud.consul.discovery.tags配置 Consul 注册服务的 Tags,设置为urlprefix-/serviceName的格式,是自动注册到 Fabio 集群中。spring.cloud.consul.discovery.instanceId配置 Consul 注册服务 ID。
上面的工作做完之后,我们还需要在本地启动 Consul 和 Fabio
然后我们就可以直接使用 IntelliJ IDEA 调试项目了,按Shift + F9进行调试。
上面说到 Actuator 的打印信息:
2018-03-28 10:09:54.645 INFO 63482 --- [ main] s.b.a.e.w.s.WebMvcEndpointHandlerMapping : Mapped "{[/actuator/health],methods=[GET],produces=[application/vnd.spring-boot.actuator.v2+json || application/json]}" onto public java.lang.Object org.springframework.boot.actuate.endpoint.web.servlet.AbstractWebMvcEndpointHandlerMapping$OperationHandler.handle(javax.servlet.http.HttpServletRequest,java.util.Map<java.lang.String, java.lang.String>)
2018-03-28 10:09:54.646 INFO 63482 --- [ main] s.b.a.e.w.s.WebMvcEndpointHandlerMapping : Mapped "{[/actuator/info],methods=[GET],produces=[application/vnd.spring-boot.actuator.v2+json || application/json]}" onto public java.lang.Object org.springframework.boot.actuate.endpoint.web.servlet.AbstractWebMvcEndpointHandlerMapping$OperationHandler.handle(javax.servlet.http.HttpServletRequest,java.util.Map<java.lang.String, java.lang.String>)
2018-03-28 10:09:54.647 INFO 63482 --- [ main] s.b.a.e.w.s.WebMvcEndpointHandlerMapping : Mapped "{[/actuator],methods=[GET],produces=[application/vnd.spring-boot.actuator.v2+json || application/json]}" onto protected java.util.Map<java.lang.String, java.util.Map<java.lang.String, org.springframework.boot.actuate.endpoint.web.Link>> org.springframework.boot.actuate.endpoint.web.servlet.WebMvcEndpointHandlerMapping.links(javax.servlet.http.HttpServletRequest,javax.servlet.http.HttpServletResponse)
或者我们也可以使用 Maven 打包发布,然后使用命令启动服务。使用 IntelliJ IDEA 中的 Maven 进行打包,或者使用 Maven 命令打包都可以,这边我们使用Maven 命令进行打包。
在我们安装 IntelliJ IDEA 的时候,Maven 自动安装了,但直接敲mvn -v会发现命令找不到,需要我们配置一下环境变量。
我自己的 Maven 文件目录是/Applications/IntelliJ IDEA.app/Contents/plugins/maven/lib/maven3,可以在 IntelliJ IDEA 的配置设置中找到,然后我们执行下面的命令:
$ export M2_HOME="/Applications/IntelliJ IDEA.app/Contents/plugins/maven/lib/maven3" &&
export PATH=$PATH:$M2_HOME/bin &&
chmod a+x "/Applications/IntelliJ IDEA.app/Contents/plugins/maven/lib/maven3/bin/mvn"
然后检查下 Maven 命令是否生效:
$ mvn -v
Apache Maven 3.3.9 (bb52d8502b132ec0a5a3f4c09453c07478323dc5; 2015-11-11T00:41:47+08:00)
Maven home: /Applications/IntelliJ IDEA.app/Contents/plugins/maven/lib/maven3
Java version: 10, vendor: Oracle Corporation
Java home: /Library/Java/JavaVirtualMachines/jdk-10.jdk/Contents/Home
Default locale: zh_CN_#Hans, platform encoding: UTF-8
OS name: "mac os x", version: "10.13.2", arch: "x86_64", family: "mac"
然后我们修改application.yml中的debug:false,使用 Maven 进行打包(目录切换到pom.xml平级):
$ mvn clean package -Dmaven.test.skip=true
[INFO] Scanning for projects...
[INFO]
[INFO] ------------------------------------------------------------------------
[INFO] Building spring-cloud-consul-sample 0.0.1-SNAPSHOT
[INFO] ------------------------------------------------------------------------
[INFO]
[INFO] --- maven-clean-plugin:3.0.0:clean (default-clean) @ spring-cloud-consul-sample ---
[INFO] Deleting /Users/xishuai/Documents/项目文件/测试项目/spring-cloud-consul-sample/target
[INFO]
[INFO] --- maven-resources-plugin:3.0.1:resources (default-resources) @ spring-cloud-consul-sample ---
[INFO] Using 'UTF-8' encoding to copy filtered resources.
[INFO] Copying 2 resources
[INFO] Copying 0 resource
[INFO]
[INFO] --- maven-compiler-plugin:3.7.0:compile (default-compile) @ spring-cloud-consul-sample ---
[INFO] Changes detected - recompiling the module!
[INFO] Compiling 1 source file to /Users/xishuai/Documents/项目文件/测试项目/spring-cloud-consul-sample/target/classes
[INFO]
[INFO] --- maven-resources-plugin:3.0.1:testResources (default-testResources) @ spring-cloud-consul-sample ---
[INFO] Not copying test resources
[INFO]
[INFO] --- maven-compiler-plugin:3.7.0:testCompile (default-testCompile) @ spring-cloud-consul-sample ---
[INFO] Not compiling test sources
[INFO]
[INFO] --- maven-surefire-plugin:2.20.1:test (default-test) @ spring-cloud-consul-sample ---
[INFO] Tests are skipped.
[INFO]
[INFO] --- maven-jar-plugin:3.0.2:jar (default-jar) @ spring-cloud-consul-sample ---
[INFO] Building jar: /Users/xishuai/Documents/项目文件/测试项目/spring-cloud-consul-sample/target/spring-cloud-consul-sample-0.0.1-SNAPSHOT.jar
[INFO]
[INFO] --- spring-boot-maven-plugin:2.0.0.RELEASE:repackage (default) @ spring-cloud-consul-sample ---
[INFO] ------------------------------------------------------------------------
[INFO] BUILD SUCCESS
[INFO] ------------------------------------------------------------------------
[INFO] Total time: 3.815 s
[INFO] Finished at: 2018-03-28T10:26:46+08:00
[INFO] Final Memory: 30M/114M
[INFO] ------------------------------------------------------------------------
生成的 jar 程序包,会在 target 目录下,文件为spring-cloud-consul-sample-0.0.1-SNAPSHOT.jar(格式为项目名 + 版本号),然后我们可以直接启动服务了:
$ java -jar target/spring-cloud-consul-sample-0.0.1-SNAPSHOT.jar
2018-03-28 10:33:31.750 INFO 63875 --- [   main] s.c.a.AnnotationConfigApplicationContext : Refreshing org.springframework.context.annotation.AnnotationConfigApplicationContext@2b662a77: startup date [Wed Mar 28 10:33:31 CST 2018]; root of context hierarchy
WARNING: An illegal reflective access operation has occurred
WARNING: Illegal reflective access by org.springframework.cglib.core.ReflectUtils$1 (jar:file:/Users/xishuai/Documents/项目文件/测试项目/spring-cloud-consul-sample/target/spring-cloud-consul-sample-0.0.1-SNAPSHOT.jar!/BOOT-INF/lib/spring-core-5.0.4.RELEASE.jar!/) to method java.lang.ClassLoader.defineClass(java.lang.String,byte[],int,int,java.security.ProtectionDomain)
WARNING: Please consider reporting this to the maintainers of org.springframework.cglib.core.ReflectUtils$1
WARNING: Use --illegal-access=warn to enable warnings of further illegal reflective access operations
WARNING: All illegal access operations will be denied in a future release
2018-03-28 10:33:31.971 INFO 63875 --- [   main] f.a.AutowiredAnnotationBeanPostProcessor : JSR-330 'javax.inject.Inject' annotation found and supported for autowiring
2018-03-28 10:33:32.015 INFO 63875 --- [   main] trationDelegate$BeanPostProcessorChecker : Bean 'configurationPropertiesRebinderAutoConfiguration' of type [org.springframework.cloud.autoconfigure.ConfigurationPropertiesRebinderAutoConfiguration$$EnhancerBySpringCGLIB$$4d45e598] is not eligible for getting processed by all BeanPostProcessors (for example: not eligible for auto-proxying)

 . ____   _   __ _ _
 /\\ / ___'_ __ _ _(_)_ __ __ _ \ \ \ \
( ( )\___ | '_ | '_| | '_ \/ _` | \ \ \ \
 \\/ ___)| |_)| | | | | || (_| | ) ) ) )
 ' |____| .__|_| |_|_| |_\__, | / / / /
 =========|_|==============|___/=/_/_/_/
 :: Spring Boot ::  (v2.0.0.RELEASE)
查看健康检查是否成功:
查看 Consul 是否服务注册成功:

查看 Fabio 集群是否包含服务:
服务注册成功之后,我们可以手动进行发现服务,或者通过 Spring Cloud Ribbon/Feign 组件进行发现,并提供负载均衡功能(类似于 Fabio 功能),后面再研究下。
以上就是本文的全部内容,希望对大家的学习有所帮助,也希望大家多多支持我们。
相关推荐
-
详解使用Spring Cloud Consul实现服务的注册和发现
首先安装consul环境,参照之前的文章:https://www.jb51.net/article/141789.htm 项目规划,2个服务端,1个客户端 首先来看服务端, 一:服务端1: 项目依赖 <dependencyManagement> <dependencies> <dependency> <groupId>org.springframework.cloud</groupId> <artifactId>spring-clou
-
详解Spring Cloud Consul 实现服务注册和发现
Spring Cloud 是一个基于 Spring Boot 实现的云应用开发工具,它为基于 JVM 的云应用开发中涉及的配置管理.服务发现.断路器.智能路由.微代理.控制总线.全局锁.决策竞选.分布式会话和集群状态管理等操作提供了一种简单的开发方式.通过 Spring Boot 风格进行再封装屏蔽掉了复杂的配置和实现原理,最终给开发者留出了一套简单易懂.易部署和易维护的分布式系统开发工具包. Spring Cloud 包含了多个子项目(针对分布式系统中涉及的多个不同开源产品),比如:Sprin
-

Spring Cloud Consul的服务注册与发现
运行Consul 以Windows为例,下载解压后,以开发模式运行: consul agent --dev 启动成功后,可以访问Consul提供的管理页面,默认端口为8500,页面上显示了已注册服务的列表,包括它们的运行状况等信息. 服务注册 1.添加Spring Cloud Consul依赖: <dependencies> <dependency> <groupId>org.springframework.cloud</groupId> <artif
-
基于Spring Cloud Zookeeper实现服务注册与发现
服务注册 1.添加Spring Cloud Zookeeper依赖: <dependencies> <dependency> <groupId>org.springframework.cloud</groupId> <artifactId>spring-cloud-starter-zookeeper-discovery</artifactId> <exclusions> <exclusion> <grou
-
详解spring cloud构建微服务架构的网关(API GateWay)
前言 在我们前面的博客中讲到,当服务A需要调用服务B的时候,只需要从Eureka中获取B服务的注册实例,然后使用Feign来调用B的服务,使用Ribbon来实现负载均衡,但是,当我们同时向客户端暴漏多个服务的时候,客户端怎么调用我们暴漏的服务了,如果我们还想加入安全认证,权限控制,过滤器以及动态路由等特性了,那么就需要使用Zuul来实现API GateWay了,下面,我们先来看下Zuul怎么使用. 一.加入Zuul的依赖 <dependency> <groupId>org.spri
-
详解Spring Cloud Gateway基于服务发现的默认路由规则
1.Spring Gateway概述 1.1 什么是Spring Cloud Gateway Spring Cloud Gateway是Spring官方基于Spring 5.0,Spring Boot 2.0和Project Reactor等技术开发的网关,Spring Cloud Gateway旨在为微服务架构提供一种简单而有效的统一的API路由管理方式.Spring Cloud Gateway作为Spring Cloud生态系中的网关,目标是替代Netflix ZUUL,其不仅提供统一的路由
-
详解Spring Cloud 跨服务数据聚合框架
AG-Merge Spring Cloud 跨服务数据聚合框架 解决问题 解决Spring Cloud服务拆分后分页数据的属性或单个对象的属性拆分之痛, 支持对静态数据属性(数据字典).动态主键数据进行自动注入和转化, 其中聚合的静态数据会进行 一级混存 (guava). 举个栗子: 两个服务,A服务的某张表用到了B服务的某张表的值,我们在对A服务那张表查询的时候,把B服务某张表的值聚合在A服务的那次查询过程中 示例 具体示例代码可以看 ace-merge-demo 模块 |------- ac
-
详解spring cloud整合Swagger2构建RESTful服务的APIs
前言 在前面的博客中,我们将服务注册到了Eureka上,可以从Eureka的UI界面中,看到有哪些服务已经注册到了Eureka Server上,但是,如果我们想查看当前服务提供了哪些RESTful接口方法的话,就无从获取了,传统的方法是梳理一篇服务的接口文档来供开发人员之间来进行交流,这种情况下,很多时候,会造成文档和代码的不一致性,比如说代码改了,但是接口文档没有改等问题,而Swagger2则给我们提供了一套完美的解决方案,下面,我们来看看Swagger2是如何来解决问题的. 一.引入Swag
-
详解spring cloud使用Hystrix实现单个方法的fallback
本文介绍了spring cloud-使用Hystrix实现单个方法的fallback,分享给大家,具体如下: 一.加入Hystrix依赖 <dependency> <groupId>org.springframework.cloud</groupId> <artifactId>spring-cloud-starter-hystrix</artifactId> </dependency> 二.编写Controller package c
-
Spring Cloud EureKa Ribbon 服务注册发现与调用
概述 用一个简单的例子演示Spring Cloud中EureKa和Ribbon的基本用法. 版本和环境 IDEA Spring Boot 1.5.·0 JDK 1.8 Maven 3 构建eureka server 在Spring Cloud,可以使用eureka来管理微服务,微服务可以注册到eureka中. 首先可以用IDEA的Spring Initialzr 来创建eureka server注册中心. 修改application.properties文件,添加如下内容 spring.appl
-
详解Spring cloud使用Ribbon进行Restful请求
写在前面 本文由markdown格式写成,为本人第一次这么写,排版可能会有点乱,还望各位海涵. 主要写的是使用Ribbon进行Restful请求,测试各个方法的使用,代码冗余较高,比较适合初学者,介意轻喷谢谢. 前提 一个可用的Eureka注册中心(文中以之前博客中双节点注册中心,不重要) 一个连接到这个注册中心的服务提供者 一个ribbon的消费者 注意:文中使用@GetMapping.@PostMapping.@PutMapping.@DeleteMapping等注解需要升级 spring