Python sns.distplot()方法的使用方法
#displot参数如下
sns.distplot(a, bins=None, hist=True, kde=True, rug=False, fit=None, hist_kws=None, kde_kws=None, rug_kws=None, fit_kws=None, color=None, vertical=False, norm_hist=False, axlabel=None, label=None, ax=None)
- hist: 控制是否显示条形图,默认为True
- kde: 控制是否显示核密度估计图,默认为True
- rug: 控制是否显示观测的小细条(边际毛毯)默认为false
- fit: 设定函数图像,与原图进行比较
- axlabel: 设置x轴的label
- label : 没有发现什么作yong.
- ax: 图片位置
import matplotlib.pyplot as plt
import numpy as np
import pandas as pd
import seaborn as sns
sns.set()  #切换到sns的默认运行配置
import warnings
warnings.filterwarnings('ignore')
x=np.random.randn(100)
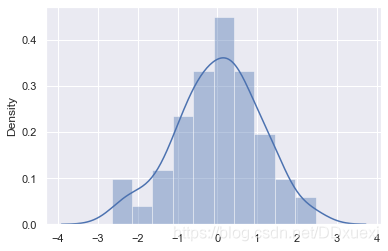
sns.distplot(x)
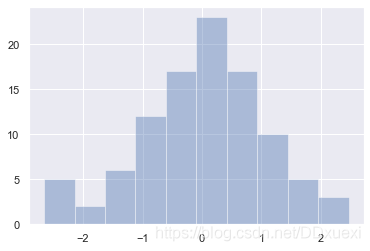
sns.distplot(x,kde=False)
<AxesSubplot:>
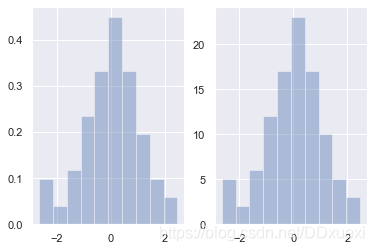
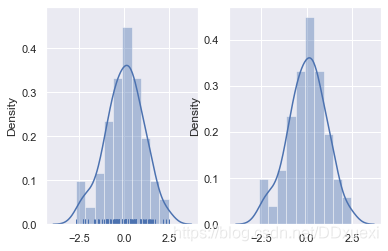
norm_hist:若为True, 则直方图高度显示密度而非计数(含有kde图像中默认为True)
#norm_hist
fig,axes=plt.subplots(1,2)
sns.distplot(x,norm_hist=True,kde=False,ax=axes[0]) #左图
sns.distplot(x,kde=False,ax=axes[1]) #右图
<AxesSubplot:>
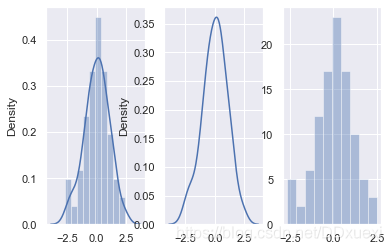
通过hidt和kde参数调节是否显示直方图和核密度估计((默认hist,kde均为True)
fig,axes = plt.subplots(1,3) # 创建一个1行3列的图片
sns.distplot(x,ax=axes[0]) # ax=axex[0]表示该图片在整个画板中的位置
sns.distplot(x,hist=False,ax=axes[1])  #不显示直方图
sns.distplot(x,kde=False,ax=axes[2])  #不显示核密度
<AxesSubplot:>
rag:控制是否生成观测数值的小细条
#rag
fig,axes=plt.subplots(1,2)
sns.distplot(x,rug=True,ax=axes[0]) #左图
sns.distplot(x,ax=axes[1]) #右图
<AxesSubplot:ylabel='Density'>
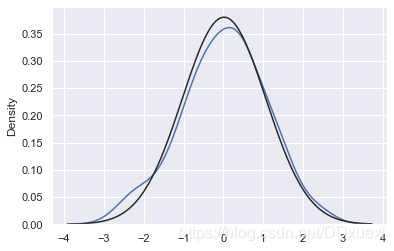
fit:控制拟合的参数分布图形,能够直观地评估它与观察数据的对应关系(黑色线条为确定的分布)
#fit
from scipy.stats import *
sns.distplot(x,hist=False,fit=norm) #拟合标准正态分布
<AxesSubplot:ylabel='Density'>
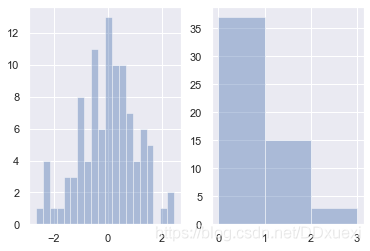
bins:int或list,控制直方图的划分
#bins
fig,axes=plt.subplots(1,2)
sns.distplot(x,kde=False,bins=20,ax=axes[0]) #分成20个区间
sns.distplot(x,kde=False,bins=[x for x in range(4)],ax=axes[1]) #以0,1,2,3为分割点,形成区间[0,1],[1,2],[2,3],区间外的值不计入。
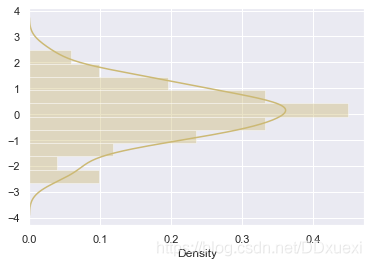
vertical / color 参数
#
sns.distplot(x,vertical=True,color="y")
总结
到此这篇关于Python sns.distplot()方法使用的文章就介绍到这了,更多相关sns.distplot()方法使用内容请搜索我们以前的文章或继续浏览下面的相关文章希望大家以后多多支持我们!
相关推荐
-

Python sns.distplot()方法的使用方法
#displot参数如下 sns.distplot(a, bins=None, hist=True, kde=True, rug=False, fit=None, hist_kws=None, kde_kws=None, rug_kws=None, fit_kws=None, color=None, vertical=False, norm_hist=False, axlabel=None, label=None, ax=None) hist: 控制是否显示条形图,默认为True kde: 控制
-
python中requests使用代理proxies方法介绍
学习网络爬虫难免遇到使用代理的情况,下面介绍一下如何使用requests设置代理: 如果需要使用代理,你可以通过为任意请求方法提供 proxies 参数来配置单个请求: import requests proxies = { "http": "http://10.10.1.10:3128", "https": "http://10.10.1.10:1080", } requests.get("http://examp
-
python爬虫之BeautifulSoup 使用select方法详解
本文介绍了python爬虫之BeautifulSoup 使用select方法详解 ,分享给大家.具体如下: <html><head><title>The Dormouse's story</title></head> <body> <p class="title" name="dromouse"><b>The Dormouse's story</b></
-
python数据结构之图的实现方法
本文实例讲述了python数据结构之图的实现方法.分享给大家供大家参考.具体如下: 下面简要的介绍下: 比如有这么一张图: A -> B A -> C B -> C B -> D C -> D D -> C E -> F F -> C 可以用字典和列表来构建 graph = {'A': ['B', 'C'], 'B': ['C', 'D'], 'C': ['D'], 'D': ['C'], 'E': [
-
python追加元素到列表的方法
本文实例讲述了python追加元素到列表的方法.分享给大家供大家参考.具体实现方法如下: scores = ["1","2","3"] # add a score score = int(raw_input("What score did you get?: ")) scores.append(score) # list high-score table for score in scores: print score 运行结
-
python运行其他程序的实现方法
python运行其他程序的实现方法 这里提供了两种实现方法,一.os.system()函数和 使用ShellExecute函数运行其他程序及实现代码,大家可以参考下, 一 使用os.system()函数运行其他程序 打开系统的记事本程序 >>>import os >>> os.system('notepad') 0 >>> os.system('notepad python.txt') 0 二 使用ShellExecute函数
-
Python查询阿里巴巴关键字排名的方法
本文实例讲述了Python查询阿里巴巴关键字排名的方法.分享给大家供大家参考.具体如下: 这里使用python库urllib及pyquery基本东西的应用,实现阿里巴巴关键词排名的查询,其中涉及到urllib代理的设置,pyquery对html文档的解析 1. urllib 基础模块的应用,通过该类获取到url中的html文档信息,内部可以重写代理的获取方法 class ProxyScrapy(object): def __init__(self): self.proxy_robot = Pro
-
python执行子进程实现进程间通信的方法
本文实例讲述了python执行子进程实现进程间通信的方法.分享给大家供大家参考.具体实现方法如下: a.py: import subprocess, time subproc = subprocess.Popen(['c:\python31\python.exe', 'c:/b.py'], stdin=subprocess.PIPE, shell=True) time.sleep(0.5) print('start') subproc.stdin.write('data\n') subproc.
-
python通过post提交数据的方法
本文实例讲述了python通过post提交数据的方法.分享给大家供大家参考.具体实现方法如下: # -*- coding: cp936 -*- import urllib2 import urllib def postHttp(name=None,tel=None,address=None, price=None,num=None,paytype=None, posttype=None,other=None): url="http://www.xxx.com/dog.php" #定义要
-
python使用PyGame模块播放声音的方法
本文实例讲述了python使用PyGame模块播放声音的方法.分享给大家供大家参考.具体实现方法如下: import pygame pygame.init() pygame.mixer.music.load("sound_file.ogg") pygame.mixer.music.play() pygame.event.wait() 希望本文所述对大家的Python程序设计有所帮助.