小程序选项卡以及swiper套用(跨页面)
选项卡tab和swpier之间的套用,供大家参考,具体内容如下
其实我之前写过一篇选项卡的切换demo,大家阔以参考一下 小程序多个选项卡切换
那今天写这个demo呢,是因为项目需求,所以仅供参考。
首先,我是拿到了home.wxml的数组下标,通过url传参的方式去将这个数组id传到下一个页面,下一个页面接收以后再将id赋值给对应的tab或者currentId(swiper 的下标)
实现上一个页面进来以后直接进入对应的页面。
首先看一下效果图吧
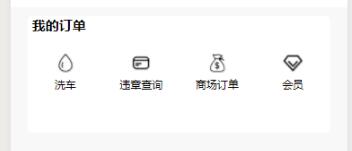
当我点击违章查询

跳转到对应的页面展示对应的内容
那么上菜!!!
home.wxml
<view class='wrpg'>
 <view class='wrpg-bottom'>
 <view class='myOrder'>
 <view class='myTips'>
 <text>我的订单</text>
 </view>
 <view class='allOrder' >
 <view class='item-Order' wx:for="{{allOrder}}" wx:key='' >
 <view class='washcar' bindtap='toOrder' data-index='{{index}}' data-id='{{item.id}}'>
  <image class='washcarImg' src="{{item.washcar}}" ></image>
  <text class='tips'>{{item.tips}}</text>
 </view>
 </view>
 </view>
 </view>
 </view>
</view>
home.wxss
.wrpg {
 width: 90%;
 height: 100%;
 margin: 0 auto;
}
.myOrder {
 margin: 20rpx auto;
 width: 100%;
 height: 260rpx;
 background: #fff;
 border-radius: 10rpx;
}

.myTips {
 font-size: 30rpx;
 font-weight: bold;
 margin: 10rpx;
}

.allOrder {
 width: 100%;
 height: 150rpx;
 display: flex;
 justify-content: center;
 align-items: center;
}

.item-Order {
 width: 100%;
 height: 100rpx;
 display: flex;
 justify-content: center;
 align-items: center;
}

.washcar {
 width: 100rpx;
 height: 100rpx;
 display: flex;
 justify-content: center;
 align-items: center;
/* 保持行级 */
 flex-flow: column nowrap;
 font-size: 25rpx;
}

.washcarImg {
 width: 45rpx;
 height: 45rpx;
}

.tips {
 margin-top: 10rpx;
}
home.js
数组写在data里
allOrder: [{
 id:0,//这里就是你需要的传递数组的id
 washcar: "images/water.png",
 tips: "洗车"
 },
 {
 id:1,
 washcar: "images/bank.png",
 tips: "违章查询"
 },
 {
 id: 2,
 washcar: "images/money.png",
 tips: "商场订单"
 },
 {
 id: 3,
 washcar: "images/peo.png",
 tips: "会员"
 },
 ],
//事件处理函数,通过url传参

 toOrder(e){

 var id = e.currentTarget.dataset.id;
 console.log(id);
 wx.navigateTo({
 url: 'order/order?id='+id,
 })
 },
OK!上一个页面传递成功,那么接下来就是接收了
order.wxml
<view class='wrpg'>
 <view class='wrpg-top'>
 <view class="content-titles">
 <view class='washcar {{index==indexNum?"active":""}}' wx:for="{{washcar}}" data-index='{{index}}' wx:key="" bindtap='tabChange'>
 <text>{{item.tips}}</text>
 </view>
 </view>
 </view>
 <view class='wrpg-content'>
 <swiper vertical="{{false}}" current='{{indexNum}}' bindchange='Change'>
 <!-- 第一屏 -->
 <swiper-item>
 <view class=''>washcar</view>
 </swiper-item>
 <!-- 第二屏 -->
 <swiper-item>
 <view class="select-content-titles">
  <view class='selectContent {{idx == index? "type-item-on" : ""}}' wx:for="{{selecttab}}" data-index='{{index}}' wx:key="" bindtap='checkviolation'>
  <text>{{item.tips}}</text>
  </view>
 </view>
 <view wx:if='{{idx == 0}}' class='tab1' data-id='0'>
  <image class='tab1Img' src="../images/order.png"></image>
  <text>你暂时还没有违章查询~</text>
 </view>
 <view wx:if='{{idx == 1}}' class='tab2' data-id='1'>222</view>
 <view wx:if='{{idx == 2}}' class='tab3' data-id='2'>333</view>
 <view wx:if='{{idx == 3}}' class='tab3' data-id='3'>444</view>
 </swiper-item>
 <!-- 第三屏 -->
 <swiper-item>
 <view class="select-content-titles">
  <view class='selectContent {{idx == index? "type-item-on" : ""}}' wx:for="{{ordertab}}" data-index='{{index}}' wx:key="" bindtap='checkviolation'>
  <text>{{item.tips}}</text>
  </view>
 </view>
 <view wx:if='{{idx == 0}}' class='tab1' data-id='0'>
 000
 </view>
 <view wx:if='{{idx == 1}}' class='tab2' data-id='1'>
 <image class='tab1Img' src="../images/order.png"></image>
  <text>你暂时还没有商品~</text>
  <text class='buyMore'>去逛逛~</text>
 </view>
 <view wx:if='{{idx == 2}}' class='tab3' data-id='2'>

  <image class='orderDetailImg' src="../images/orderDetail.png"></image>
 </view>
 <view wx:if='{{idx == 3}}' class='tab3' data-id='3'>444</view>
 </swiper-item>
 <!-- 第四屏 -->
 <swiper-item>
 <view class=''>vip</view>
 </swiper-item>
 </swiper>

 </view>
</view>
order.wxss
/* pages/home/order/order.wxss */

page {
 width: 100%;
 height: 100%;
 background: rgb(244, 246, 250);
}

.wrpg-top {
 width: 100%;
 height: 80rpx;
 background: #fff;
}

.content-titles {
 display: flex;
 justify-content: center;
 align-items: center;
}

.washcar {
 width: 200rpx;
 height: 100rpx;

 display: flex;
 justify-content: center;
 align-items: center;
 margin-left: 10rpx;
 font-size: 30rpx;

}

.active {
 font-size: 40rpx;
 font-weight: bold;
}

swiper{
 width:100%;
 height: 1100rpx;

}
.select-content-titles{
width: 100%;
height: 80rpx;
background: #fff;
 display: flex;
 justify-content: center;
 align-items: center;
}
.selectContent{
 width: 200rpx;
 height: 100rpx;
 display: flex;
 justify-content: center;
 align-items: center;
 margin-left: 10rpx;
 font-size: 25rpx;
}
.type-item-on {
border-bottom: 4rpx solid rgb(95, 162, 238);
color: rgb(95, 162, 238);
}
.tab1,.tab2{
width: 100%;
height: 100%;

 display: flex;
 justify-content: center;
 align-items: center;
 flex-flow: column;
 font-size: 30rpx;
}
.tab1Img{
 width: 100rpx;
 height: 100rpx;
}
.buyMore{
 color: rgb(95, 162, 238);
}
.orderDetailImg{
width: 100%;
height: 600rpx;
margin: 10rpx;
}
1.接下来就是需要在在order.js接收上一个页面home的数组id:
onload事件里刷新order.wxml的选项卡数组下标,
这样就是从上一个页面子元素进入本页面的对应子元素。
但是
我的这里拿到这个homeid以后没有直接赋值给我的washcar数组的id。
我是赋值给了我的swiper的下标indexNum。
因为我的swiper 和导航的选项卡数组下标做了联动,我只需要改其中之一就能实现。所以我就取巧了,不建议这样做,只是我刚好有罢了
2.在swiper里,利用swiper组件的属性 current拿到对应的滑块的下标,将滑块的下标赋值给我的order.wxml的选项卡数组下标,就可以实现滑动的同时,刷新tab对应的选项样式。
// pages/home/order/order.js

Page({

 /**
 * 页面的初始数据
 */
 data: {
 idx: 0, //默认选中第一项
 indexNum: 0,
 washcar: [{
 tips: "洗车"
 },
 {
 tips: "违章查询"
 },
 {
 tips: "商城订单"
 },
 {
 tips: "会员"
 },
 ],
 selecttab: [{
 id: 0,
 tips: "处理中"
 },
 {
 id: 1,
 tips: "已成功"
 },
 {
 id: 2,
 tips: "已撤销"
 },
 {
 id: 3,
 tips: "全部"
 },

 ],
 ordertab: [{
 id: 0,
 tips: "全部"
 },
 {
 id: 1,
 tips: "待付款"
 },
 {
 id: 2,
 tips: "待收货"
 },
 {
 id: 3,
 tips: "待评价"
 },
 ],
 },
//导航栏点击事件
 tabChange: function(e) {
 var navigitionIndex = e.currentTarget.dataset.index;
 this.setData({
 indexNum: navigitionIndex
 })

 },
 //选项卡滑动
 Change(e) {
 var cur = e.detail.current;
 this.setData({
 indexNum: cur
 })
 },
 //查询违章选项卡
 checkviolation(e) {
 let that = this;
 let index = e.currentTarget.dataset.index;
 that.setData({
 idx: index,
 })

 },
 /**
 * 生命周期函数--监听页面加载
 */
 onLoad: function(options) {
 var id = options.id;
 this.setData({
 indexNum:id
 })
 },
一开始我想点击事件和滑动事件都共用一个滑动事件,通过判断来控制下标,但bindtap和滑动里的bindchange事件,根本就是两个事件,无法再一个事件里实现,我一直纠结在使用一个事件来实现,导致一直卡壳。想复杂了
其实我是一个前端小白,从后台转过了也才没有多久,希望有不对可以指正。广泛交友。共同成长
如果大家还想深入学习,可以点击两个精彩的专题:javascript选项卡操作方法汇总 jquery选项卡操作方法汇总
为大家推荐现在关注度比较高的微信小程序教程一篇:《微信小程序开发教程》小编为大家精心整理的,希望喜欢。
以上就是本文的全部内容,希望对大家的学习有所帮助,也希望大家多多支持我们。
相关推荐
-

微信小程序实现顶部普通选项卡效果(非swiper)
背景:前段时间写了一个抢红包小程序,里面涉及到了顶部选项卡,把它抽了出来. 效果图: 下面直接上代码: wxml: <view class="navbar"> <text wx:for="{{navbar}}" data-index="{{index}}" class="item {{currentIndex==index?'active':''}}" bindtap="navbarTab"
-
微信小程序实现顶部选项卡(swiper)
微信小程序顶部选项卡在开发中是非常常用的,下面用一点时间实现了一下. 效果图: 下面直接上代码: wxml: <!--pages/index/index.wxml--> <view class="swiper-tab"> <view class="tab-item {{currentTab==0 ? 'on' : ''}}" data-current="0" bindtap="swichNav"&
-
小程序选项卡以及swiper套用(跨页面)
选项卡tab和swpier之间的套用,供大家参考,具体内容如下 其实我之前写过一篇选项卡的切换demo,大家阔以参考一下 小程序多个选项卡切换 那今天写这个demo呢,是因为项目需求,所以仅供参考. 首先,我是拿到了home.wxml的数组下标,通过url传参的方式去将这个数组id传到下一个页面,下一个页面接收以后再将id赋值给对应的tab或者currentId(swiper 的下标) 实现上一个页面进来以后直接进入对应的页面. 首先看一下效果图吧 当我点击违章查询 跳转到对应的页面展示对应的内
-
微信小程序中的swiper组件详解
微信小程序中的swiper组件 微信小程序中的swiper组件真的是简单方便 提供了页面中图片文字等滑动的效果 <swiper> <swiper-item></swiper-item> <swiper-item></swiper-item> <swiper-item></swiper-item> </swiper> 这里的就是一个滑块视图容器:而就是你希望滑动的东西,可以是文字也可以是image 其中swipe
-
微信小程序 选项卡的简单实例
微信小程序 选项卡的简单实例 看下效果 代码: home.wxml <!--pages/home/home.wxml--> <view class="swiper-tab"> <view class="swiper-tab-item {{currentTab==0 ? 'on' : ''}}" data-current="0" bindtap="swichNav">热门</view&g
-
微信小程序开发之全局配置与页面配置实现
目录 一.全局配置 (1)小程序窗口的组成部分 (2)导航栏 navigationBar (3)下拉刷新页面 (4)上拉触底的距离 (5)底部导航栏 tabBar (6)图标的获取 二.页面配置 (1)概念 (2)页面配置与全局配置的关系 (3)常用配置项 三.综合案例 一.全局配置 app.json文件就是项目的全局配置文件 (1)小程序窗口的组成部分 (2)导航栏 navigationBar 1)window节点常用配置项 2)设置导航栏 设置导航栏标题文字 app.json-->win
-
微信小程序 监听手势滑动切换页面实例详解
微信小程序 监听手势滑动切换页面实例详解 1.对应的xml里写上手势开始.滑动.结束的监听: <view class="touch" bindtouchstart="touchStart" bindtouchmove="touchMove" bindtouchend="touchEnd" ></view> 2.js: var touchDot = 0;//触摸时的原点 var time = 0;// 时
-
微信小程序使用for循环动态渲染页面操作示例
本文实例讲述了微信小程序使用for循环动态渲染页面操作.分享给大家供大家参考,具体如下: 先来看看运行效果: 这种列表效果可以说是最常见的一种,肯定不是我们一个一个写上去,这就用到了我们这次要说的for循环渲染了 其实也很简单,我就直接上代码了 wxml部分: <view wx:for='{{languageList}}' class='hua' data-name='{{item.name}}' data-id='{{item.id}}' bindtap='select'> <text
-
微信小程序按钮去除边框线分享页面功能
有一个需求是分享当前页面,使用美工的分享按钮图片来分享,而小程序分享功能只有button有 open-type="share"这个属性,使用image标签肯定不行.我是这样做的: <button open-type="share" style="height:85rpx;width:215rpx;padding:0;background-color:#fff;border-color:#fff;margin-right:10rpx" >
-
微信小程序学习笔记之跳转页面、传递参数获得数据操作图文详解
本文实例讲述了微信小程序学习笔记之跳转页面.传递参数获得数据操作.分享给大家供大家参考,具体如下: 前面一篇介绍了微信小程序表单提交与PHP后台数据交互处理.现在需要实现点击博客标题或缩略图,跳转到博客详情页面. 开始想研究一下微信小程序的web-view组件跳转传参,把网页嵌入到小程序,结果看到官方文档的一句话打消了念头,因为没有认证...... [方法一 使用navigator组件跳转传参] 前台博客列表页面data.wxml:(后台数据交互参考上一篇) <view wx:for="{
-
微信小程序按钮点击跳转页面详解
微信小程序中,按钮也是<button></button>标签,它通过bindtap属性绑定点击事件: 然后在js里面注册这个回调函数: 回调函数里面通过 wx.navigateTo({ url: '/pages/index/talkPage', }) 跳转到talkPage界面. 注意,html界面要在app.json里面注册: 不注册的话会报错:navigateTo:fail url "pages/index/talkPage" is not in app.j
-
小程序跳转到的H5页面再跳转回跳小程序的方法
哈喽,大家上午好,萍子又来啦,本人最近一段时间一直在做小程序的项目,大大小小的坑真的是踩了不小,无奈本人啊还老是忘记自己究竟踩过那些坑,但是不得不说虽然小程序尚还有很多不完善的地方,但是还是蛮强大的啦,也是引得众公司纷纷引用小程序项目啊. 之前萍子写过一篇从小程序跳转到H5页面的博文小程序跳H5页面,那么今天我们一起来看看如何跳回来,我们要有始有终哇,O(∩_∩)O哈哈~ ####H5跳转到小程序的方法 方法有两个: 第一种比较简单,就直接点击手机的返回键,让它自动根据层级返回即可: 第二种,可