Android实现圆角ListView效果
在项目开发中我们可能会碰到圆角ListView效果,因为直角的看起来确实不那么雅观,可能大家会想到用图片实现,试想上中下要分别做三张图片,这样做太繁琐,这时使用shape来实现不失为一种更好的实现方式。
先看一下Android 中Shape的使用方法:
solid:实心,就是填充的意思
android:color指定填充的颜色
gradient:渐变
android:startColor和android:endColor分别为起始和结束颜色,ndroid:angle是渐变角度,必须为45的整数倍。
另外渐变默认的模式为android:type="linear",即线性渐变,可以指定渐变为径向渐变,android:type="radial",径向渐变需要指定半径android:gradientRadius="50"。
stroke:描边
android:width="2dp" 描边的宽度,android:color 描边的颜色。
我们还可以把描边弄成虚线的形式,设置方式为:
android:dashWidth="5dp"
android:dashGap="3dp"
其中android:dashWidth表示'-'这样一个横线的宽度,android:dashGap表示之间隔开的距离。
corners:圆角
android:radius为角的弧度,值越大角越圆。
当然,这里并不是说这种圆角的列表一段是ListView来实现的,可能是由多个LinearLayout/RelativeLayout叠起来的。这个就看你怎么取舍了;如果列表项固定不怎么变化可以采取后者来实现比较好,如果需要动态变化那么使用ListView来实现更优。
下面来定义一下ListView只有一项时的背景(上下两个角都是圆角) app_list_corner_round.xml
<?xml version="1.0" encoding="utf-8"?>
<shape xmlns:android="http://schemas.android.com/apk/res/android"
 android:shape="rectangle" >

 <!-- 渐变 -->
 <gradient
  android:angle="270"
  android:endColor="@color/white"
  android:startColor="@color/white" />

 <!-- 圆角 -->
 <corners
  android:bottomLeftRadius="4dip"
  android:bottomRightRadius="4dip"
  android:topLeftRadius="4dip"
  android:topRightRadius="4dip" />

</shape>
ListView第一项的背景(上面是圆角,下面是直角) app_list_corner_round_top.xml
<?xml version="1.0" encoding="utf-8"?>
<shape xmlns:android="http://schemas.android.com/apk/res/android"
 android:shape="rectangle" >

 <gradient
  android:angle="270"
  android:endColor="@color/white"
  android:startColor="@color/white" />

 <corners
  android:topLeftRadius="@dimen/app_list_radius"
  android:topRightRadius="@dimen/app_list_radius" />

</shape>
ListView最后一项的背景(上面是直角,下面是圆角) app_list_corner_round_bottom.xml
<?xml version="1.0" encoding="utf-8"?>
<shape xmlns:android="http://schemas.android.com/apk/res/android"
 android:shape="rectangle" >

 <gradient
  android:angle="270"
  android:endColor="@color/white"
  android:startColor="@color/white" />

 <corners
  android:bottomLeftRadius="@dimen/app_list_radius"
  android:bottomRightRadius="@dimen/app_list_radius" />

</shape>
ListView中间项的背景(上下都是直角) app_list_corner_round_center.xml
<?xml version="1.0" encoding="utf-8"?>
<shape xmlns:android="http://schemas.android.com/apk/res/android"
 android:shape="rectangle" >

 <gradient
  android:angle="270"
  android:endColor="@color/white"
  android:startColor="@color/white" />

</shape>
接下来先看看Adapter的实现
package com.example.roundcorner.adapter;

import java.util.List;

import android.content.Context;
import android.view.LayoutInflater;
import android.view.View;
import android.view.ViewGroup;
import android.widget.BaseAdapter;
import android.widget.ImageView;
import android.widget.TextView;

import com.example.roundcorner.R;
import com.example.roundcorner.entity.ListBean;

public class ListAdapter extends BaseAdapter {
 private List<ListBean> mList;
 private Context mContext;

 public ListAdapter(Context mContext,List<ListBean> mList) {
 this.mList = mList;
 this.mContext = mContext.getApplicationContext();
 }

 @Override
 public int getCount() {
 return this.mList.size();
 }

 @Override
 public Object getItem(int position) {
 return this.mList.get(position);
 }

 @Override
 public long getItemId(int position) {
 return position;
 }

 @Override
 public int getItemViewType(int position) {
 // TODO Auto-generated method stub
 return super.getItemViewType(position);
 }

 @Override
 public int getViewTypeCount() {
 // TODO Auto-generated method stub
 return super.getViewTypeCount();
 }

 @Override
 public View getView(int position, View convertView, ViewGroup parent) {
 ViewHolder holder = null;
 if (convertView == null) {
 holder = new ViewHolder();
 convertView = LayoutInflater.from(this.mContext).inflate(
  R.layout.listview_item, null, false);
 holder.textView = (TextView) convertView
  .findViewById(R.id.listview_item_textview);
 holder.imageView = (ImageView) convertView
  .findViewById(R.id.listview_item_imageview);
 convertView.setTag(holder);
 } else {
 holder = (ViewHolder) convertView.getTag();
 }

 if(position==0){

 if(position == getCount()-1){ //只有一项
 convertView.setBackgroundResource(R.drawable.app_list_corner_round);
 }else{ //第一项
 convertView.setBackgroundResource(R.drawable.app_list_corner_round_top);
 }
 }else if(position == getCount()-1){
 convertView.setBackgroundResource(R.drawable.app_list_corner_round_bottom);
 }else{
 convertView.setBackgroundResource(R.drawable.app_list_corner_round_center);
 }

 ListBean lb = mList.get(position);
 holder.textView.setText(lb.getKey());

 return convertView;
 }

 static class ViewHolder {
 TextView textView;
 ImageView imageView;
 }
}
listview_item.xml
<?xml version="1.0" encoding="utf-8"?>
<RelativeLayout xmlns:android="http://schemas.android.com/apk/res/android"
 android:layout_width="match_parent"
 android:layout_height="wrap_content">

 <TextView
  android:id="@+id/listview_item_textview"
  android:layout_width="wrap_content"
  android:layout_height="48dp"
  android:paddingLeft="10dp"
  android:gravity="center_vertical"
  android:layout_centerVertical="true"
  android:text="A-H"
  android:textColor="@color/black"
  android:textSize="20sp" />

 <ImageView
  android:id="@+id/listview_item_imageview"
  android:layout_width="wrap_content"
  android:layout_height="wrap_content"
  android:src="@drawable/arrow"
  android:layout_alignParentRight="true"
  android:layout_centerVertical="true"
  />

</RelativeLayout>
最后看看主界面Activity的实现
package com.example.roundcorner;

import java.util.ArrayList;
import java.util.List;

import android.app.Activity;
import android.os.Bundle;
import android.widget.ListView;

import com.example.roundcorner.adapter.ListAdapter;
import com.example.roundcorner.entity.ListBean;

public class MainActivity extends Activity {

 private List<ListBean> data;

 @Override
 protected void onCreate(Bundle savedInstanceState) {
 super.onCreate(savedInstanceState);
 setContentView(R.layout.activity_main);

 initData();

 findView();
 }

 private void findView() {
 ListView mListView = (ListView) findViewById(R.id.mListView);

 ListAdapter mAdapter = new ListAdapter(this,data);
 mListView.setAdapter(mAdapter);
 }

 private void initData() {
 data = new ArrayList<ListBean>();
 for (int i = 0; i < 5; i++) {
 ListBean lb = new ListBean();
 lb.setKey("设置 "+i);
 data.add(lb);
 }
 }

}
activity_main.xml
<LinearLayout xmlns:android="http://schemas.android.com/apk/res/android"
 xmlns:tools="http://schemas.android.com/tools"
 android:layout_width="match_parent"
 android:layout_height="match_parent"
 android:orientation="vertical"
 tools:context=".MainActivity" >

 <TextView
  android:layout_width="match_parent"
  android:layout_height="48dp"
  android:background="@color/white"
  android:gravity="center"
  android:text="设置"
  android:textSize="20sp" />

 <RelativeLayout
  android:layout_width="match_parent"
  android:layout_height="match_parent"
  android:padding="10dp" >

  <ListView
   android:id="@+id/mListView"
   android:layout_width="match_parent"
   android:layout_height="wrap_content"
   android:background="@drawable/app_list_round"
   android:cacheColorHint="@android:color/transparent"
   android:divider="@drawable/app_list_divider"
   android:dividerHeight="2dip"
   android:padding="2dp" />
 </RelativeLayout>

</LinearLayout>
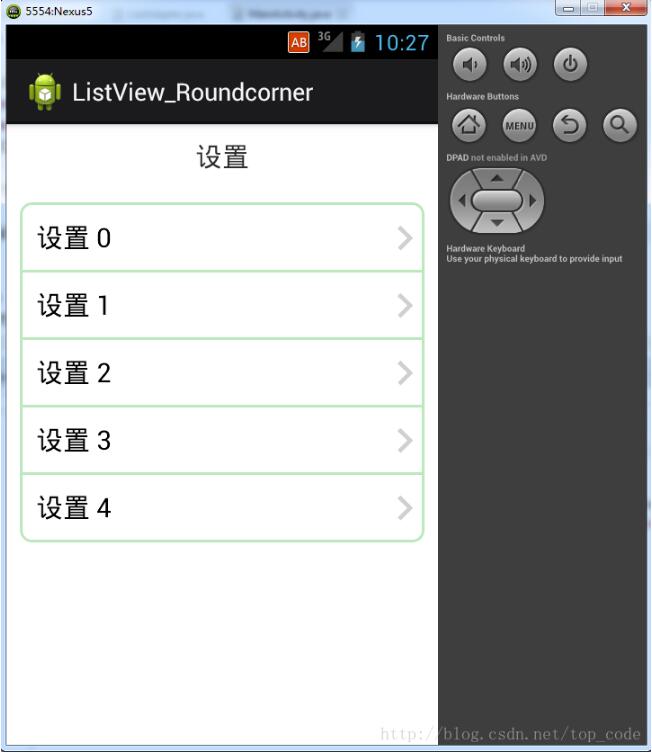
最后看看实现的效果
以上就是本文的全部内容,希望对大家的学习有所帮助,也希望大家多多支持我们。
相关推荐
-

android开发之方形圆角listview代码分享
先看效果图: 首先,你得写一个类我们命名为CornerListView [java] 复制代码 代码如下: /** * 圆角ListView示例 * @Description: 圆角ListView示例 * @FileName: CornerListView.java */ public class CornerListView extends ListView { public CornerListView(Context context) { super(conte
-
Android UI控件之ListView实现圆角效果
今天在Android群里面有人再求圆角ListView的实现方式,正好自己以前实现过.因此就共享了现在将其实现方式写在博客中共他人学习.给出实现方式之前顺带加点自己的想法,感觉上android中方形的ListView还是太"硬性",没有圆角的有亲和力.连Apple也为了"圆角"这个设计去申请专利. 看来圆角确实比较适合现在人们的喜好吧. 照老规矩先上两张效果图吧: 第一张: 第二张: 该方式主要就是需要重新去实现自己的ListView代码如下: package co
-
android panellistview 圆角实现代码
(效果如上图所示) 其实很简单: 比方说上面的容器是一个ListView 复制代码 代码如下: <ListView android:id="@+id/listView_devices" android:layout_width="fill_parent" android:layout_height="fill_parent" <SPAN style="COLOR: #ff0000"> android:back
-
基于Android实现ListView圆角效果
本文演示如何在Android中实现ListView圆角效果. 无论是网站,还是APP,人们都爱看一些新颖的视图效果.直角看多了,就想看看圆角,这几年刮起了一阵阵的圆角设计风:CSS新标准纳入圆角元素,特别是在iphone中几乎随处可见圆角设计,现在也开始出现很多圆角名片了. 现在就给大家实现一个圆角的ListView效果. 圆角的设计,我们并不追求到处都用,无处不用,android中有少数界面用直角确实容易显得锋利,和周边界面太过对比而显得不协调,比如大栏目列表,设置等等,而采用圆角实现,则会活
-
Android实现圆角ListView效果
在项目开发中我们可能会碰到圆角ListView效果,因为直角的看起来确实不那么雅观,可能大家会想到用图片实现,试想上中下要分别做三张图片,这样做太繁琐,这时使用shape来实现不失为一种更好的实现方式. 先看一下Android 中Shape的使用方法: solid:实心,就是填充的意思 android:color指定填充的颜色 gradient:渐变 android:startColor和android:endColor分别为起始和结束颜色,ndroid:angle是渐变角度,必须为45的整数倍
-
android 自定义圆角button效果的实例代码(自定义view Demo)
概述 在平时开发过程中经常会碰到需要使用圆角button的情况,一般也会包括很多其他小功能,比如要在里面添加img,设置不同的圆角大小等. 针对这样的场景,直接使用创建多个shape,定义多个xml文件也是可以实现的.但是如果使用非常频繁,那么直接自定义一个就会来的非常方便. 甚至在一些情况下,不是可以用shape定义的规则图形,比如需要用到贝塞尔曲线等. 如果全局需要这样风格的view,那么自定义一个View是非常必要的. 本文主要是个demo记录,如有需要的读者可以借鉴学习. Demo 主要
-
Android编程实现ListView头部ViewPager广告轮询图效果
本文实例讲述了Android编程实现ListView头部ViewPager广告轮询图效果.分享给大家供大家参考,具体如下: 之前看了别人的一些软件,发现其广告图轮询的时候,那个广告感觉和ViewPager的效果不太一样,后来也查了一下,是因为时间问题,找了一些资料,自己也实践一下. 1.为了解决ListView头部加ViewPager滑动冲突问题,必须自定义ListView,重写里面的onInterceptTouchEvent方法,ListView代码如下: package com.exampl
-
Android开发实现ListView点击展开收起效果示例
本文实例讲述了Android开发实现ListView点击展开收起效果.分享给大家供大家参考,具体如下: 废话不说先上效果: 实际上这是采用一个ExpandableListView实现的 布局文件很简单: <?xml version="1.0" encoding="utf-8"?> <LinearLayout xmlns:android="http://schemas.android.com/apk/res/android" xm
-
Android自定义View实现带4圆角或者2圆角的效果
1 问题 实现任意view经过自定义带4圆角或者2圆角的效果 2 原理 1) 实现view 4圆角 我们只需要把左边的图嵌入到右边里面去,最终显示左边的图就行. 2) 实现view上2圆角 我们只需要把左边的图嵌入到右边里面去,最终显示左边的图就行. 安卓源码里面有这样的类 package android.graphics; /** * <p>Specialized implementation of {@link Paint}'s * {@link Paint#setXfermode(Xfe
-
Android开发之ListView、GridView 详解及示例代码
ListView与GridView是Android开发中的常用控件,它们和Adapter配合使用能够实现很多界面效果.下面分别以实例说明ListView.GridView的用法. 1.ListView的Android开发实例 ListView 是android开发中最常用的控件之一,一般构成列表包括三个元素,ListView:用来展示列表的视图.Adapter:数据与视图连接的桥梁.Data:具体的数据包括字符串 .图片或者控件. 适配器一般有以下几种类型: ArrayAdapte
-
Android实现圆角Button按钮
本文实例讲述了Android开发圆角Button按钮实现过程,分享给大家供大家参考,具体内容如下 需求及效果图: 实现思路: 1.shape实现圆角 在drawable新建两个xml 文件, 这两个 xml文件用shape 实现了圆角效果. Note: 因为要让用户有按下去的效果体验, 所有要有两套圆角图, 在按下去时候切换 <!-- res/drawable/button_shape_normal.xml --> <shape xmlns:android="http://sc
-
Android 实现圆角图片的简单实例
Android 实现圆角图片的简单实例 实现效果图: 本来想在网上找个圆角的例子看一看,不尽人意啊,基本都是官方的Demo的那张原理图,稍后会贴出.于是自己自定义了个View,实现图片的圆角以及圆形效果.效果图: Android 圆角图片的实现形式,包括用第三方.也有系统的.比如makeramen:roundedimageview,系统的cardview , glide .fresco . compile 'com.android.support:appcompat-v7:24.0.0' com
-
Android编程记录ListView标记行状态的方法
本文实例讲述了Android编程记录ListView标记行状态的方法.分享给大家供大家参考,具体如下: 小Demo无什么特别之处,最特别的就是尽量少用notifyDataSetChanged,开销太大了,当然使用是会省不少工的,不过有时候还是会遇到别的问题的,项目经验表示会有这个可能性的,废话不多少了,直接上关键代码. @Override public void onItemClick(AdapterView<?> adapterView, View view, int pos, long a