Springboot+redis+Vue实现秒杀的项目实践
目录
- 1、Redis简介
- 2、实现代码
- 3、启动步骤
- 4、使用ab进行并发测试
- 5、线程安全
- 6、总结
- 7、参考资料
1、Redis简介
Redis是一个开源的key-value存储系统。
Redis的五种基本类型:String(字符串),list(链表),set(集合),zset(有序集合),hash,stream(Redis5.0后的新数据结构)
这些数据类型都支持push/pop、add/remove及取交集并集和差集及更丰富的操作,而且这些操作都是原子性的。
Redis的应用场景为配合关系型数据库做高速缓存,降低数据库IO
需要注意的是,Redis是单线程的,如果一次批量处理命令过多,会造成Redis阻塞或网络拥塞(传输数据量大)
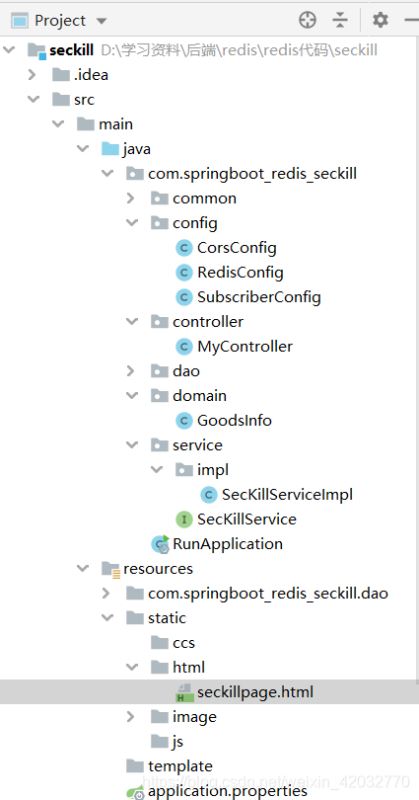
2、实现代码
pom.xml
<?xml version="1.0" encoding="UTF-8"?>
<project xmlns="http://maven.apache.org/POM/4.0.0"
         xmlns:xsi="http://www.w3.org/2001/XMLSchema-instance"
         xsi:schemaLocation="http://maven.apache.org/POM/4.0.0 http://maven.apache.org/xsd/maven-4.0.0.xsd">
    <modelVersion>4.0.0</modelVersion>
    <parent>
        <groupId>org.springframework.boot</groupId>
        <artifactId>spring-boot-starter-parent</artifactId>
        <version>2.2.1.RELEASE</version>
        <relativePath/> <!-- lookup parent from repository -->
    </parent>
    <groupId>org.example</groupId>
    <artifactId>seckill</artifactId>
    <version>1.0-SNAPSHOT</version>
    <properties>
        <java.version>1.8</java.version>
    </properties>

    <dependencies>
        <dependency>
            <groupId>org.springframework.boot</groupId>
            <artifactId>spring-boot-starter-web</artifactId>
        </dependency>

        <!-- https://mvnrepository.com/artifact/org.springframework.boot/spring-boot-starter-test -->
        <dependency>
            <groupId>org.springframework.boot</groupId>
            <artifactId>spring-boot-starter-test</artifactId>
            <version>2.2.1.RELEASE</version>
            <scope>test</scope>
        </dependency>

        <!-- redis -->
        <dependency>
            <groupId>org.springframework.boot</groupId>
            <artifactId>spring-boot-starter-data-redis</artifactId>
        </dependency>

        <!-- spring2.X集成redis所需common-pool2-->
        <dependency>
            <groupId>org.apache.commons</groupId>
            <artifactId>commons-pool2</artifactId>
            <version>2.6.0</version>
        </dependency>

        <dependency>
            <groupId>com.alibaba</groupId>
            <artifactId>fastjson</artifactId>
            <version>1.2.24</version>
        </dependency>

    </dependencies>
    <build>
        <plugins>
            <plugin>
                <groupId>org.springframework.boot</groupId>
                <artifactId>spring-boot-maven-plugin</artifactId>
                <configuration>
                    <fork>true</fork>
                </configuration>
            </plugin>
        </plugins>
    </build>

</project>
application.properties.xml
#Redis服务器地址
spring.redis.host=192.168.1.2
#Redis服务器连接端口
spring.redis.port=6379
#Redis数据库索引(默认为0)
spring.redis.database=0
#连接超时时间(毫秒)
spring.redis.timeout=1800000
#连接池最大连接数(使用负值表示没有限制)
spring.redis.lettuce.pool.max-active=20
#最大阻塞等待时间(负数表示没限制)
spring.redis.lettuce.pool.max-wait=-1
#连接池中的最大空闲连接
spring.redis.lettuce.pool.max-idle=5
#连接池中的最小空闲连接
spring.redis.lettuce.pool.min-idle=0
# 关闭超时时间
#pring.redis.lettuce.shutdown-timeout=100
#配置spring启动端口号
server.port=8080
前端界面
seckillpage.html
<!DOCTYPE html>
<html lang="en" xmlns:v-on="http://www.w3.org/1999/xhtml" xmlns:v-bind="http://www.w3.org/1999/xhtml">
<head>
    <meta charset="UTF-8">
    <title>redis秒杀</title>
</head>
<body>
<!-- 开发环境版本,包含了有帮助的命令行警告 -->
<script src="https://cdn.jsdelivr.net/npm/vue/dist/vue.js"></script>
<!-- 官网提供的 axios 在线地址 -->
<script src="https://cdn.bootcdn.net/ajax/libs/axios/0.20.0-0/axios.min.js"></script>
<div id="app">
    <h1>商品1元秒杀</h1>
    <!-- 左箭头 -->
    <input type="button" value="<" v-on:click="prov" v-show="this.index>-1"/>
    <img v-bind:src="imgArr[index]" width="200px" />
    <!-- 右箭头 -->
    <input type="button" value=">" v-on:click="next" v-show="this.index<2"/><br>
    <input type="button" v-on:click="seckill" value="秒 杀"/>
</div>
<script>
    var app = new Vue({
        el: "#app",
        data: {
            productId: "01234",
            imgArr:[
                "/image/phone1.png",
                "/image/phone2.png",
                "/image/phone3.png",
            ],
            index:0
        },
        methods: {
            seckill: function () {
                let param = new URLSearchParams()
                param.append('productId', this.productId)
                param.append('index', this.index)
                axios({
                    method: 'post',
                    url: 'http://192.168.1.6:8080/index/doSeckill',
                    data: param
                }).then(function (response) {

                    if (response.data == true) {
                        alert("秒杀成功");
                    } else {
                        alert("抢光了");
                    }

                },
                    function(error){
                    alert("发生错误");
                });

            },

            prov:function(){
                this.index--;
            },
            next:function(){
                this.index++;
            }
        }
    });

</script>
</body>
</html>
相关配置类
Redis配置类
RedisConfig.java
package com.springboot_redis_seckill.config;

import com.fasterxml.jackson.annotation.JsonAutoDetect;
import com.fasterxml.jackson.annotation.PropertyAccessor;
import com.fasterxml.jackson.databind.ObjectMapper;
import org.springframework.cache.CacheManager;
import org.springframework.cache.annotation.CachingConfigurerSupport;
import org.springframework.cache.annotation.EnableCaching;
import org.springframework.context.annotation.Bean;
import org.springframework.context.annotation.Configuration;
import org.springframework.data.redis.cache.RedisCacheConfiguration;
import org.springframework.data.redis.cache.RedisCacheManager;
import org.springframework.data.redis.connection.RedisConnectionFactory;
import org.springframework.data.redis.core.RedisTemplate;
import org.springframework.data.redis.serializer.Jackson2JsonRedisSerializer;
import org.springframework.data.redis.serializer.RedisSerializationContext;
import org.springframework.data.redis.serializer.RedisSerializer;
import org.springframework.data.redis.serializer.StringRedisSerializer;

import java.time.Duration;

/**
 * @author WuL2
 * @create 2021-05-27 14:26
 * @desc
 **/
@EnableCaching
@Configuration
public class RedisConfig extends CachingConfigurerSupport {

    @Bean
    public RedisTemplate<String, Object> redisTemplate(RedisConnectionFactory factory) {
        RedisTemplate<String, Object> template = new RedisTemplate<>();
        RedisSerializer<String> redisSerializer = new StringRedisSerializer();
        Jackson2JsonRedisSerializer jackson2JsonRedisSerializer = new Jackson2JsonRedisSerializer(Object.class);
        ObjectMapper om = new ObjectMapper();
        om.setVisibility(PropertyAccessor.ALL, JsonAutoDetect.Visibility.ANY);
        om.enableDefaultTyping(ObjectMapper.DefaultTyping.NON_FINAL);
        jackson2JsonRedisSerializer.setObjectMapper(om);
        template.setConnectionFactory(factory);
        template.setKeySerializer(redisSerializer); //key序列化方式
        template.setValueSerializer(jackson2JsonRedisSerializer); //value序列化
        template.setHashValueSerializer(jackson2JsonRedisSerializer); //value hashmap序列化
        return template;
    }

    @Bean(name = "cacheManager")
    public CacheManager cacheManager(RedisConnectionFactory factory) {
        RedisSerializer<String> redisSerializer = new StringRedisSerializer();
        Jackson2JsonRedisSerializer jackson2JsonRedisSerializer = new Jackson2JsonRedisSerializer(Object.class);
        //解决查询缓存转换异常的问题
        ObjectMapper om = new ObjectMapper();
        om.setVisibility(PropertyAccessor.ALL, JsonAutoDetect.Visibility.ANY);
        om.enableDefaultTyping(ObjectMapper.DefaultTyping.NON_FINAL);
        jackson2JsonRedisSerializer.setObjectMapper(om);
        // 配置序列化(解决乱码的问题),过期时间600秒
        RedisCacheConfiguration config = RedisCacheConfiguration.defaultCacheConfig()
                .entryTtl(Duration.ofSeconds(600))
                .serializeKeysWith(RedisSerializationContext.SerializationPair.fromSerializer(redisSerializer))
                .serializeValuesWith(RedisSerializationContext.SerializationPair.fromSerializer(jackson2JsonRedisSerializer))
                .disableCachingNullValues();
        RedisCacheManager cacheManager = RedisCacheManager.builder(factory)
                .cacheDefaults(config)
                .build();
        return cacheManager;
    }
}
配置Vue获取后端接口数据时出现的跨域请求问题。
CorsConfig.java
package com.springboot_redis_seckill.config;

import org.springframework.context.annotation.Bean;
import org.springframework.context.annotation.Configuration;
import org.springframework.web.cors.CorsConfiguration;
import org.springframework.web.cors.UrlBasedCorsConfigurationSource;
import org.springframework.web.filter.CorsFilter;

/**
 * @author: wu linchun
 * @time: 2021/5/28 22:22
 * @description: 解决跨域问题(接口是http,而axios一般请求的是https。从https到http是跨域,因此要配置跨域请求)
 */

@Configuration
public class CorsConfig {
    private CorsConfiguration buildConfig() {
        CorsConfiguration corsConfiguration = new CorsConfiguration();
        corsConfiguration.addAllowedOrigin("*"); //允许任何域名
        corsConfiguration.addAllowedHeader("*"); //允许任何头
        corsConfiguration.addAllowedMethod("*"); //允许任何方法
        return corsConfiguration;
    }

    @Bean
    public CorsFilter corsFilter() {
        UrlBasedCorsConfigurationSource source = new UrlBasedCorsConfigurationSource();
        source.registerCorsConfiguration("/**", buildConfig()); //注册
        return new CorsFilter(source);
    }

}
服务层
SecKillService.java
package com.springboot_redis_seckill.service;

public interface SecKillService {
    public boolean doSecKill(String uid,String productId);
}
SecKillServiceImpl.java
package com.springboot_redis_seckill.service.impl;

import com.springboot_redis_seckill.service.SecKillService;
import org.springframework.beans.factory.annotation.Autowired;
import org.springframework.beans.factory.annotation.Qualifier;
import org.springframework.data.redis.core.RedisTemplate;
import org.springframework.stereotype.Service;

/**
 * @author WuL2
 * @create 2021-05-27 14:53
 * @desc
 **/
@Service
public class SecKillServiceImpl implements SecKillService {
    @Autowired
    @Qualifier("redisTemplate")
    private RedisTemplate redisTemplate;

    @Override
    public synchronized boolean doSecKill(String uid, String productId) {
        //1、uid和productId非空判断
        if (uid == null || productId == null) {
            return false;
        }

        //2、拼接key
        String kcKey = "sk:" + productId + ":qt";   //库存
        String userKey = "sk:" + productId + ":user";  //秒杀成功的用户

        //3、获取库存
        String kc = String.valueOf(redisTemplate.opsForValue().get(kcKey)) ;
        if (kc == null) {
            System.out.println("秒杀还没有开始,请等待");
            return false;
        }

        //4、判断用户是否已经秒杀成功过了
        if (redisTemplate.opsForSet().isMember(userKey, uid)) {
            System.out.println("已秒杀成功,不能重复秒杀");
            return false;
        }
        //5、如果库存数量小于1,秒杀结束
        if (Integer.parseInt(kc) <=0) {
            System.out.println("秒杀结束");
            return false;
        }

        //6、秒杀过程
        redisTemplate.opsForValue().decrement(kcKey);  //库存数量减1
        redisTemplate.opsForSet().add(userKey, uid);
        System.out.println("秒杀成功。。。");
        return true;
    }
}
控制层
package com.springboot_redis_seckill.controller;

import com.alibaba.fastjson.JSONObject;
import com.springboot_redis_seckill.service.SecKillService;
import org.springframework.beans.factory.annotation.Autowired;
import org.springframework.beans.factory.annotation.Qualifier;
import org.springframework.stereotype.Controller;
import org.springframework.web.bind.annotation.RequestMapping;
import org.springframework.web.bind.annotation.RequestMethod;
import org.springframework.web.bind.annotation.ResponseBody;

import javax.servlet.http.HttpServletRequest;
import javax.servlet.http.HttpServletResponse;
import java.io.IOException;
import java.io.PrintWriter;
import java.util.Random;

/**
 * @author WuL2
 * @create 2021-05-27 14:28
 * @desc
 **/
@Controller
@RequestMapping("/index")
public class MyController {
    @Autowired
    @Qualifier("secKillServiceImpl")
    private SecKillService secKillService;

    @RequestMapping(value = {"/seckillpage"}, method = RequestMethod.GET)
    public String seckillpage() {
        return "/html/seckillpage.html";
    }

    @RequestMapping(value = {"/doSeckill"}, method = RequestMethod.POST)
    @ResponseBody  //自动返回json格式的数据
    public Object doSeckill(HttpServletRequest request, HttpServletResponse response) {
        System.out.println("doSeckill");
        String productId = request.getParameter("productId");
        String index = request.getParameter("index");
        System.out.println(productId+index);  //拼接成为商品ID
        int id = new Random().nextInt(50000);  //使用随机数生成用户ID
        String uid = String.valueOf(id) + " ";
        boolean flag = secKillService.doSecKill(uid, productId+index);
        System.out.println(flag);
        return flag;
    }
}
启动类
RunApplication.java
package com.springboot_redis_seckill;

import org.springframework.boot.SpringApplication;
import org.springframework.boot.autoconfigure.SpringBootApplication;

/**
 * @author WuL2
 * @create 2021-05-27 14:32
 * @desc
 **/
@SpringBootApplication
public class RunApplication {
    public static void main(String[] args) {
        SpringApplication.run(RunApplication.class, args);
    }
}
3、启动步骤
因为一共有三件商品要秒杀,所以在redis里面设置三个商品的库存数量。这里数量都设置为10。
127.0.0.1:6379> set sk:012340:qt 10
OK
127.0.0.1:6379> set sk:012341:qt 10
OK
127.0.0.1:6379> set sk:012342:qt 10
OK
要确保redis能够被访问,要确保关闭linux的防火墙,以及关闭redis的保护模式。
vim redis.conf   --打开redis配置

service iptables stop   --关闭防火墙

//关闭redis保护模式
redis-cli    --进入redis客户端
config set protected-mode "no"   --配置里面关闭redis保护模式(只是进入redis.conf把protected-mode变为no是不行的,还要加一句config set protected-mode "no"
启动springboot项目

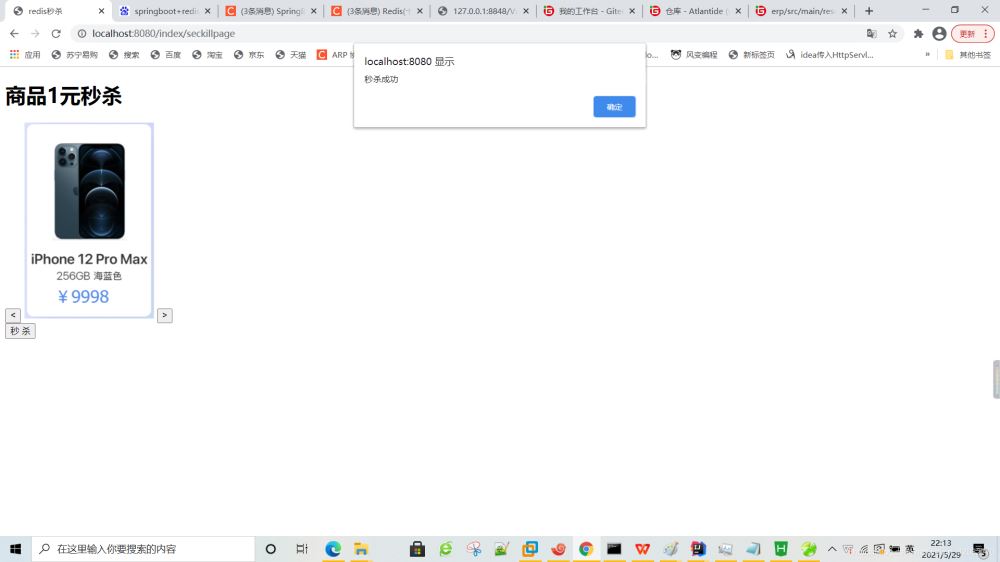
秒杀成功后,该商品在redis中的数量就减1。

当数量减为0时,则提示“抢光了”。


4、使用ab进行并发测试
如果是centOS 6版本的linux都是默认按照了ab工具的。
如果没有安装ab工具,可在linux终端用命令联网下载安装。
yum install httpd-tools
安装完成后,就可以使用ab工具进行并发测试了。
在linux终端输入如下命令:
ab -n 2000 -c 200 -p '/root/Desktop/post.txt' -T 'application/x-www-form-urlencoded' 'http://192.168.1.6:8080/index/doSeckill/'

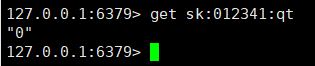
012341这个商品库存变为0了
5、线程安全
为了防止出现“超买”的现象,需要让操作redis的方法是线程安全的(即在方法上加上一个“悲观锁”synchronized)。
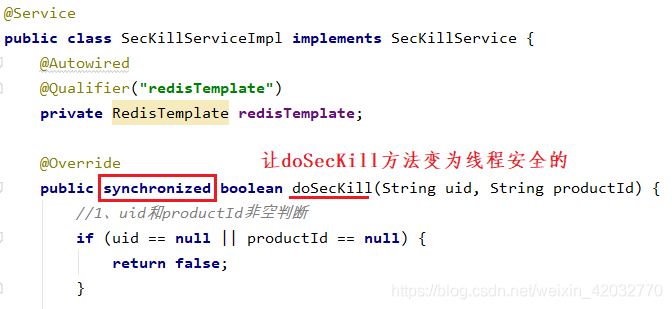
如果不加synchronized就会出现“超买”现象,即redis库存会出现负数


之所以产生这种现象是由于并发导致多个用户同时调用了doSecKill()方法,多个用户同时修改了redis中的sk:012342:qt的值,但暂时都没有提交存入到redis中去。等到后来一起提交,导致了sk:012342:qt的值被修改了多次,因此会出现负数。
因此在doSecKill()方法加上悲观锁,用户调用该方法就对该方法加锁,修改了sk:012342:qt的值后并提交存入redis中之后,才会释放锁。其他用户才能得到锁并操作该方法。
6、总结
redis作为一种Nosql的非关系型数据库,因为其单实例,简单高效的特性通常会被作为其他关系型数据库的高速缓存。尤其是在秒杀这样的高并发操作。先将要秒杀的商品信息从数据库读入到redis中,秒杀的过程实际上是在与redis进行交互。等秒杀完成后再将秒杀的结果存入数据库。可以有效降低降低数据库IO,防止数据库宕机。
7、参考资料
https://www.bilibili.com/video/BV1Rv41177Af?p=27
https://www.cnblogs.com/taiyonghai/p/5810150.html
到此这篇关于Springboot+redis+Vue实现秒杀的项目实践的文章就介绍到这了,更多相关Springboot+redis+Vue 秒杀内容请搜索我们以前的文章或继续浏览下面的相关文章希望大家以后多多支持我们!
相关推荐
-
springboot集成redis实现简单秒杀系统
本文实例为大家分享了springboot集成redis实现简单秒杀系统的具体代码,供大家参考,具体内容如下 项目是有地址的,我会放到文章的最后面 1. 直接service,我们会介绍两种秒杀模式 public interface GoodsService { /** * 通过lua脚本实现的秒杀 * @param skuCode 商品编码 * @param buyNum 购买数量 * @return 购买数量 */ Long flashSellByLuaScript(String skuCode
-

SpringBoot+RabbitMQ+Redis实现商品秒杀的示例代码
目录 业务分析 创建表 功能实现 1.用户校验 2.下单 3.减少库存 4.支付 总结 业务分析 一般而言,商品秒杀大概可以拆分成以下几步: 用户校验 校验是否多次抢单,保证每个商品每个用户只能秒杀一次 下单 订单信息进入消息队列,等待消费 减少库存 消费订单消息,减少商品库存,增加订单记录 付款 十五分钟内完成支付,修改支付状态 创建表 goods_info 商品库存表 列 说明 id 主键(uuid) goods_name 商品名称 goods_stock 商品库存 package com.
-
基于Redis结合SpringBoot的秒杀案例详解
目录 1.构建SpringBoot项目 2.启动类 3.在Controller层里定义秒杀接口 4.在Service层里通过lua脚本实现秒杀效果 5.配置redis连接参数 6.演示秒杀效果 6.1 准备redis环境 6.2 启动项目 6.3 多线程形式发起秒杀请求 1.构建SpringBoot项目 搭建名为quickbuy的springboot项目,相关的依赖包如下所示: <?xml version="1.0" encoding="UTF-8"?>
-
springboot +rabbitmq+redis实现秒杀示例
目录 实现说明 1.工具准备 2.数据表 3.pom 4.代码结构 5.配置config 6.订单业务层 7.redis实现层 8.mq实现层 9.redis模拟初始化库存量 10.controller控制层 11.测试 12.测试结果 实现说明 这里的核心在于如何在大并发的情况下保证数据库能扛得住压力,因为大并发的瓶颈在于数据库.如果用户的请求直接从前端传到数据库,显然,数据库是无法承受几十万上百万甚至上千万的并发量的.因此,我们能做的只能是减少对数据库的访问.例如,前端发出了100万个请求,
-
SpringBoot之使用Redis实现分布式锁(秒杀系统)
一.Redis分布式锁概念篇 建议直接采用Redis的官方推荐的Redisson作为redis的分布式锁 1.1.为什么要使用分布式锁 我们在开发应用的时候,如果需要对某一个共享变量进行多线程同步访问的时候,可以使用我们学到的Java多线程的18般武艺进行处理,并且可以完美的运行,毫无Bug! 注意这是单机应用,也就是所有的请求都会分配到当前服务器的JVM内部,然后映射为操作系统的线程进行处理!而这个共享变量只是在这个JVM内部的一块内存空间! 后来业务发展,需要做集群,一个应用需要部署到几台机
-
SpringBoot使用Redisson实现分布式锁(秒杀系统)
前面讲完了Redis的分布式锁的实现,接下来讲Redisson的分布式锁的实现,一般提及到Redis的分布式锁我们更多的使用的是Redisson的分布式锁,Redis的官方也是建议我们这样去做的.Redisson点我可以直接跳转到Redisson的官方文档. 1.1.引入Maven依赖 <dependency> <groupId>org.redisson</groupId> <artifactId>redisson-spring-boot-starter&l
-
Springboot+redis+Vue实现秒杀的项目实践
目录 1.Redis简介 2.实现代码 3.启动步骤 4.使用ab进行并发测试 5.线程安全 6.总结 7.参考资料 1.Redis简介 Redis是一个开源的key-value存储系统. Redis的五种基本类型:String(字符串),list(链表),set(集合),zset(有序集合),hash,stream(Redis5.0后的新数据结构) 这些数据类型都支持push/pop.add/remove及取交集并集和差集及更丰富的操作,而且这些操作都是原子性的. Redis的应用场景为配合关
-
SpringBoot+MyBatisPlus+Vue 前后端分离项目快速搭建过程(前端篇)
后端篇 SpringBoot+MyBatisPlus+Vue 前后端分离项目快速搭建[后端篇][快速生成后端代码.封装结果集.增删改查.模糊查找][毕设基础框架] 前端篇 创建vue项目 1.找个文件夹进入命令行,输入:vue create vue-front 2.直接回车,等待片刻,稍微有点小久 3.根据提示指令测试 打开浏览器输入:http://localhost:8080/ 安装所需工具 安装的工具会有点多,为了提供更好的拓展性,可以自主选择安装(不建议),后面的代码中都是使用到了,不安装
-
SpringBoot+MyBatisPlus+Vue 前后端分离项目快速搭建过程(后端)
数据库准备 data_test.sql: /* SQLyog Enterprise v12.08 (64 bit) MySQL - 5.7.31 : Database - data_test ********************************************************************* */ /*!40101 SET NAMES utf8 */; /*!40101 SET SQL_MODE=''*/; /*!40014 SET @OLD_UNIQUE_
-
利用Redis进行数据缓存的项目实践
目录 1. 引言 2. 将信息添加到缓存的业务流程 3. 实现代码 3.1 代码实现(信息添加到缓存中) 3.2 缓存更新策略 3.3 实现主动更新 4. 缓存穿透 4.1 解决缓存穿透(使用空对象进行解决) 5. 缓存雪崩 6. 缓存击穿 6.1 互斥锁代码 6.2 逻辑过期实现 1. 引言 缓存有啥用? 降低对数据库的请求,减轻服务器压力 提高了读写效率 缓存有啥缺点? 如何保证数据库与缓存的数据一致性问题? 维护缓存代码 搭建缓存一般是以集群的形式进行搭建,需要运维的成本 2. 将信息添加
-
SpringBoot实现扫码登录的项目实践
目录 一.首先咱们需要一张表 二.角色都有哪些 三.接口都需要哪些? 四.步骤 五.疯狂贴代码 Spring Boot中操作WebSocket 一.首先咱们需要一张表 这表是干啥的呢?就是记录一下谁扫码了.谁登录了. User_Token表 字段如下: uuid : 用于确保唯一性 userId :谁登录的 loginTime :登录时间 createTime :创建时间 用于判断是否过期 state:是否二维码失效 0有效 1失效 二.角色都有哪些 咱们还需要分析一下子.扫码登录这个业务逻辑都
-
vue.js+boostrap项目实践(案例详解)
一.为什么要写这篇文章 最近忙里偷闲学了一下vue.js,同时也复习了一下boostrap,发现这两种东西如果同时运用到一起,可以发挥很强大的作用,boostrap优雅的样式和丰富的组件使得页面开发变得更美观和更容易,同时vue.js又是可以绑定model和view(这个相当于MVC中的,M和V之间的关系),使得对数据变换的操作变得更加的简易,简化了很多的逻辑代码. 二.学习这篇文章需要具备的知识 1.需要有vue.js的知识 2.需要有一定的HTML.CSS.JavaScript的基础知识 3
-
Vue+Vux项目实践完整代码
提供完整的路由,services````````````` ----------------------------------------------------------------------------------------------------------------------------------------------------------------------------------------------------------------------------
-
docker部署springboot和vue项目的实现步骤
A. docker 部署 springboot项目 一.springboot项目编译打包 二.在项目根目录创建Dockerfile文件 FROM openjdk:8-jdk-alpine VOLUME /tmp ADD ./target/demo-0.0.1-SNAPSHOT.jar demo.jar RUN sh -c 'touch /demo.jar' ENTRYPOINT ["sh", "-c", "java $JAVA_OPTS -Djava.se
-
springboot+vue制作后台管理系统项目
目录 一.所使用的环境配置: 二.项目简介 三.知识点总结(代码和配置) SpringBoot: 1.Mybatis-Plus配置文件,实现分页查询:MybatisPlusConfig 2.跨域配置文件:CorsConfig 3.请求返回类!:Result 4.pom.xml配置文件 Vue: 其余知识点总结: 总结: 学习资源来自于B站UP,up他讲的非常详细,对于熟悉两大框架很有用. 我的作业源代码在文章末尾,欢迎有需要的同学,学习参考使用,内置SQL文件,导入后,开启springboot和