ASP.NET MVC 4使用PagedList.Mvc分页的实现代码
ASP.NET MVC中进行分页的方式有多种,在NuGet上有提供使用PagedList、PagedList.Mvc进行分页。
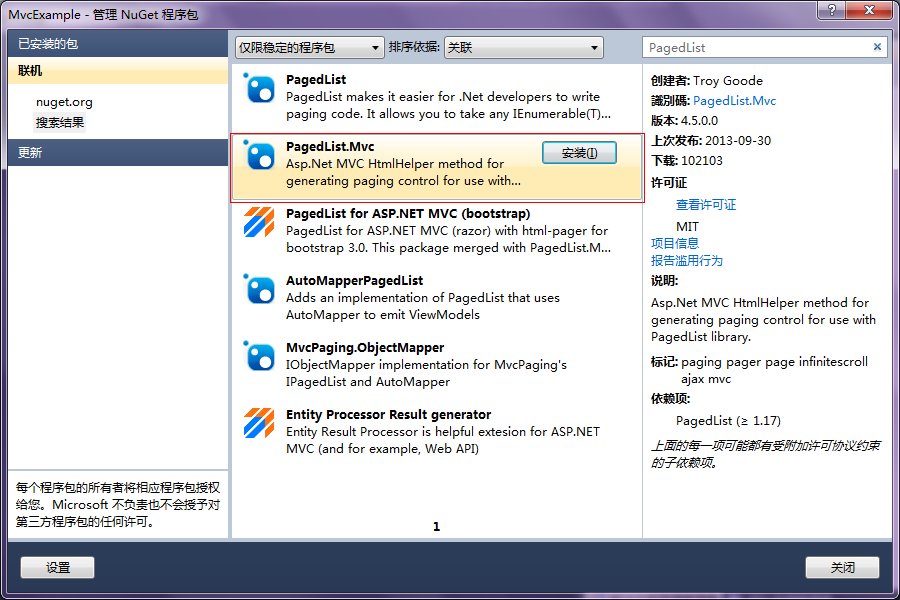
在安装引用PagedList.Mvc的同时会安装引用PagedList。
@Html.PagedListPager((PagedList.IPagedList<SampleInfo>)ViewBag.Models, page => Url.Action("Index", new { page, keyword = Request["keyword"], datemin = Request["datemin"], datemax = Request["datemax"] }))
搜索触发事件:
 <input type="text" id="datemin" class="input-text Wdate" style="width:60px;" value="@Request["datemin"]">
 <input type="text" id="datemax" class="input-text Wdate" style="width:60px;" value="@Request["datemax"]">
 <input type="text" class="input-text" style="width:250px" placeholder="输入关键词" id="keyword" name="" value="@Request["keyword"]">
 <button type="submit" class="btn btn-success" id="" name="" onclick="search()"><i class="icon-search"></i> 搜索</button>
 <script>
 function search() {
  var url = "?type=1";
  if ($("#keyword").val() != "") {
   url += "&keyword=" + $("#keyword").val();
  }
  if ($("#datemin").val() != "") {
   url += "&datemin=" + $("#datemin").val();
  }
  if ($("#datemax").val() != "") {
   url += "&datemax=" + $("#datemax").val();
  }
  window.location.href = "/Admin/SampleInfo/Index"+url;
 }
 </script>
后台方法:
IQueryable<SampleInfo> models = db.SampleInfoBLL.GetAllEntities().Where(d => d.IsDel == false);
if (!String.IsNullOrEmpty(Request["keyword"]))
{
string keyword = Request["keyword"];
models = models.Where(d => d.Site_Chinese.Contains(keyword));
}
if (!String.IsNullOrEmpty(Request["datemin"]))
{
int datemin = Convert.ToInt32(Request["datemin"]);
models = models.Where(d => Convert.ToDouble(d.Lon_Degree) >= datemin);
}
if (!String.IsNullOrEmpty(Request["datemax"]))
{
int datemax = Convert.ToInt32(Request["datemax"]);
models = models.Where(d => Convert.ToDouble(d.Lat_Degree) <= datemax);
}
int page = 1;
if (Request["page"] != null)
{
page = Convert.ToInt32(Request["page"]);
}
ViewBag.ModelsCount = models.Count();
ViewBag.Models = models.OrderBy(d => d.SampleInfoID).ToPagedList(page, 10);
分页控件样式:
.pagination {
 display: inline-block;
 padding-left: 0;
 margin: 20px 0;
 border-radius: 4px;
}

.pagination > li {
 display: inline;
}

.pagination > li > a,
.pagination > li > span {
 position: relative;
 float: left;
 padding: 6px 12px;
 margin-left: -1px;
 line-height: 1.428571429;
 text-decoration: none;
 background-color: #ffffff;
 border: 1px solid #dddddd;
}

.pagination > li:first-child > a,
.pagination > li:first-child > span {
 margin-left: 0;
 border-bottom-left-radius: 4px;
 border-top-left-radius: 4px;
}

.pagination > li:last-child > a,
.pagination > li:last-child > span {
 border-top-right-radius: 4px;
 border-bottom-right-radius: 4px;
}

.pagination > li > a:hover,
.pagination > li > span:hover,
.pagination > li > a:focus,
.pagination > li > span:focus {
 background-color: #eeeeee;
}

.pagination > .active > a,
.pagination > .active > span,
.pagination > .active > a:hover,
.pagination > .active > span:hover,
.pagination > .active > a:focus,
.pagination > .active > span:focus {
 z-index: 2;
 color: #ffffff;
 cursor: default;
 background-color: #428bca;
 border-color: #428bca;
}

.pagination > .disabled > span,
.pagination > .disabled > a,
.pagination > .disabled > a:hover,
.pagination > .disabled > a:focus {
 color: #999999;
 cursor: not-allowed;
 background-color: #ffffff;
 border-color: #dddddd;
}

.pagination-lg > li > a,
.pagination-lg > li > span {
 padding: 10px 16px;
 font-size: 18px;
}

.pagination-lg > li:first-child > a,
.pagination-lg > li:first-child > span {
 border-bottom-left-radius: 6px;
 border-top-left-radius: 6px;
}

.pagination-lg > li:last-child > a,
.pagination-lg > li:last-child > span {
 border-top-right-radius: 6px;
 border-bottom-right-radius: 6px;
}

.pagination-sm > li > a,
.pagination-sm > li > span {
 padding: 5px 10px;
 font-size: 12px;
}

.pagination-sm > li:first-child > a,
.pagination-sm > li:first-child > span {
 border-bottom-left-radius: 3px;
 border-top-left-radius: 3px;
}

.pagination-sm > li:last-child > a,
.pagination-sm > li:last-child > span {
 border-top-right-radius: 3px;
 border-bottom-right-radius: 3px;
}

.pager {
 padding-left: 0;
 margin: 20px 0;
 text-align: center;
 list-style: none;
}

.pager:before,
.pager:after {
 display: table;
 content: " ";
}

.pager:after {
 clear: both;
}

.pager:before,
.pager:after {
 display: table;
 content: " ";
}

.pager:after {
 clear: both;
}

.pager li {
 display: inline;
}

.pager li > a,
.pager li > span {
 display: inline-block;
 padding: 5px 14px;
 background-color: #ffffff;
 border: 1px solid #dddddd;
 border-radius: 15px;
}

.pager li > a:hover,
.pager li > a:focus {
 text-decoration: none;
 background-color: #eeeeee;
}

.pager .next > a,
.pager .next > span {
 float: right;
}

.pager .previous > a,
.pager .previous > span {
 float: left;
}

.pager .disabled > a,
.pager .disabled > a:hover,
.pager .disabled > a:focus,
.pager .disabled > span {
 color: #999999;
 cursor: not-allowed;
 background-color: #ffffff;
}
.pagination-container {
 text-align: center;
}
分页样式效果:

以上就是本文的全部内容,希望对大家的学习有所帮助,也希望大家多多支持我们。
相关推荐
-

asp.net MVC使用PagedList.MVC实现分页效果
在上一篇的EF之DB First中,存在以下的两个问题: 1. 添加/编辑页面显示的是属性名称,而非自定义的名称(如:姓名.专业...) 2. 添加/编辑时没有加入验证 3. 数据展示使用分页 @Html.LabelFor(model => model.Name, htmlAttributes: new { @class = "control-label col-md-2" }) 是显示属性Name的"标签",如果没有指定Display特性,则直接显示属性名N
-
ASP.NET MVC 5使用X.PagedList.Mvc进行分页教程(PagedList.Mvc)
ASP.NET MVC中进行分页的方式有多种,但在NuGet上使用最广泛的就是用PagedList.X.PagedList.Mvc进行分页.(原名为:PagedList.Mvc,但是2014年开始,作者将项目名称改名字为"X.PagedList.Mvc"),用这个插件的话会非常便利,大家可以试试,接下来将给大家讲下如何安装这个NuGet插件. ASP.NET MVC 5使用X.PagedList.Mvc进行分页教程(原名为PagedList.Mvc) 1.工具--NuGet 程序包管理
-
ASP.NET MVC 4使用PagedList.Mvc分页的实现代码
ASP.NET MVC中进行分页的方式有多种,在NuGet上有提供使用PagedList.PagedList.Mvc进行分页. 在安装引用PagedList.Mvc的同时会安装引用PagedList. 复制代码 代码如下: @Html.PagedListPager((PagedList.IPagedList<SampleInfo>)ViewBag.Models, page => Url.Action("Index", new { page, keyword = Req
-
MVC+Bootstrap+Drapper使用PagedList.Mvc支持多查询条件分页
前几天做一个小小小项目,使用了MVC+Bootstrap,以前做分页都是异步加载Mvc部分视图的方式,因为这个是小项目,就随便一点.一般的列表页面,少不了有查询条件,下面分享下Drapper+PagedList.Mvc支持多查询条件分页的使用经验. 在MVC中我们一般习惯使用强类型Model,通过分析Orders的展示页面,来构建这个Model. 1.查询参数的Model public class OrderQueryParamModel { /// <summary> /// 订单编号 //
-
ASP.NET Core中使用默认MVC路由的配置
ASP.NET Core里Route这块的改动不大,只是一些用法上有了调整,提供了一些更加简洁的语法. 而对于自定义路由的支持当然也是没有问题的,这个功能应该是从MVC1.0版本就已经有这个功能. 先看看ASP.NET Core里面实现默认MVC路由的配置方式 通常情况下,在使用MVC项目的时候,默认的路由就足够了,就是常见的通过Controller和Action获取具体的方法的方式. 从一个最基本的项目开始,执行以下步骤,就可以使得项目支持MVC路由 1.创建一个空白的ASP.NET Core
-
MVC+EasyUI+三层新闻网站建立 分页查询数据功能(七)
MVC新闻网站建立,完成分页查询数据功能. 1.在Model里面建立NewInfo(里面存放的是新闻信息的实体信息) 然后在DAL层中建立NewInfoDal (里面存放对新闻信息的操作) 写入分页查询的代码 /// <summary> /// 分页查询 /// </summary> /// <param name="start">分页开始条数</param> /// <param name="end">分
-
基于KO+BootStrap+MVC实现的分页控件代码分享
JS: /// <reference path="../knockout-3.2.0.js" /> var ViewModel = function (data) { var self = this; self.ObjectList = ko.observableArray(data.ObjectList) self.TotalCount = ko.observable(data.TotalCount); self.PerCount = ko.observable(data
-
ASP.Net MVC利用NPOI导入导出Excel的示例代码
什么是NPOI 该项目是位于http://poi.apache.org/的POI Java项目的.NET版本.POI是一个开源项目,可以帮助您读取/写入xls,doc,ppt文件.它有着广泛的应用.本文给大家介绍ASP.Net MVC利用NPOI导入导出Excel的问题. 因近期项目遇到所以记录一下: 首先导出Excel: 首先引用NPOI包 (Action一定要用FileResult) /// <summary> /// 批量导出本校第一批派位学生 /// </summary>
-
asp.net使用FCK编辑器中的分页符实现长文章分页功能
本文实例讲述了asp.net使用FCK编辑器中的分页符实现长文章分页功能.分享给大家供大家参考,具体如下: <%@ Page Language="C#" AutoEventWireup="true" CodeFile="SplitContent.aspx.cs" Inherits="SplitContent" %> <%@ Register Assembly="FredCK.FCKeditorV2&
-
asp中通过getrows实现数据库记录分页的一段代码
<%@ Language = VBSCRIPT %> <% Option Explicit %> <% rem 在asp中通过getrows实现数据库记录分页的一段代码 Dim iStart, iOffset iStart = Request("Start") iOffset = Request("Offset") if Not IsNumeric(iStart) or Len(iStart) = 0 then iStart = 0 e